Deploying Docker Containers with ECS

Table of Contents
What Is AWS ECS
AWS Elastic Container Service (AWS ECS) is a managed container service that is used to run and deploy containers. It is similar to Kubernetes in that it allows us to launch, monitor, and set up docker containers within a specified cluster. Unlike Kubernetes its a AWS specific technology for managing the lifecycle of a container.
AWS ECS is not to be confused with AWS EKS, which is AWS’s kubernetes service. EKS competes with Google Kubernetes Service ( GKE ), and Azure Kubernetes Service (AKS).
With AWS ECS, we create a cluster on which we can create various tasks we want to run. These tasks are usually individual containers that handle specific operations. When deploying our containers, we need actual infrastructure to run our docker containers. There are two options for us here. We can either decide to handle spinning up instances, connecting them to our ECS cluster, and monitoring them, or we can use Fargate. Fargate is a serverless way to run docker containers. It works by taking the container we want to deploy, and automatically provisioning the resources needed to deploy that container.
Why Use AWS ECS
Now that we have a little understanding of what ECS is and how it works. Why should we use it? are there added benefits? You should use AWS ECS because it’s:
- Beginner-Friendly: If you are looking for a simple and easy-to-use container service to deploy your container application, ECS is the service for you. All you need to understand is the ECS workflow which is very simple. It takes only five steps to get your container image from your local development environment to the cloud.
- Cost-Effectiveness: It is very cost-effective and easy to manage. With ECS, you only need to pay for the time your services are running, nothing else. If you run your services for 1 hour, you will get billed for the 1 hour your services were running.
- Auto Scaling: ECS provides auto-scaling for your infrastructure. This means that with ECS, our infrastructure will be auto-scaled with respect to the traffic we are receiving in our applications. If by chance our application cannot handle a certain amount of traffic, ECS will provision more EC2 instances and attach them to our cluster to handle the incoming traffic.
- Serverless: With ECS, there is an option to use a serverless approach to provision servers. This is useful because it abstracts some of the difficult aspects such as creating EC2 instances, connecting those instances to our ECS cluster, and managing the health status of our clusters.
How To Deploy Docker Containers With AWS ECS
Let’s deploy a Django application to ECS.
Prerequisites
You’ll need:
- An AWS account
- Docker installed on your machine
- And the AWS CLI installed
Step 1
We need to create a simple Django application, which we will containerize locally.
Firstly, we need to create a virtual environment and install our dependencies.
virtualenv envpip install django djangorestframeworkNext, we need to activate our virtual environment and create our Django project.
source env/bin/actviatedjango-admin startproject app .We then need to create our Django application and add it to our installed apps
python manage.py startapp apiWithin our app/settings.py file, add this block of code
INSTALLED_APPS = [
    ...
    'rest_framework',
    'api'
    ...
]
Since we are going to deploy our application, we need to change some configurations in our settings.py file.
One of which includes adding an asterisk to our ALLOWED_HOST list like so
ALLOWED_HOST = ['*']Next, we need to create a simple view in our api/views.py file. Add this block of code
from rest_framework import status
from rest_framework.response import Response
from rest_framework.decorators import api_view

@api_view(['GET'])
def home_endpoint(request):
    return Response({"message":"Hello World"}, status=status.HTTP_200_OK)
We need to create a urls.py file (in our api directory) that will hold the url to this endpoint.
Add this block of code
from django.urls import path
from . import views
urlpatterns = [
    path('home', views.home_endpoint, name='home'),
]
Next, we need to include our api url’s in our app/urls.py file.
from django.urls import path, include
urlpatterns = [
    path('admin/', admin.site.urls),
    path('api/', include('api.urls'))
]
Finally, we need to create our _requirements.txt_file.
pip freeze > requirements.txtStep 2
We need to create a Dockerfile which will be used for creating a docker image for our application. Note: The Dockerfile should be located in our root directory Add this block of code to the Dockerfile
FROM python:3.10.0-alpine
WORKDIR /usr/src/app
RUN pip install --upgrade pip
COPY requirements.txt /usr/src/app/
RUN pip install -r requirements.txt
COPY . /usr/src/app/
EXPOSE 8000
CMD ["python", "manage.py", "runserver", "0.0.0.0:8000"]
Step 3
After completing our Dockerfile, we need to head on to AWS to create a docker repository using Elastic Container Registry.
After creating our registry, we will build our docker image and push it to the repository.
On the AWS management console homepage, search for ECR
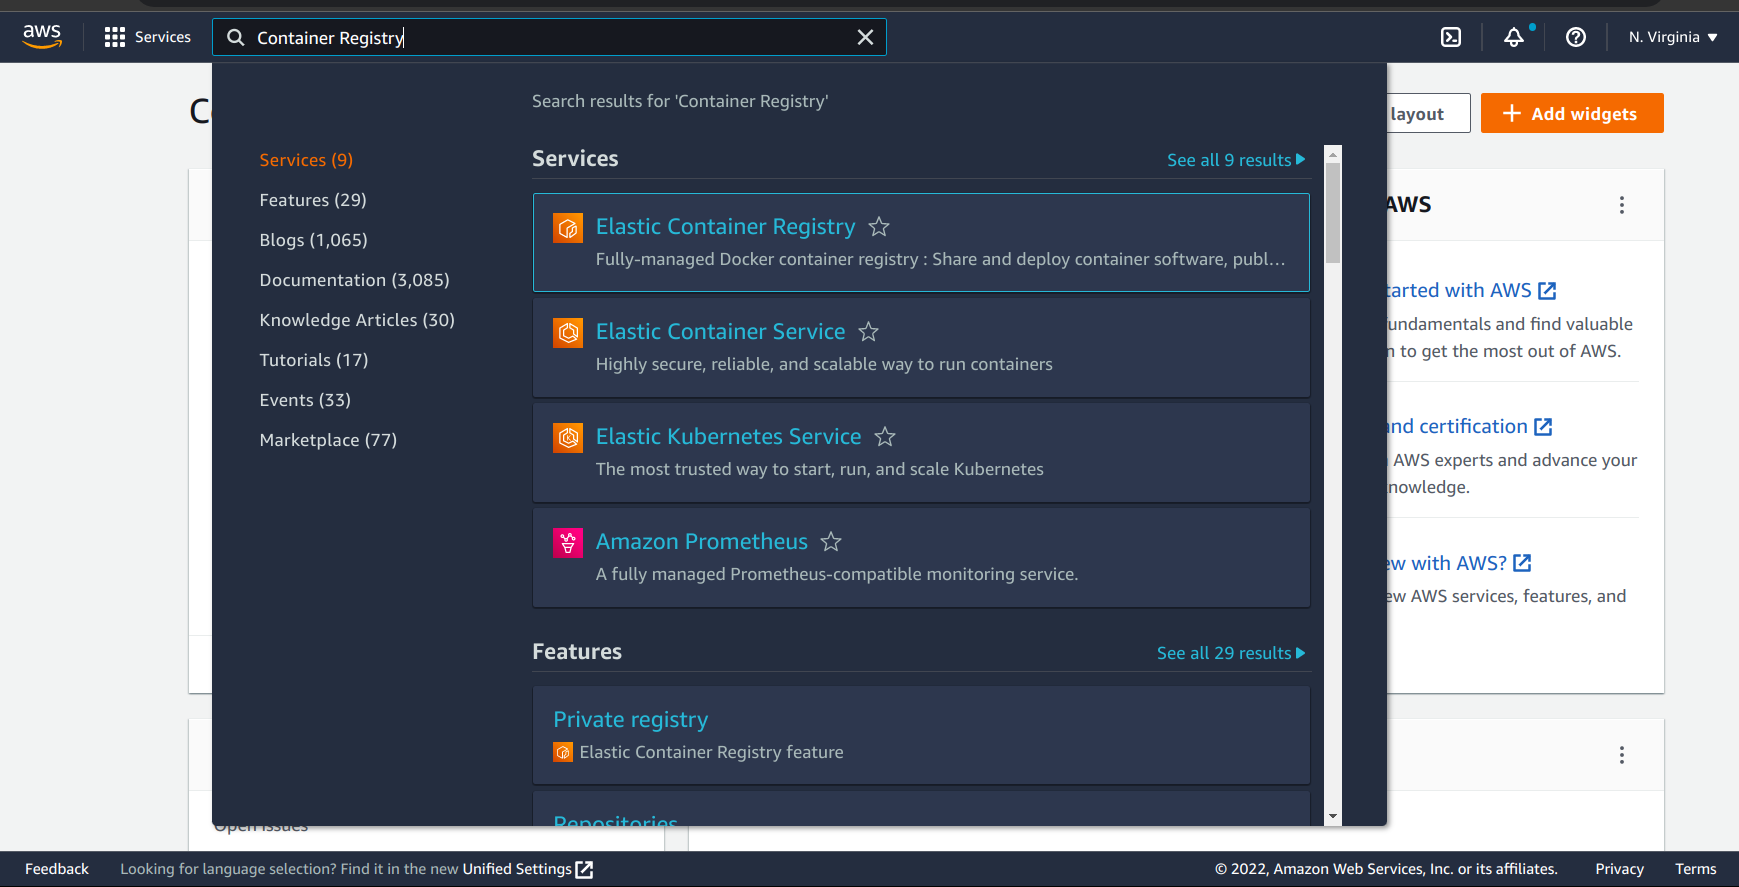
Click on Elastic Container Registry
On the ECR home page, click Get Started
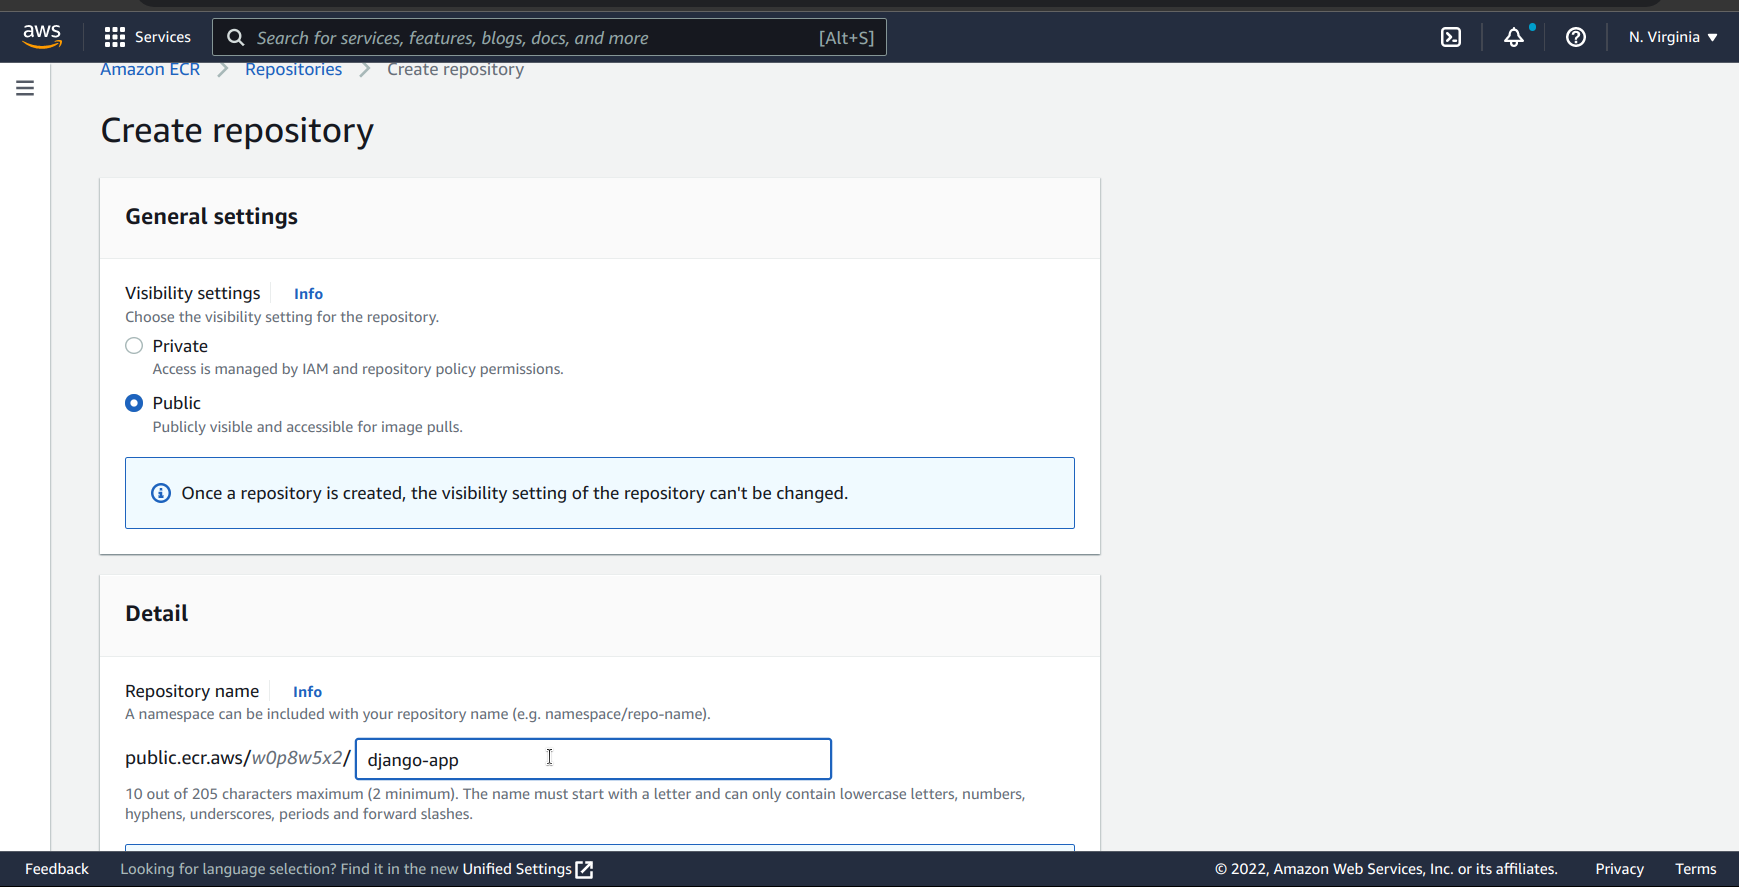
In the registry settings, make sure to select Public as the repository type.
Next, we need to give our repository a name. In this case, we are going with django-app.
After that, we need to leave every other setting as is and click on the Create button on the bottom right corner of the page.
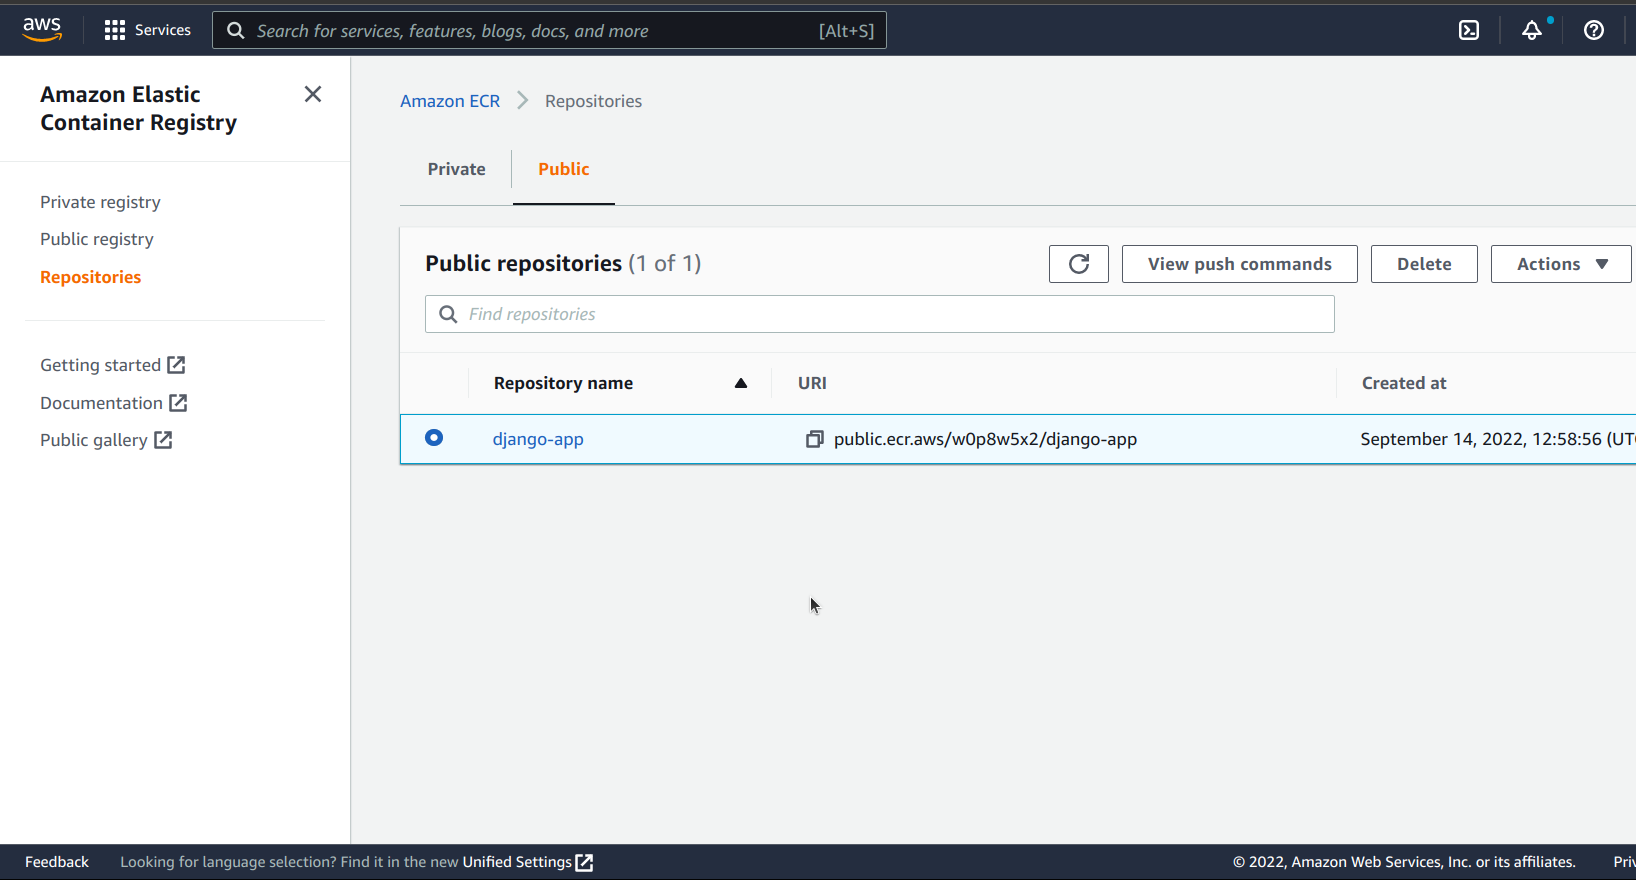
Next, we need to highlight our newly created repository, and click on the View push commands button.
On the View push commands modal, we are given a detailed guide to follow to successfully push our docker image to our repository.
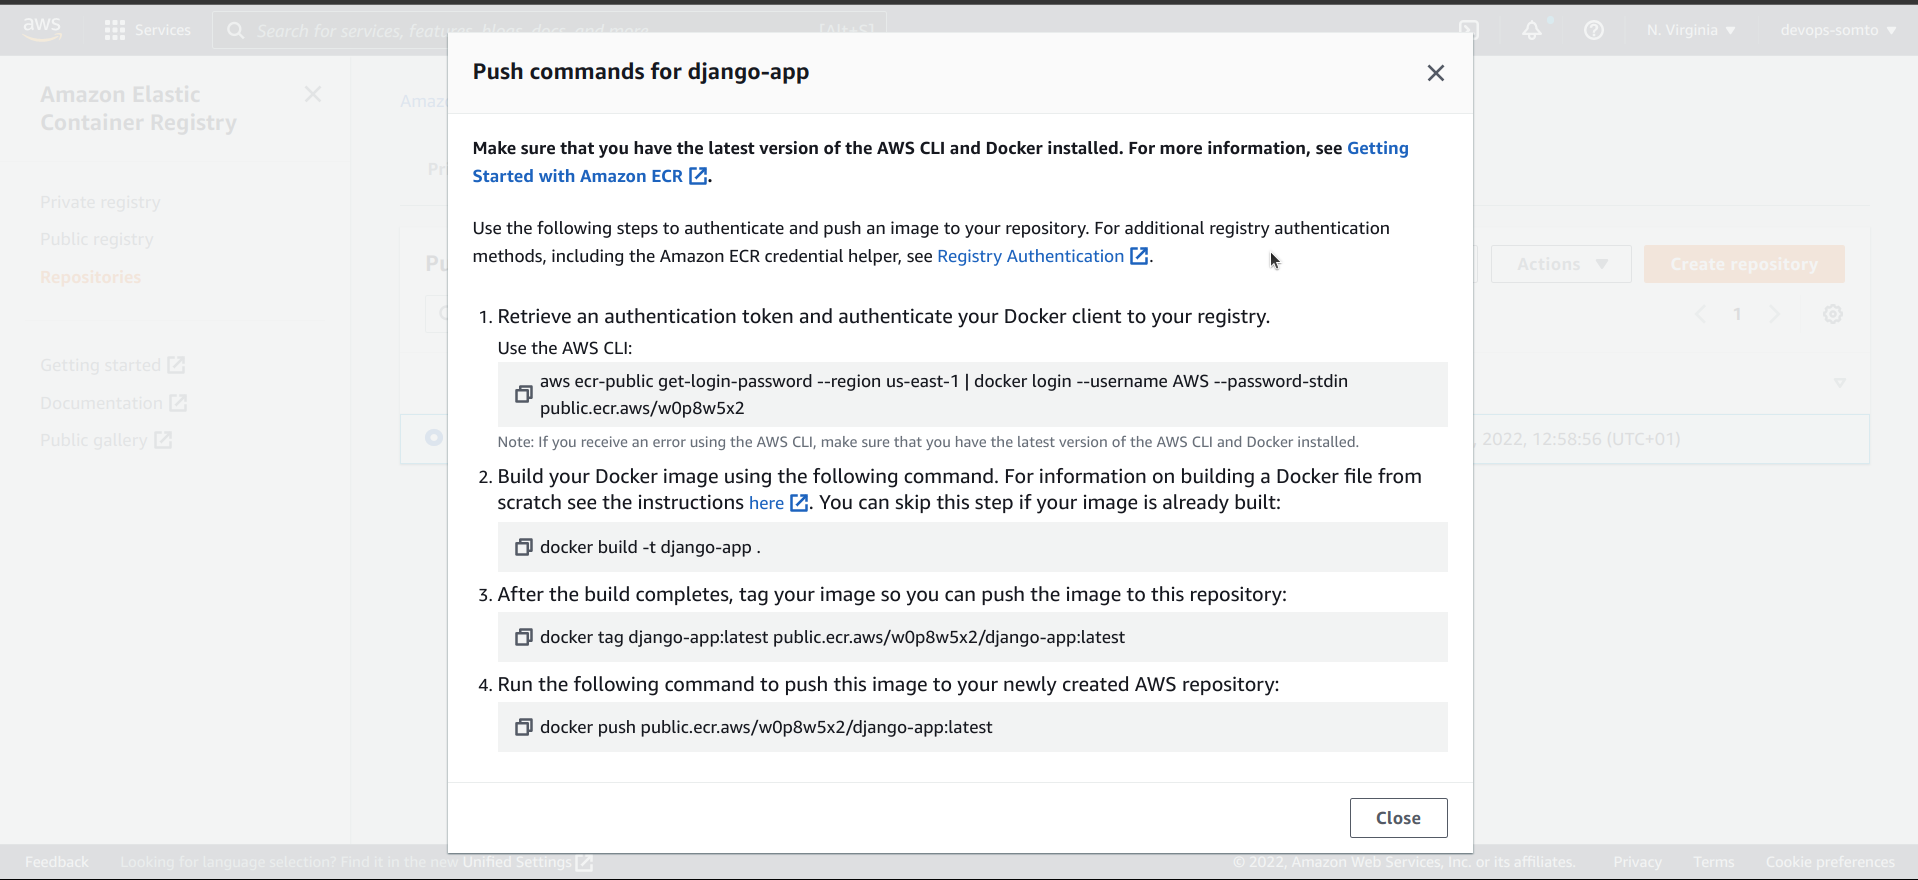
The push view has a series of instructions, let’s go over them.
Firstly, we need to retrieve an authentication token which we will use to authenticate our docker client to our AWS repository.
To do this, we will use the AWS CLI tool and run this command in our terminal
aws ecr-public get-login-password --region us-east-1 | \
docker login --username AWS --password-stdin <REPOSITORY-URI>
Next, we need to build our docker image.
docker build -t django-app .We have tagged it django-app for local development. We also need to tag it with the URL of our AWS repository
docker tag django-app:latest public.ecr.aws/w0p8w5x2/django-app:latest Finally, we push our docker image to our AWS repository
docker push public.ecr.aws/w0p8w5x2/django-app:latestNow, if we check our AWS repository, we should have an image with the tag latest.
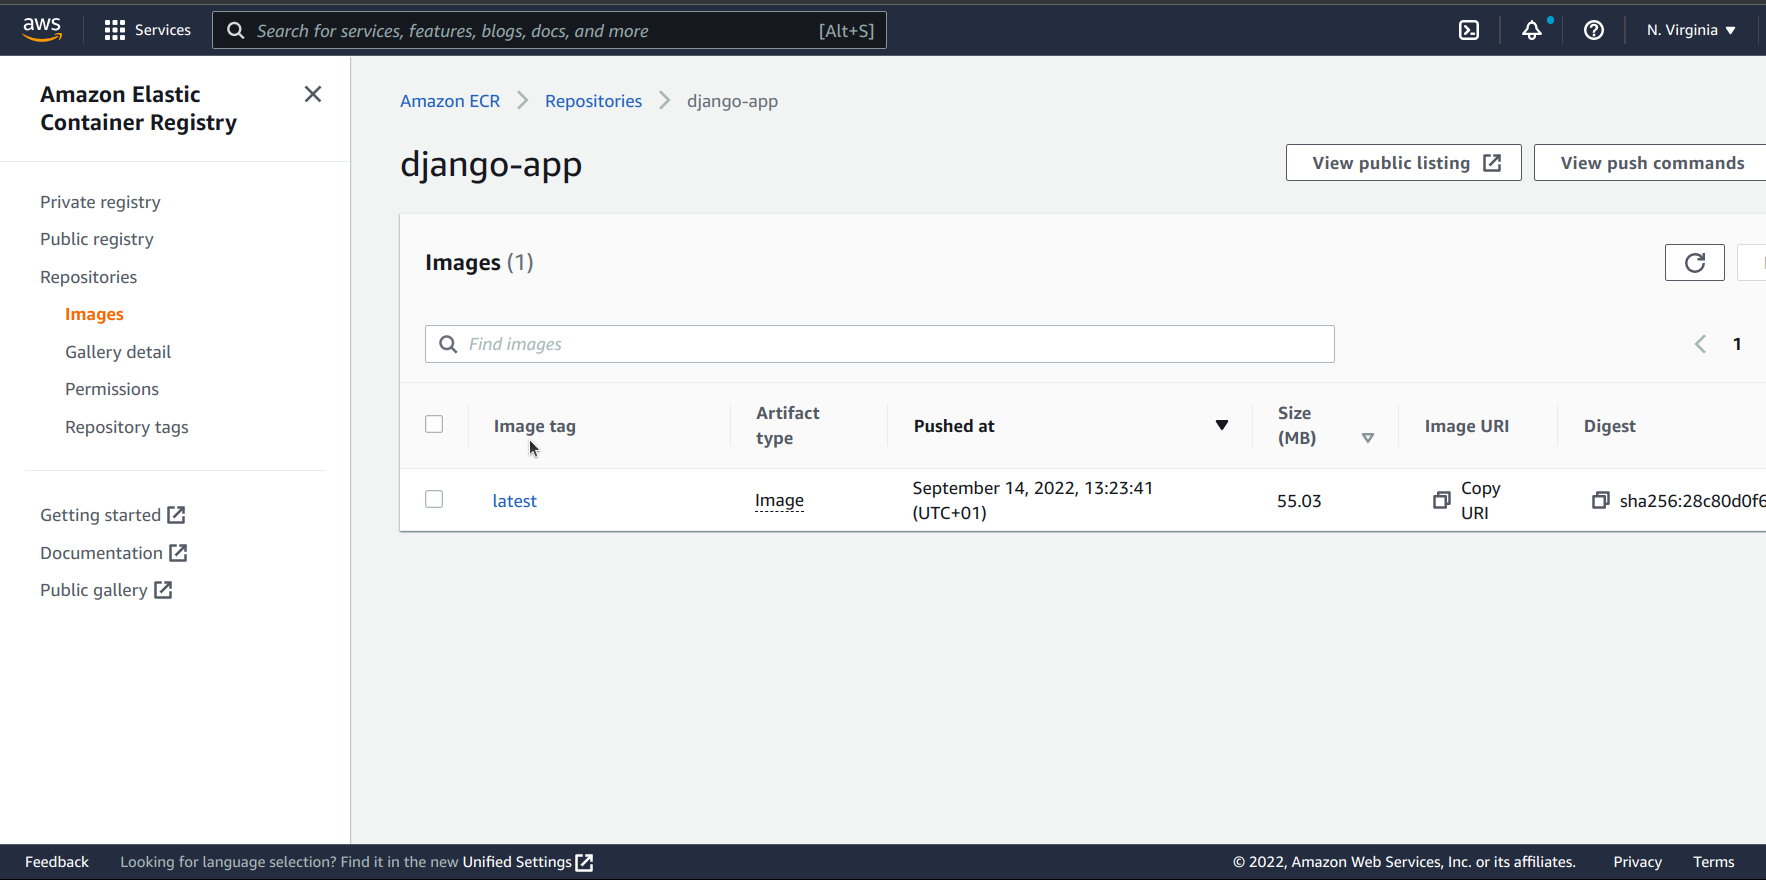
Finally, copy the image URI, because we are going to need it later.
Step 4
Now that we have our docker image. Let us create our cluster and our tasks.
In the search bar, enter ECS
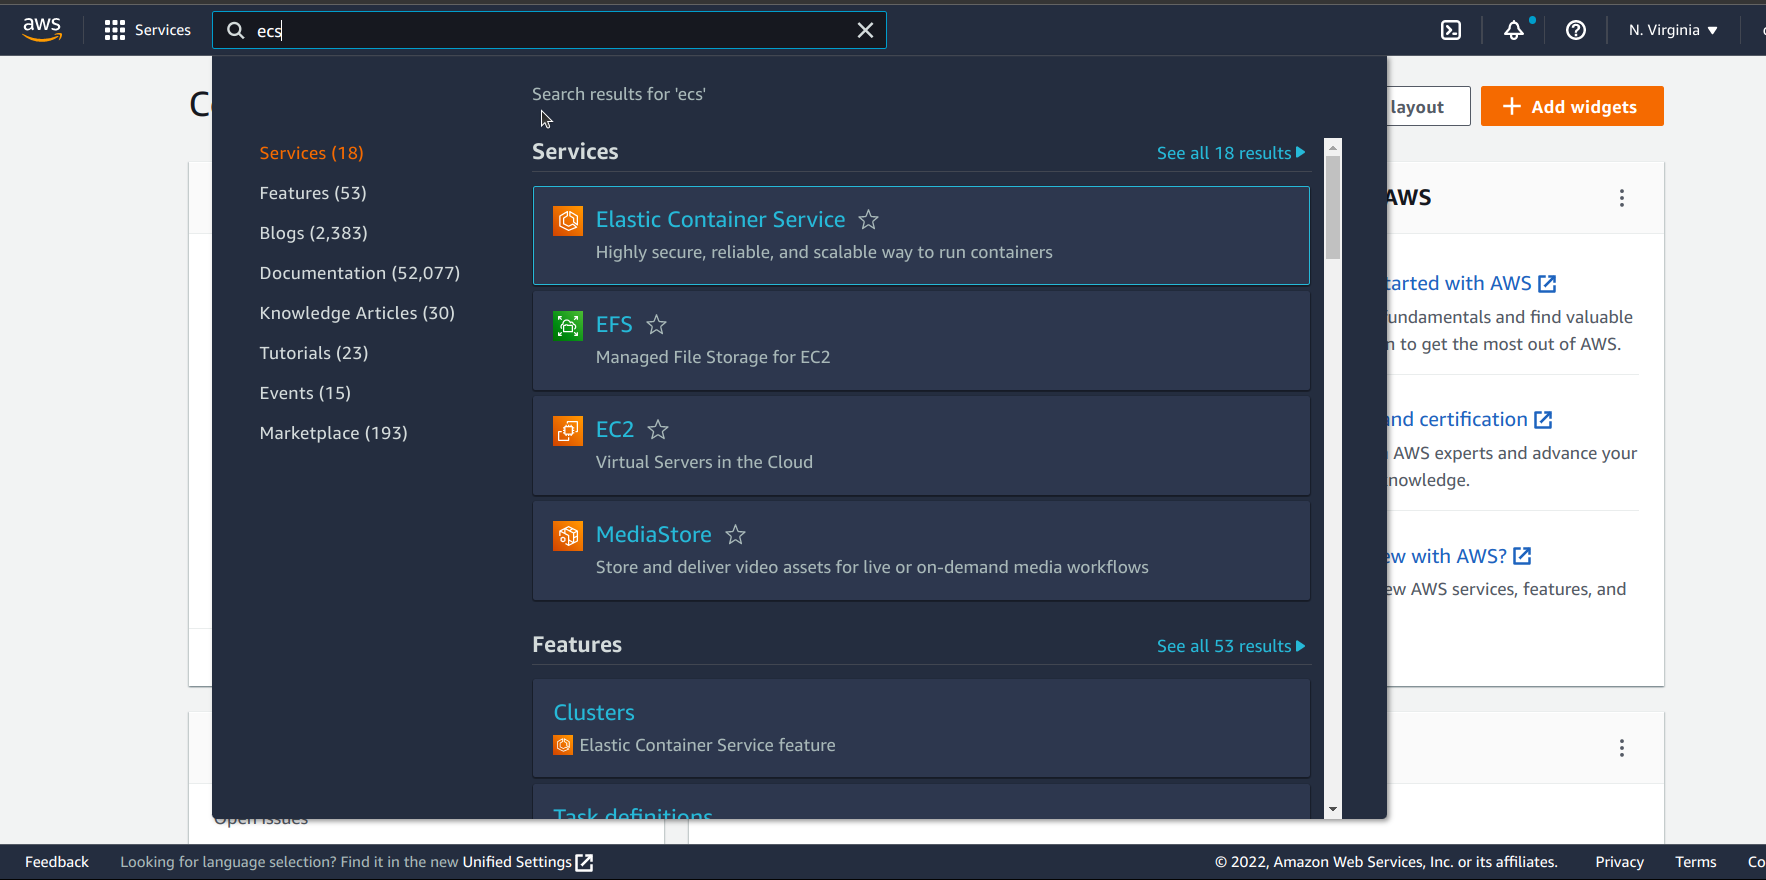
Click on Elastic Container Service
On the ECS home page, on the left pane, click Clusters
On the Clusters page, click on Create Cluster
Next, on the select templates page, select the EC2 Linux + Networking Template
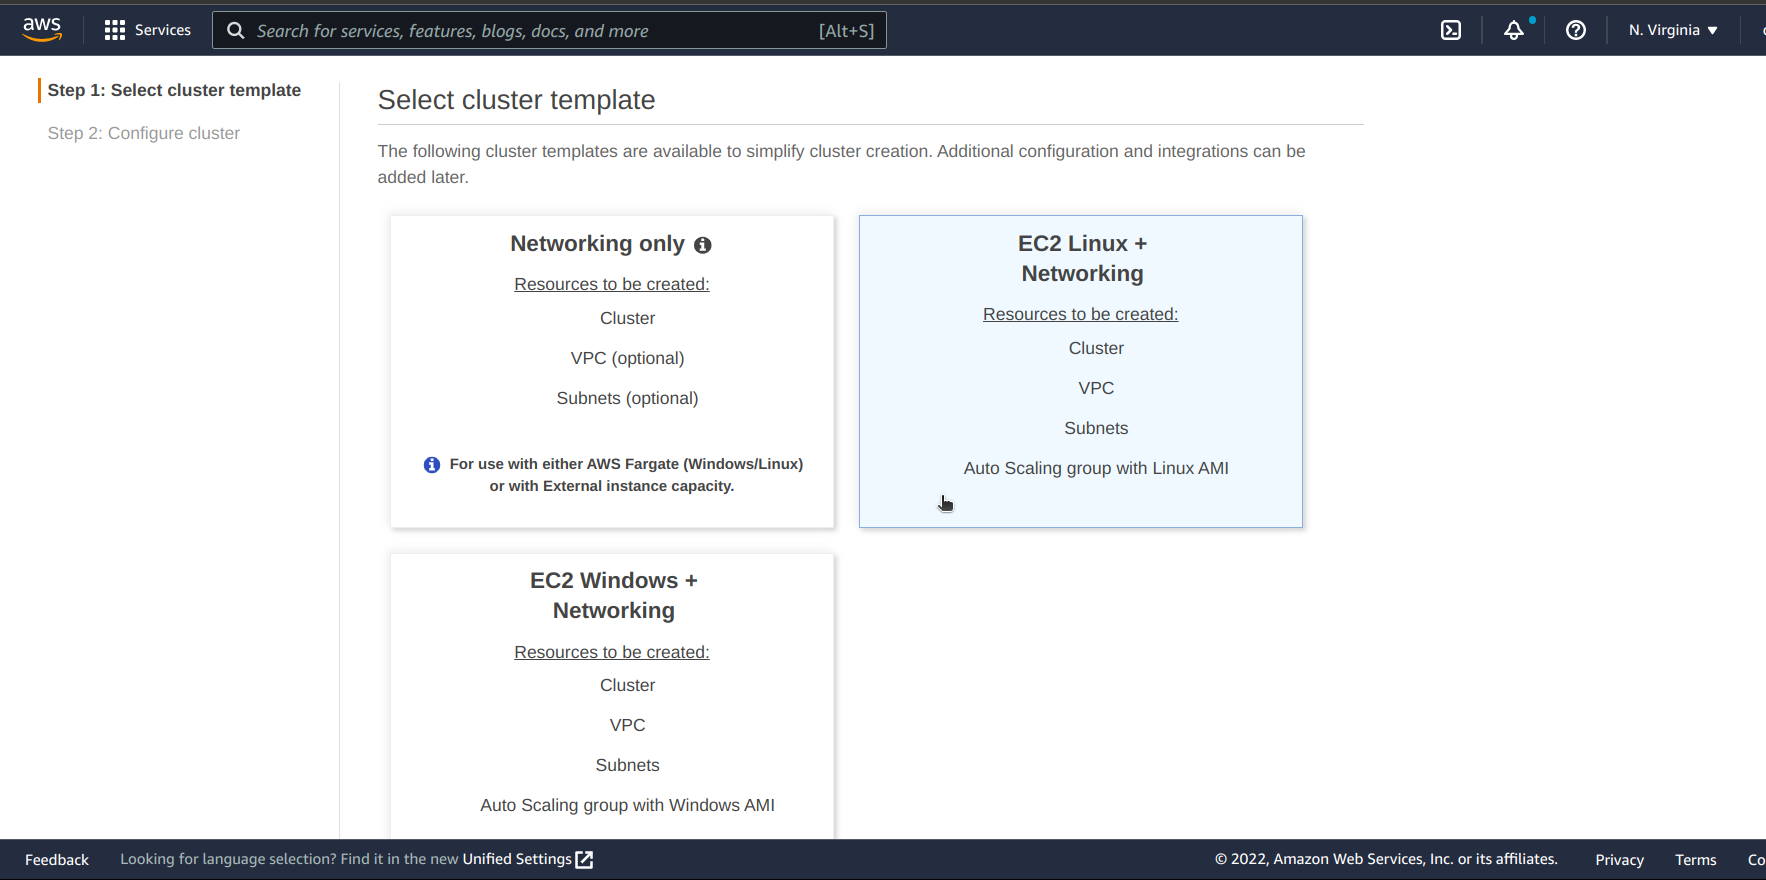
Click Next Step
Next, on our cluster configurations page, we need to give our cluster a name.
For our instance configuration, select On-Demand Instance as our Provisioning Model type.
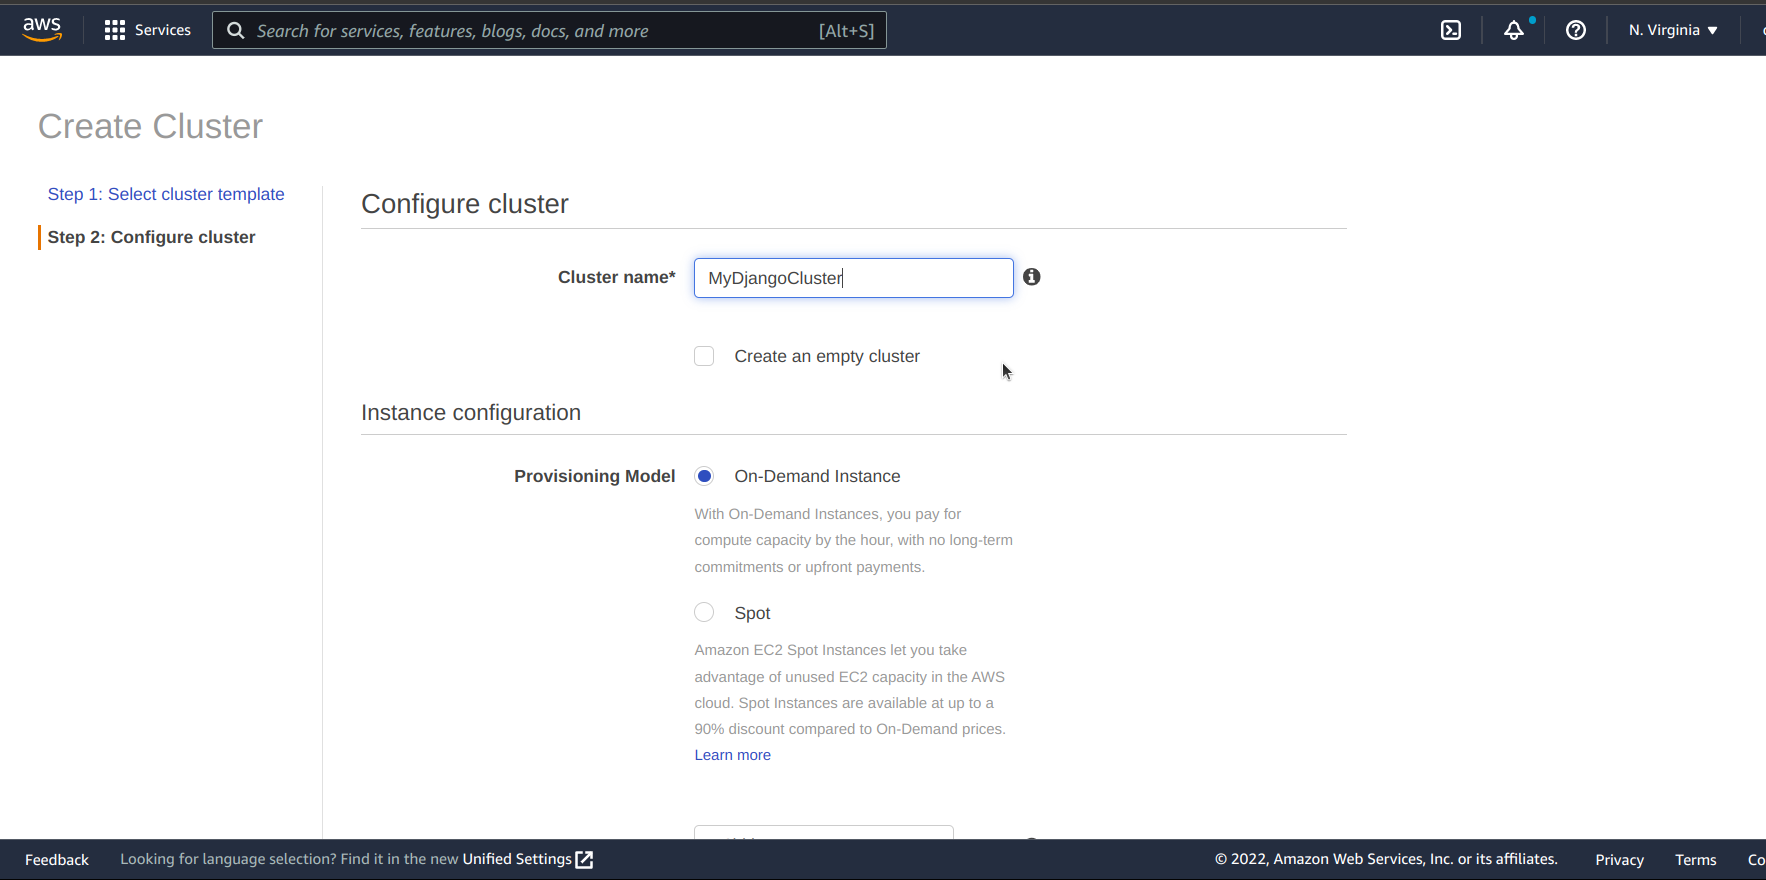
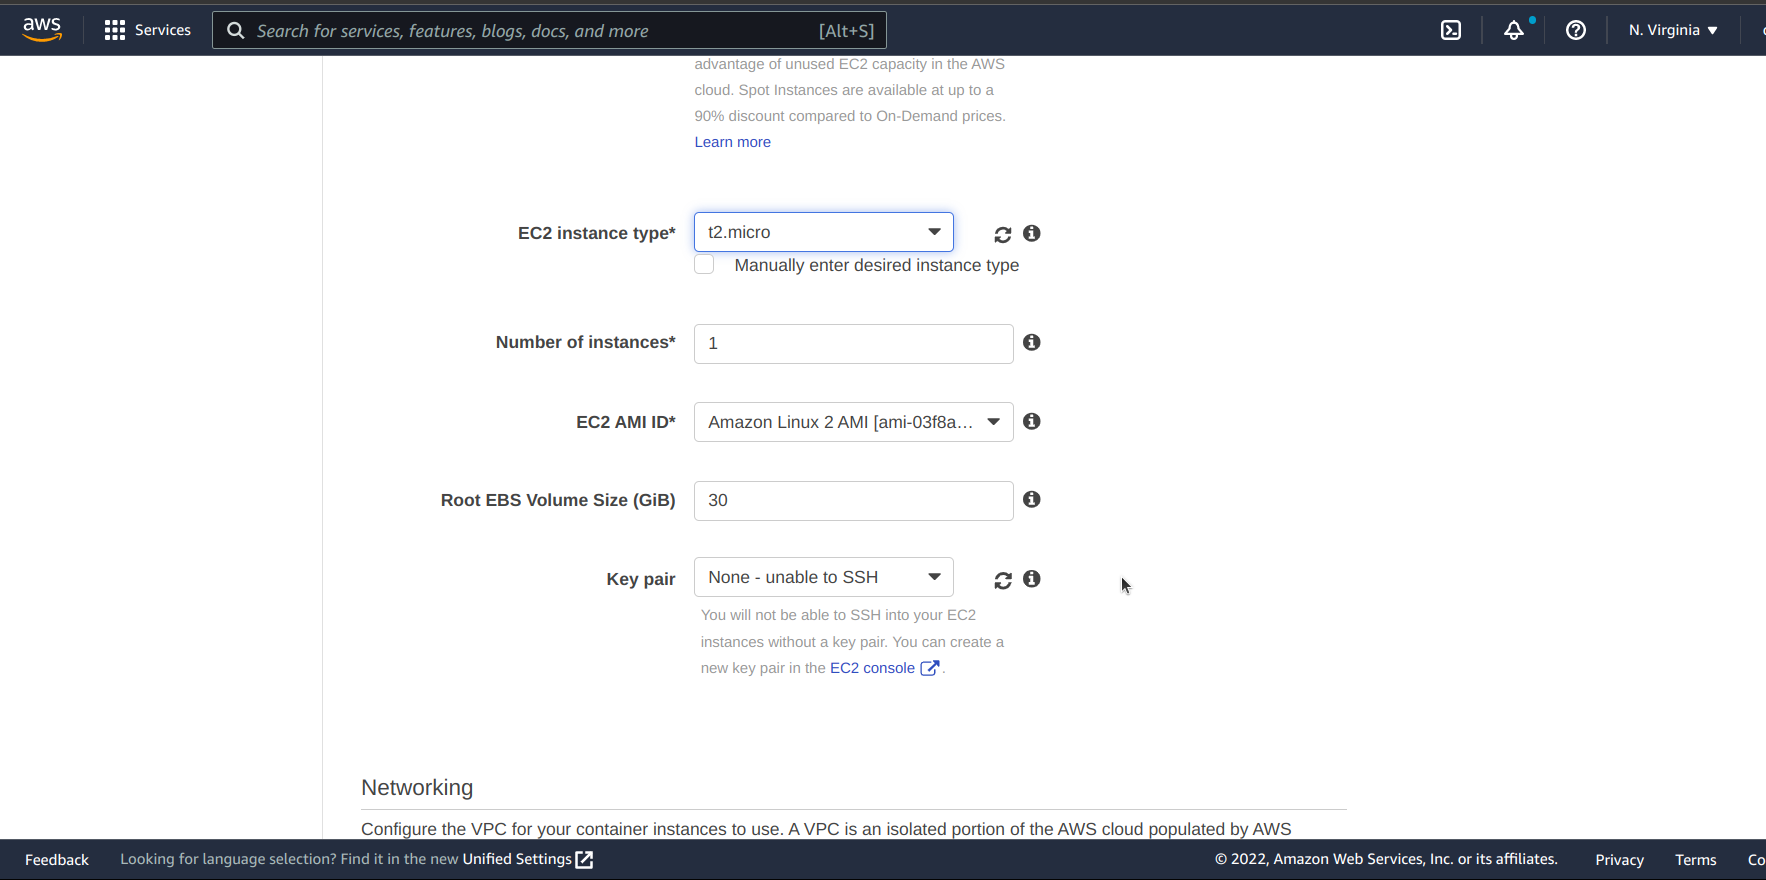
Next, for our instance type, we need to select t2.micro because it is the free tier instance type.
For the remaining configurations under instance configurations, we leave them as default.
In the Networking section, select a VPC, for subnets, select the first option.
For the Auto-assign public IP option, select Enabled, and finally, for security groups, select the first security group
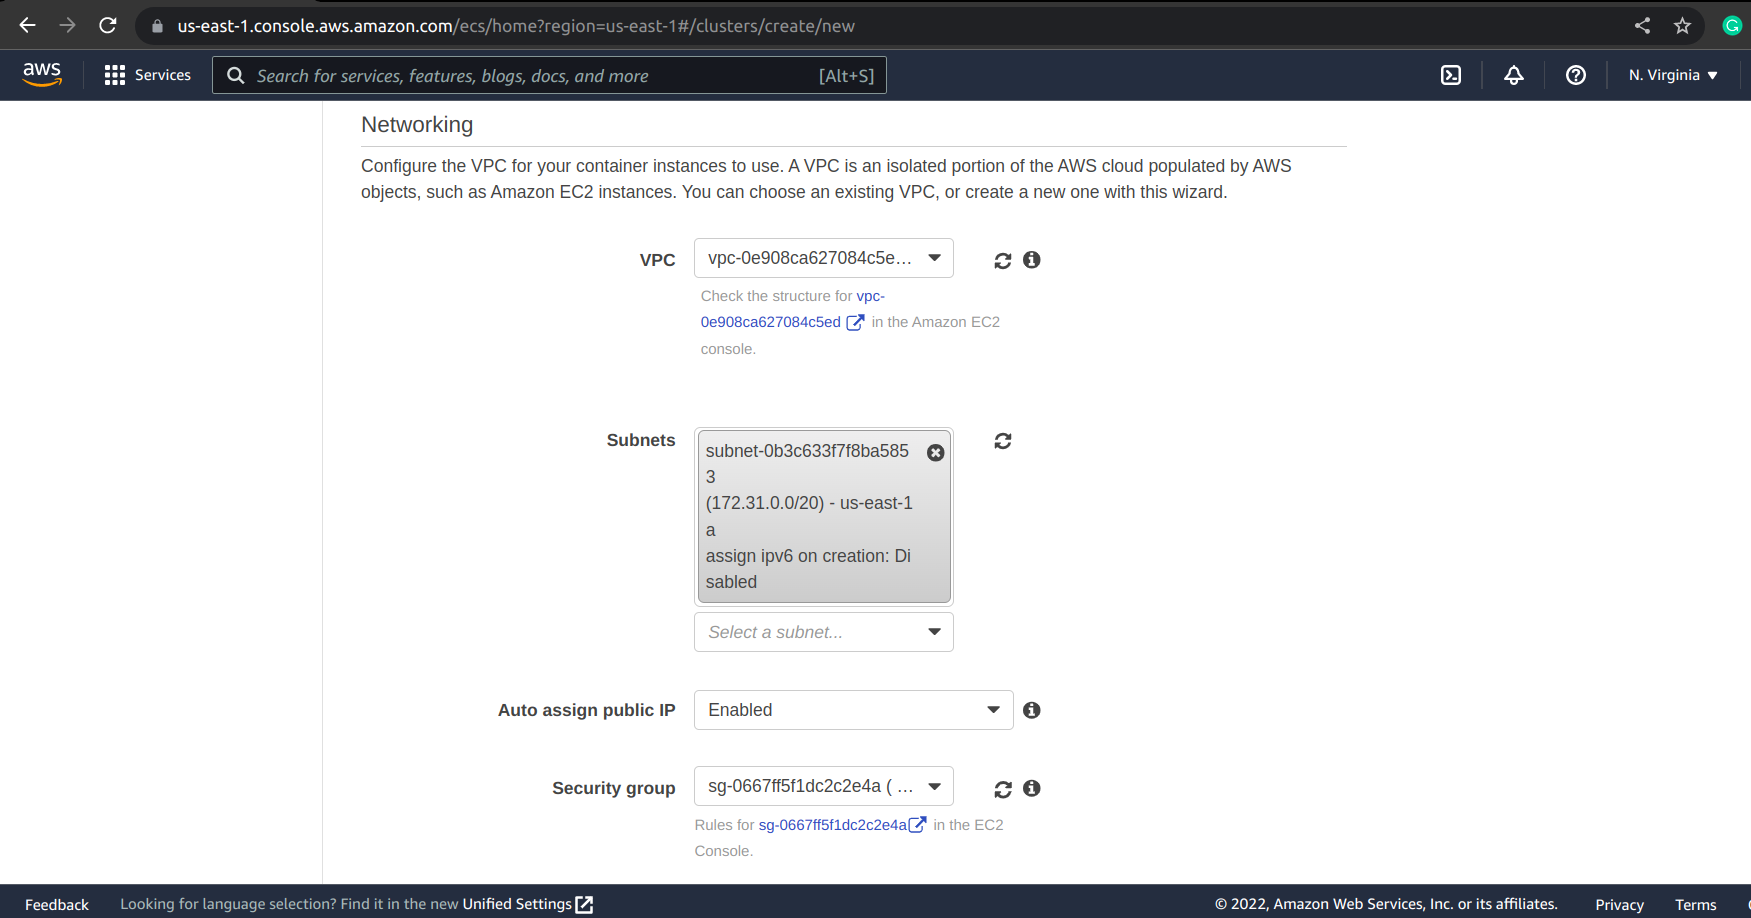
Leave every other setting as default and click on Create
After creating our cluster, we need to create one last thing, which is our task.
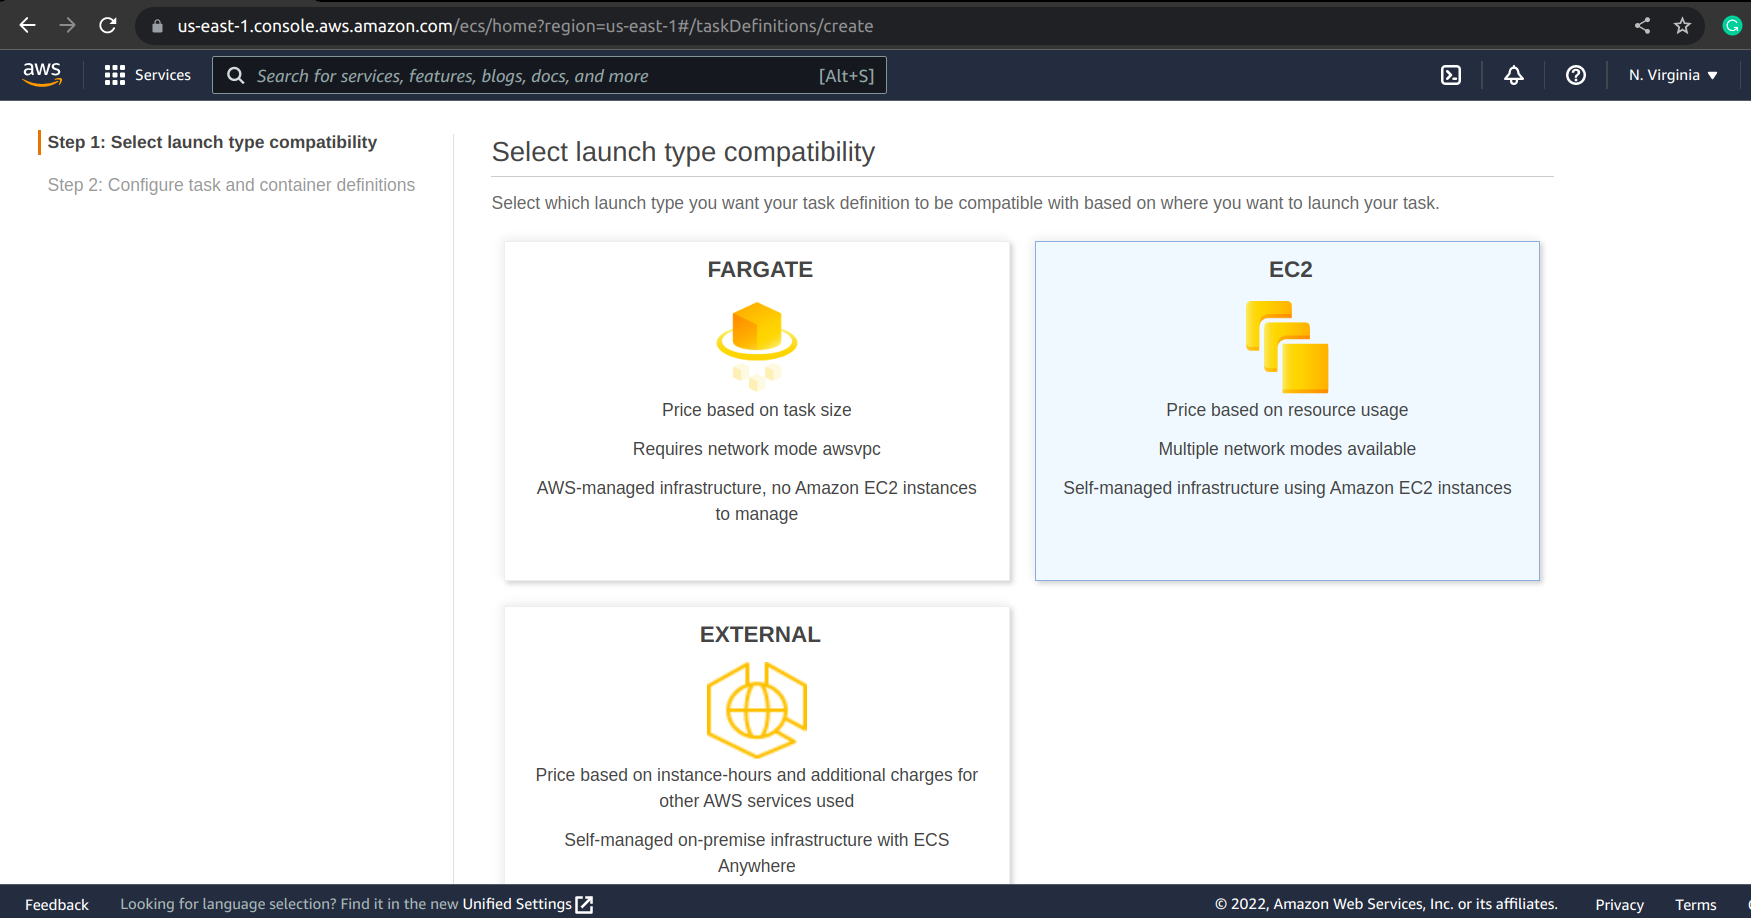
To create a new task, on the left pane of the home page of ECS click on Task Definitions.
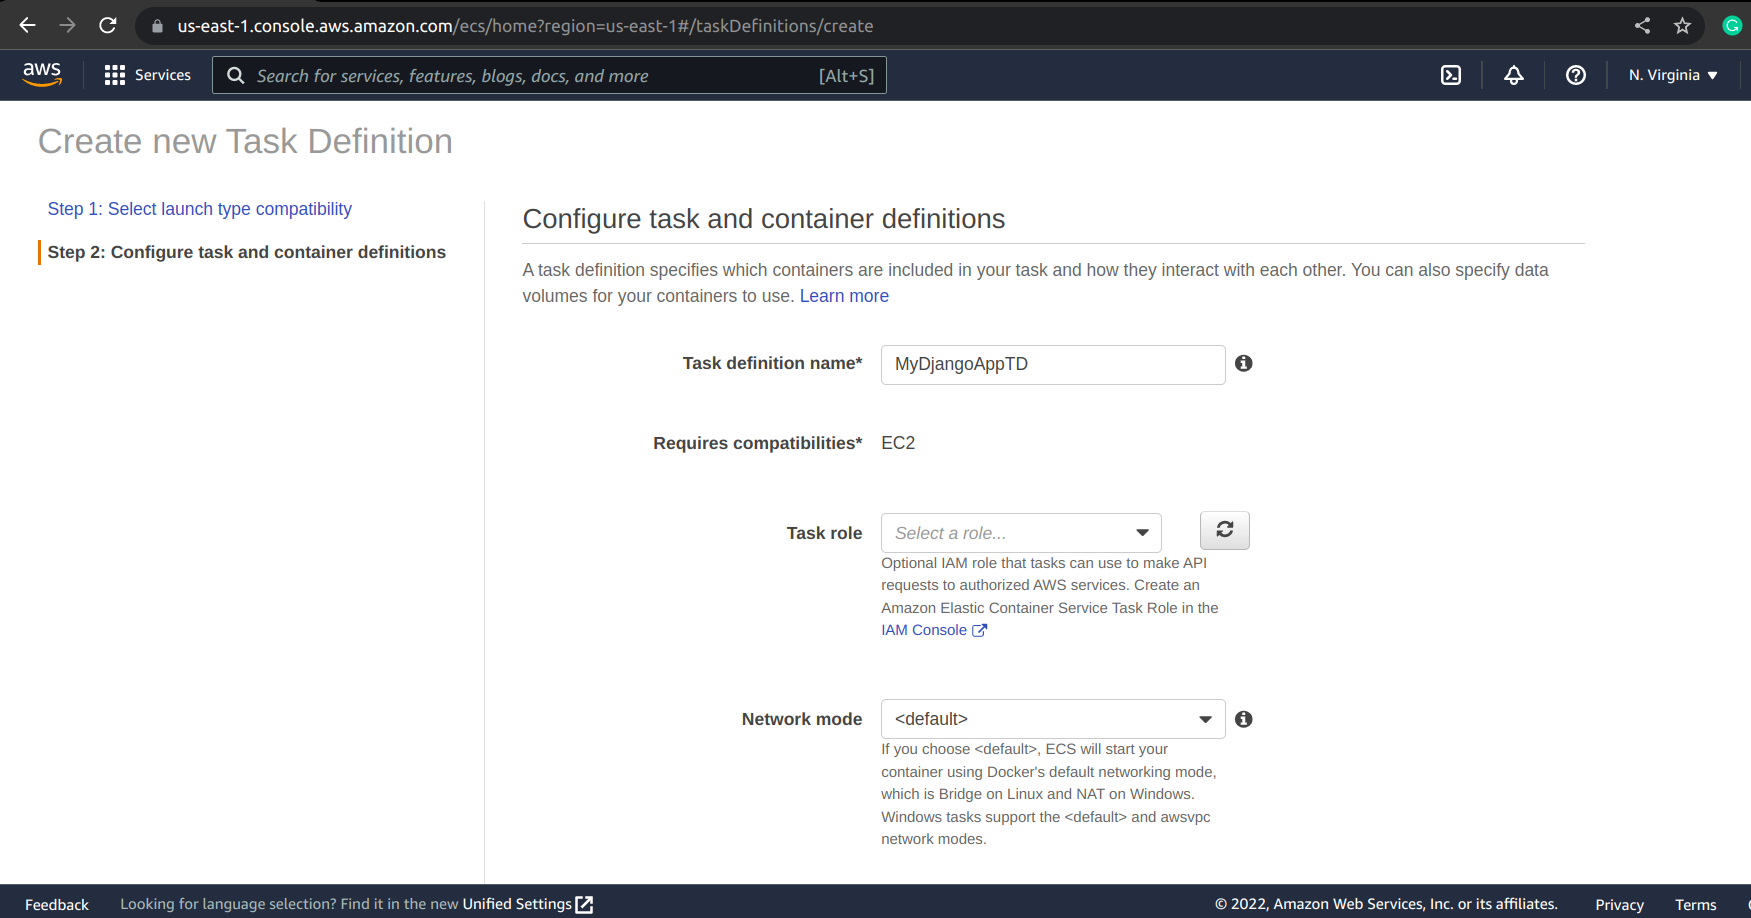
Next, click Create new Task Definition
For our launch type, we will be selecting EC2
Next, we need to give our task definition a name and leave other settings under Configure task and container definitions and Task execution IAM role section as default.
Now, in our Task Size section, we need to set our container compute resource.
Since we are creating a very basic container, we can set our Task Memory to 100, and Task CPU to 1vCPU
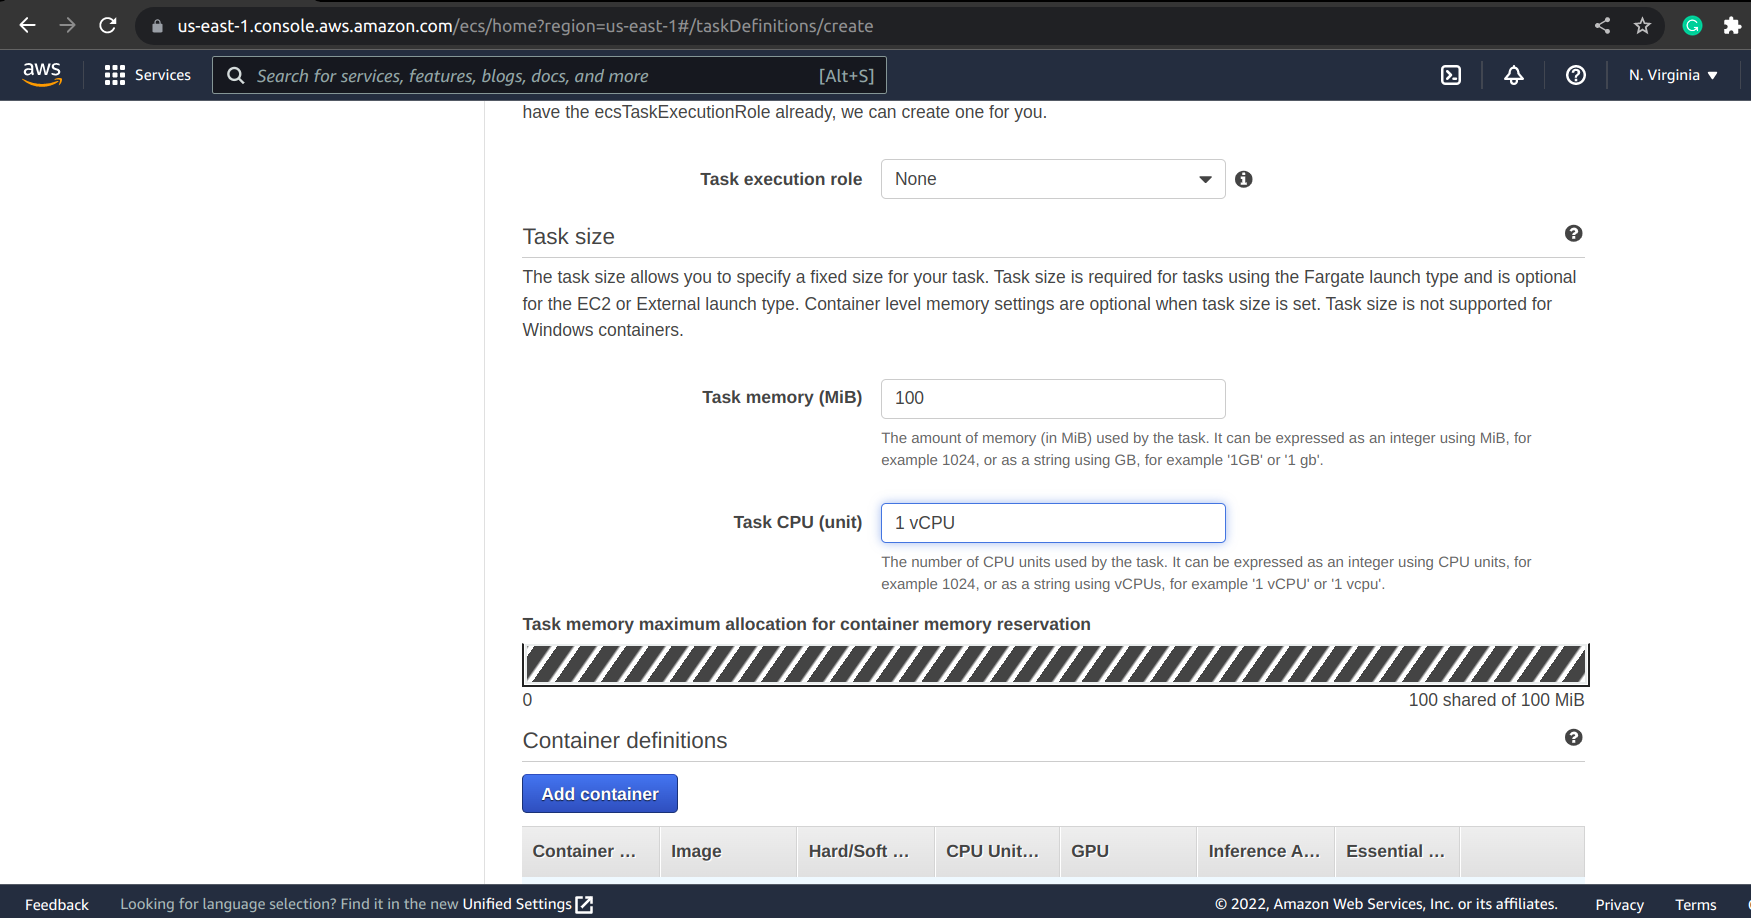
Next, in Container Definitions, we need to set some configurations for our container.
First, we need to give our container a name, and enter our image URI (this is where the image URI we copied earlier comes in).
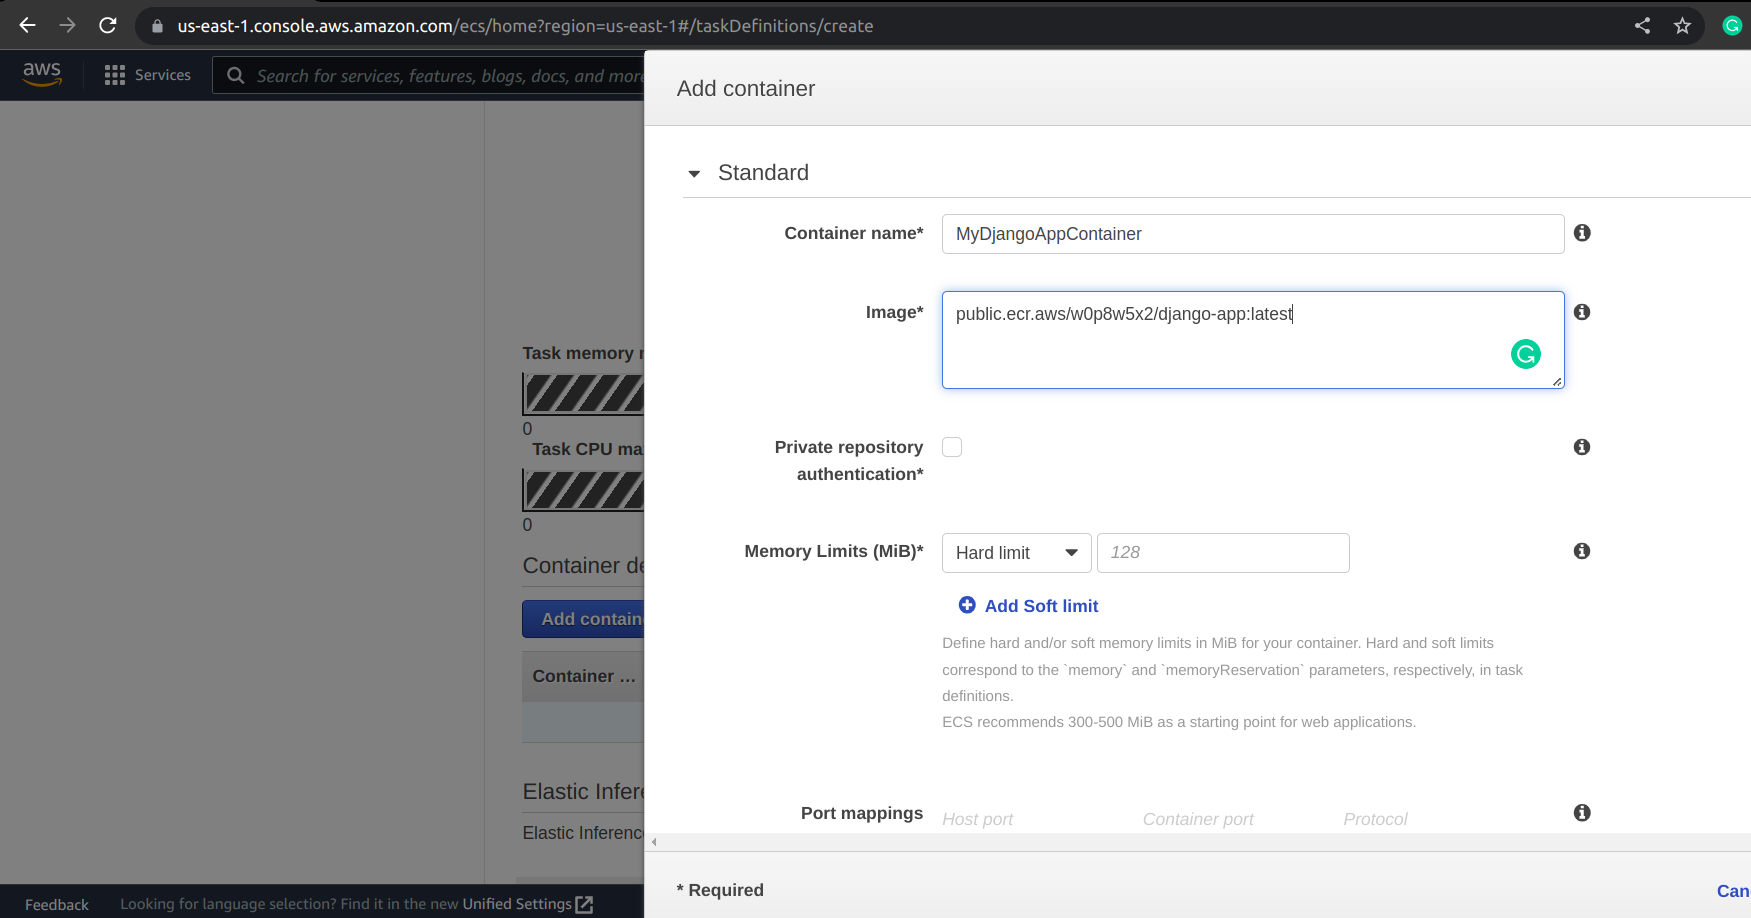
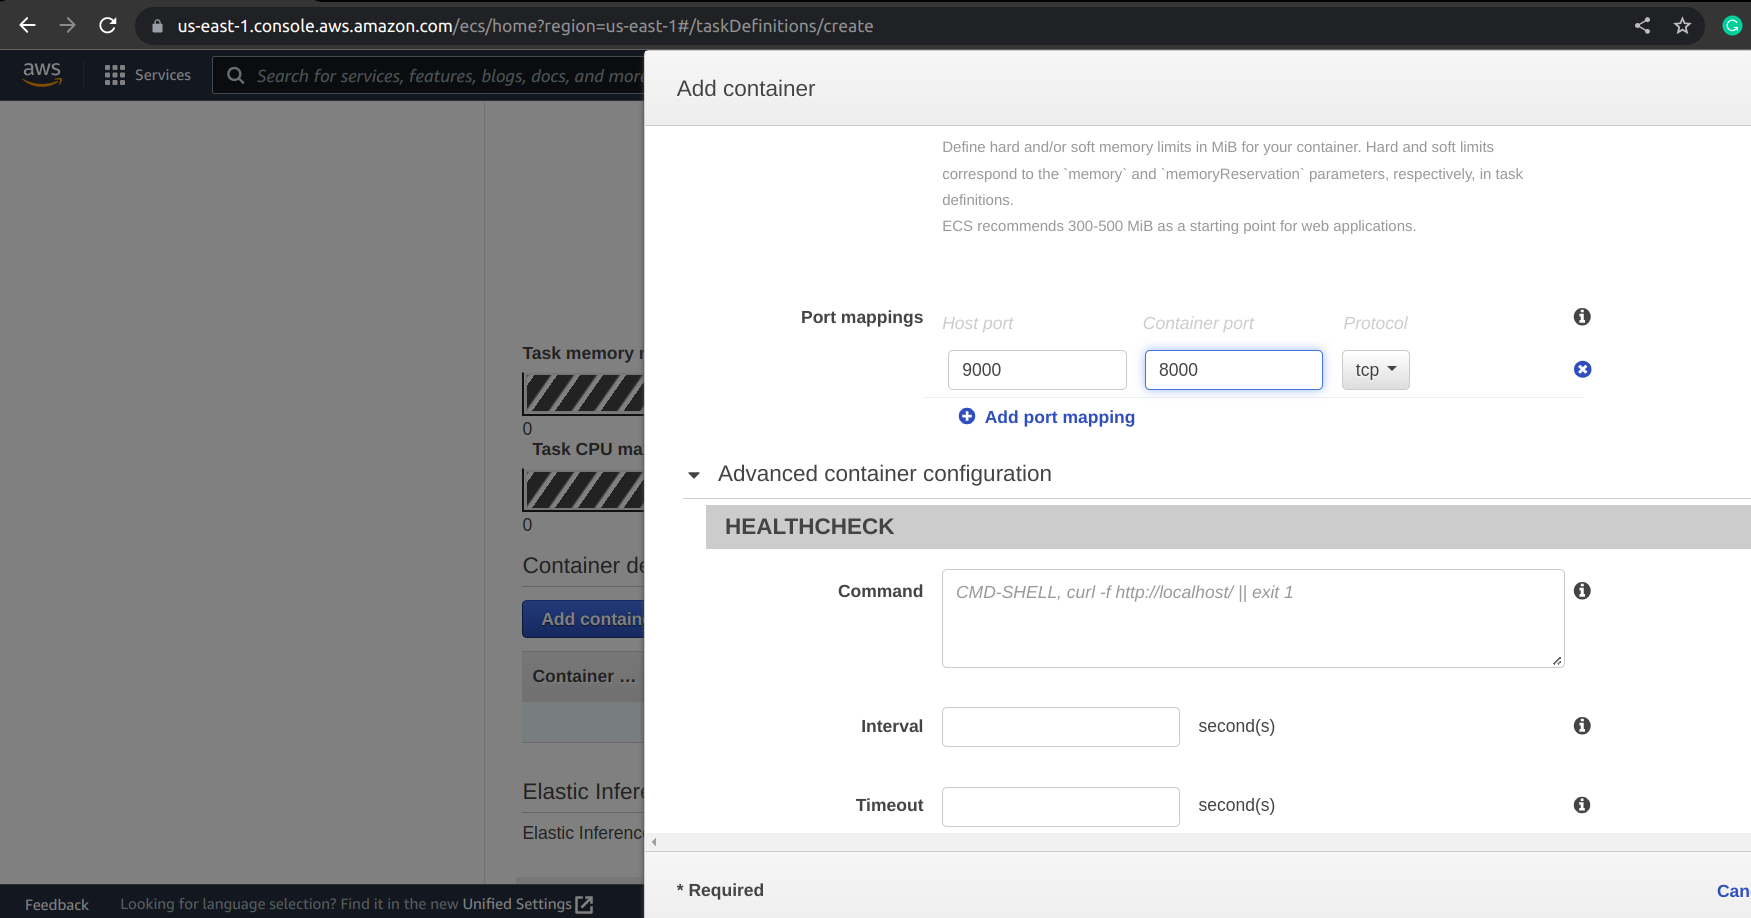
Finally, we need to configure our Port Mapping settings.
Our host port will be the port we want to expose on our EC2 instance, and our container port will be the port we are exposing in our Dockerfile.
Now that we are done, click the Add button to add the new container definition.
After that, we leave all other settings in our Task Definition as default and click on Create
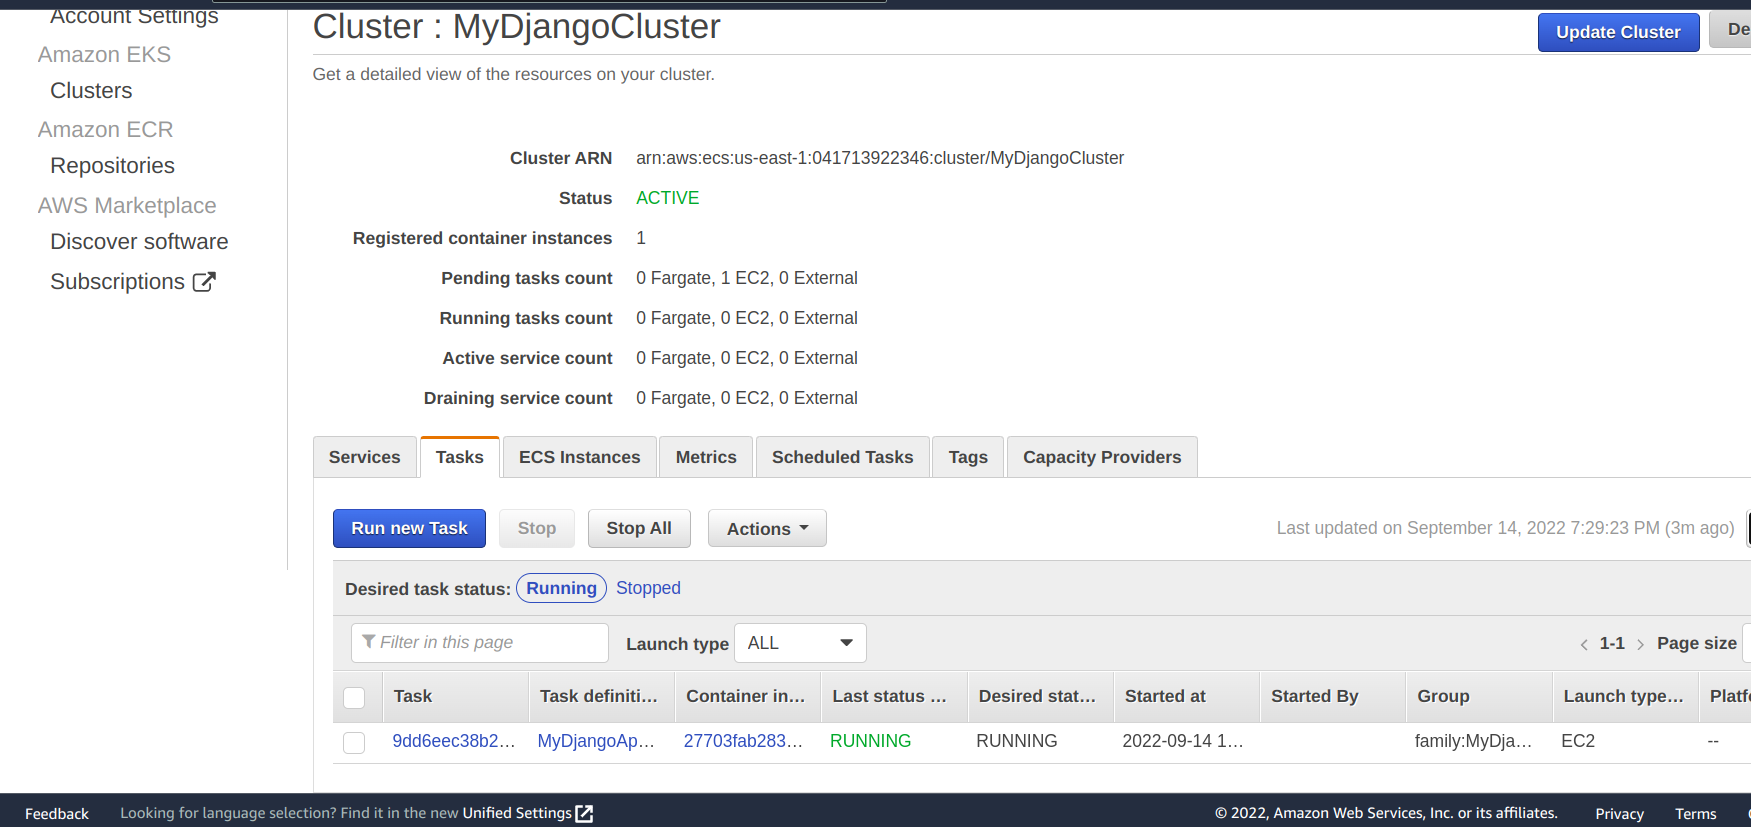
Now that we have a cluster and a task definition, all we have to do now is run a task in our cluster.
To do that, go back to the cluster we created, select Tasks, and click on Run new Task
Select EC2 as the Launch type and click on Run Task
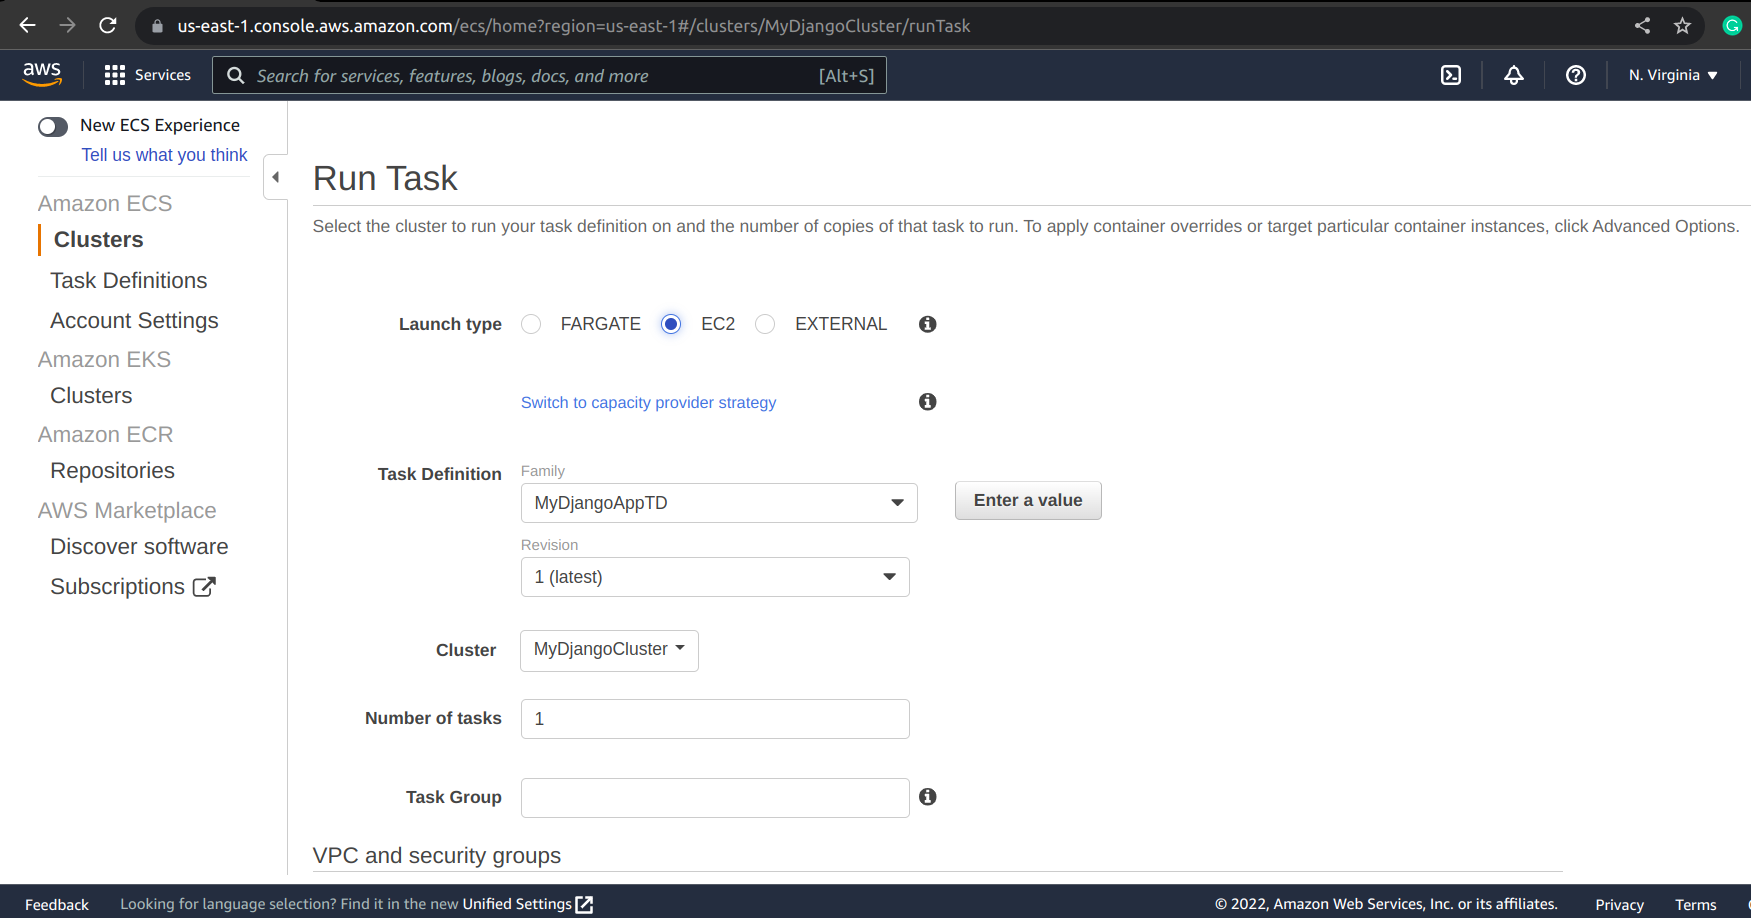
Our task should take some time before it starts running, but once it does, the status will change from PENDING to RUNNING
Step 5
Finally, before we can send requests to our Django app, we need to configure our server to allow us to send requests to it on the port we defined earlier.
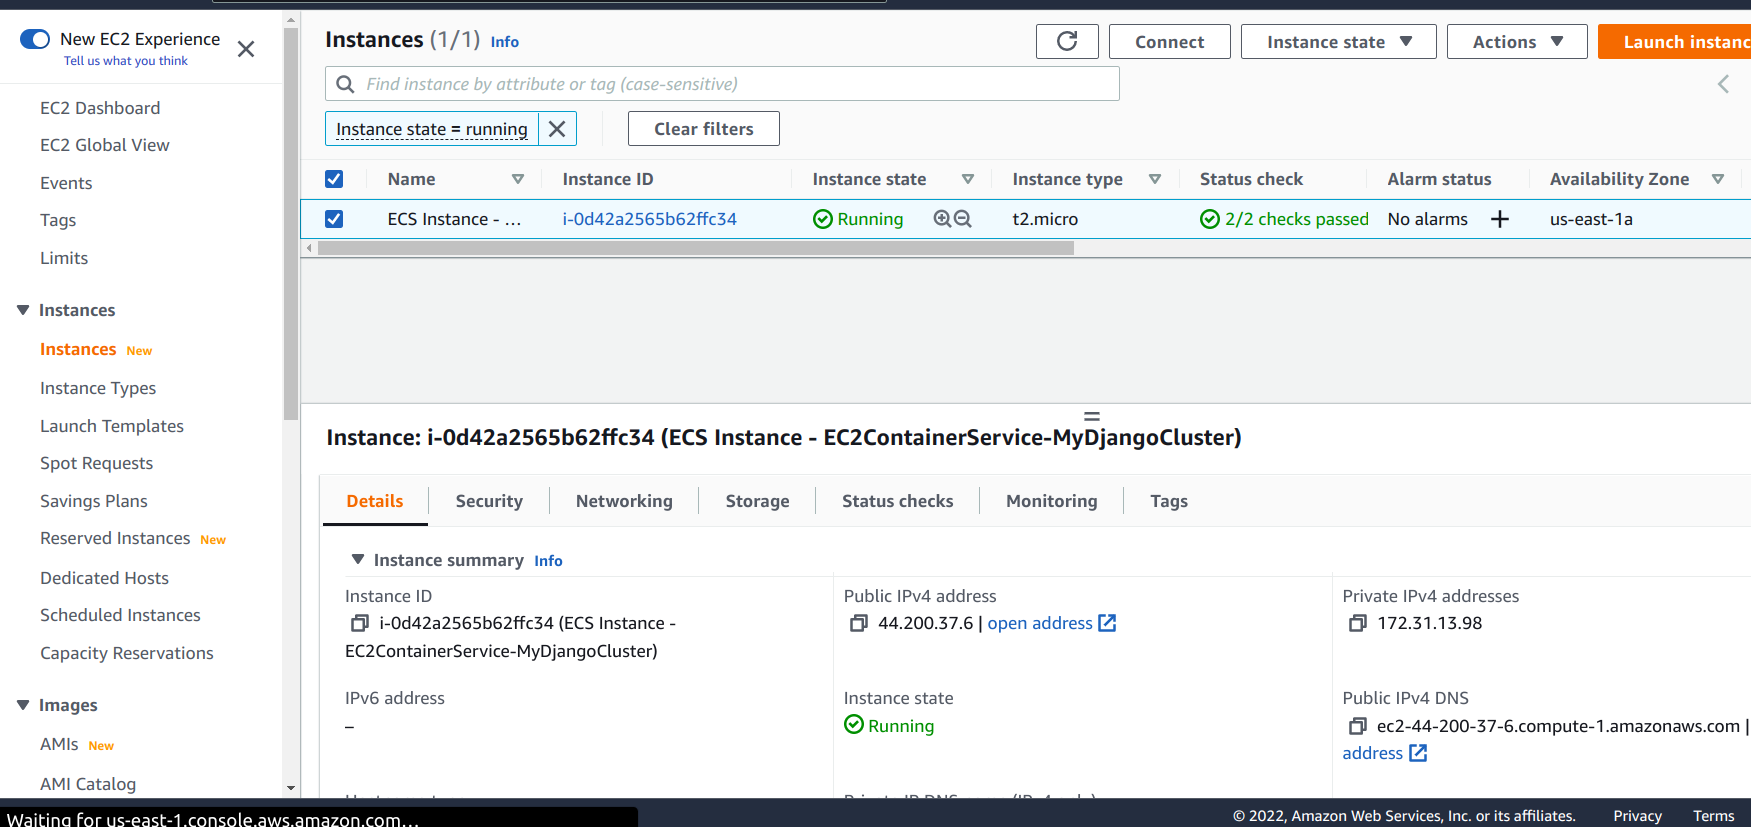
First, we need to get to our EC2 dashboard.
In the search bar, enter EC2, and click on EC2.
On the resources page, click on instances(running), and select the running EC2 instance.
Click on Security, and click on the security group
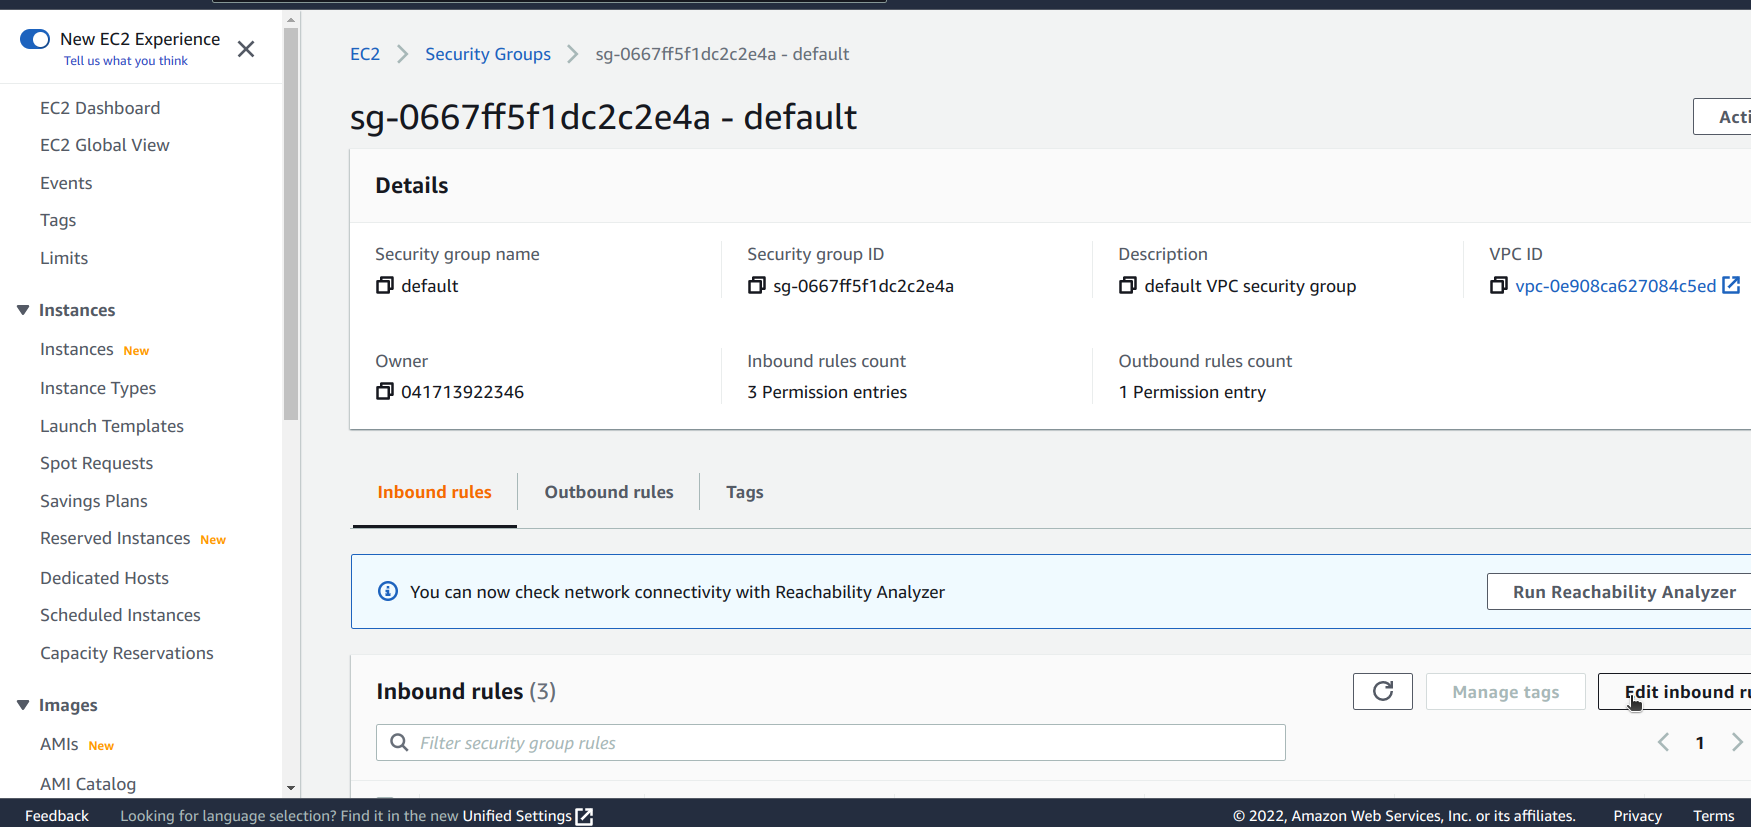
While on the Security Groups page, click on Edit inbound rules
Now, all we need to do is add more inbound rules, one of which will consist of:
- Type: Custom TCP, Port range: 9000, Source: Anywhere-IPv4 And:
- Type: Custom TCP, Port range: 9000, Source: Anywhere-IPv6
Now, we click on Save rules.
We have successfully configured our server to allow internet traffic on port 9000.
All we need to do now is go back to our instance dashboard and copy our Public IPv4 DNS.
We can now send an HTTP request to that server. We can test this with Postman
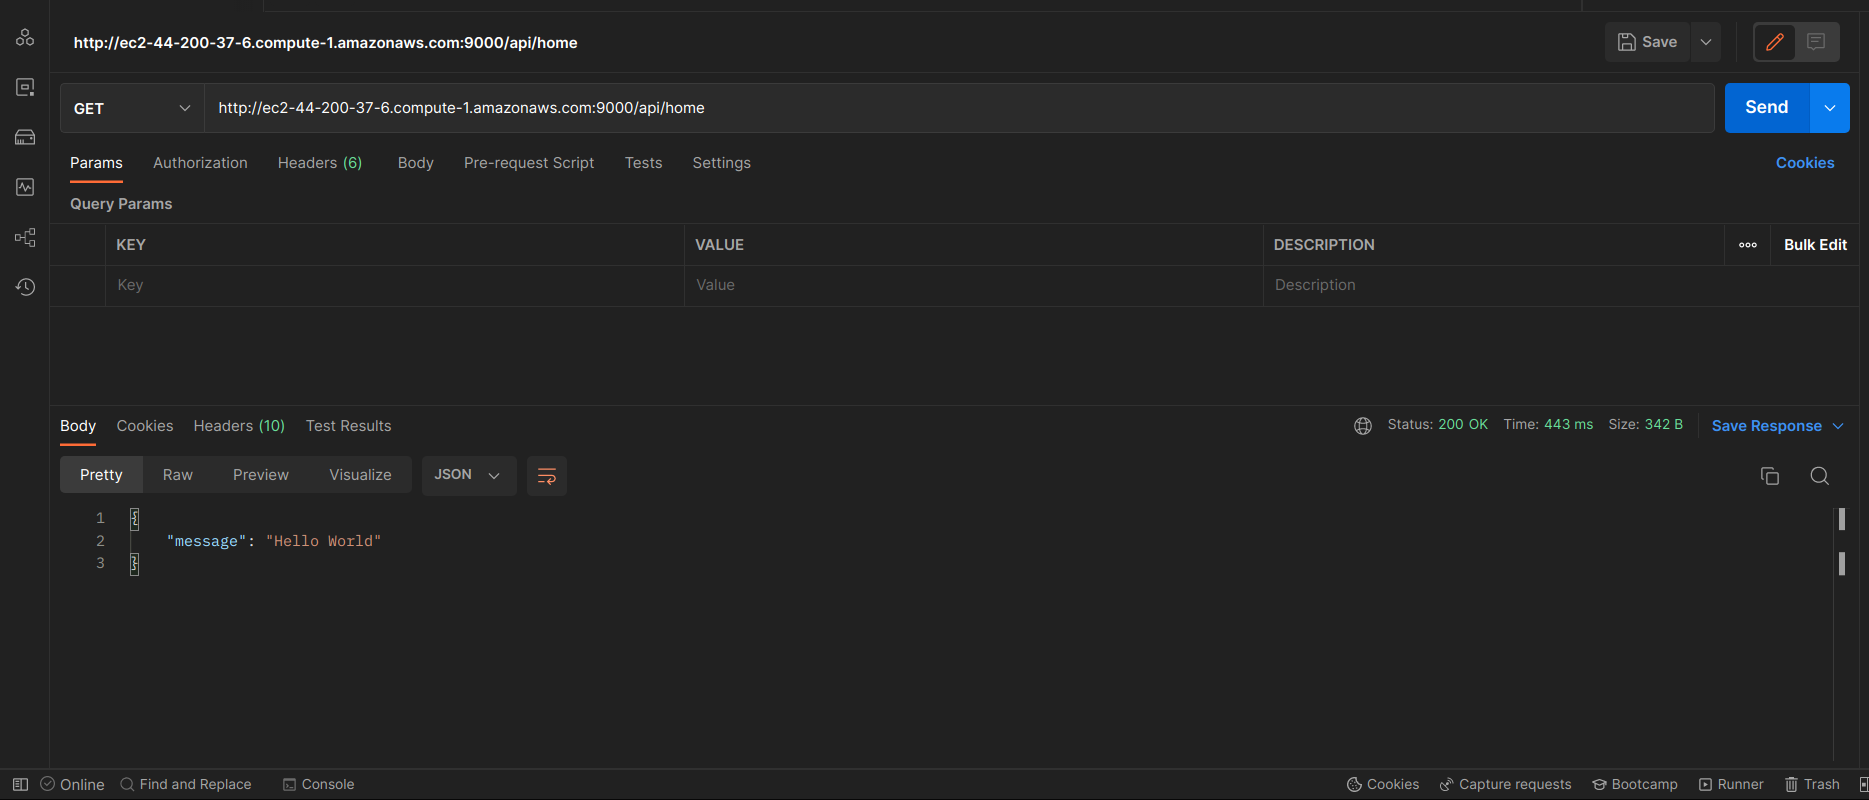
As you can see, we got a response of “{”message“:”Hello World“}”.
With that, we have just successfully deployed our docker container.
Conclusion
In a nutshell, we dived into container deployment, explored various services, and checked out the perks of using AWS ECS. We even deployed a simple Docker container.
Now, if you’re looking to level up your build process efficiency, you might want to try Earthly, especially if you’re already working with Docker containers.
Turn your engineering standards into automated guardrails that provide feedback directly in pull requests, with 100+ guardrails included out of the box and support for the tools and CI/CD systems you already have.