Using GitHub Actions to Run, Test, Build, and Deploy Docker Containers
In this Series
Table of Contents
This article explains how to automate Docker using GitHub Actions. Earthly’s caching mechanisms speed up your GitHub Actions pipeline. Learn how.
GitHub Actions is a flexible tool that enables developers to automate a variety of processes, including developing, testing, and deploying, right from their GitHub repositories. The automation of Docker containers is no exception since GitHub Actions also enables developers to automate the process of developing containerized applications. As a result, developers can save time and focus on improving the overall quality of their software.
In this article, you’ll learn how to use Github Actions to run, test, build, and deploy Docker containers using GitHub Actions.
How to Run, Test, Build, and Deploy Docker Containers Using GitHub Actions
Before you begin this tutorial, you’ll need the following:
- GitHub account
- Basic knowledge of Docker and Docker Compose
- Basic knowledge of YAML files
Once these prerequisites are met, it’s time to begin. You’ll start by creating a sample workflow, and then set a runner for the workflow. After that, you’ll learn how to set up GitHub Actions locally and then how to set up the build and test stage. Finally, you’ll execute the workflow by running the action.
Create a Workflow
The first thing you need to do is create a workflow using GitHub Actions. This workflow defines the steps that GitHub Actions should take when triggered, including checking out the code, building a Docker container, running tests, and deploying the application.
To create a workflow, log into your GitHub account and navigate to the repo you want to automate. Select Actions from the navigation bar, which will take you to the Actions page:

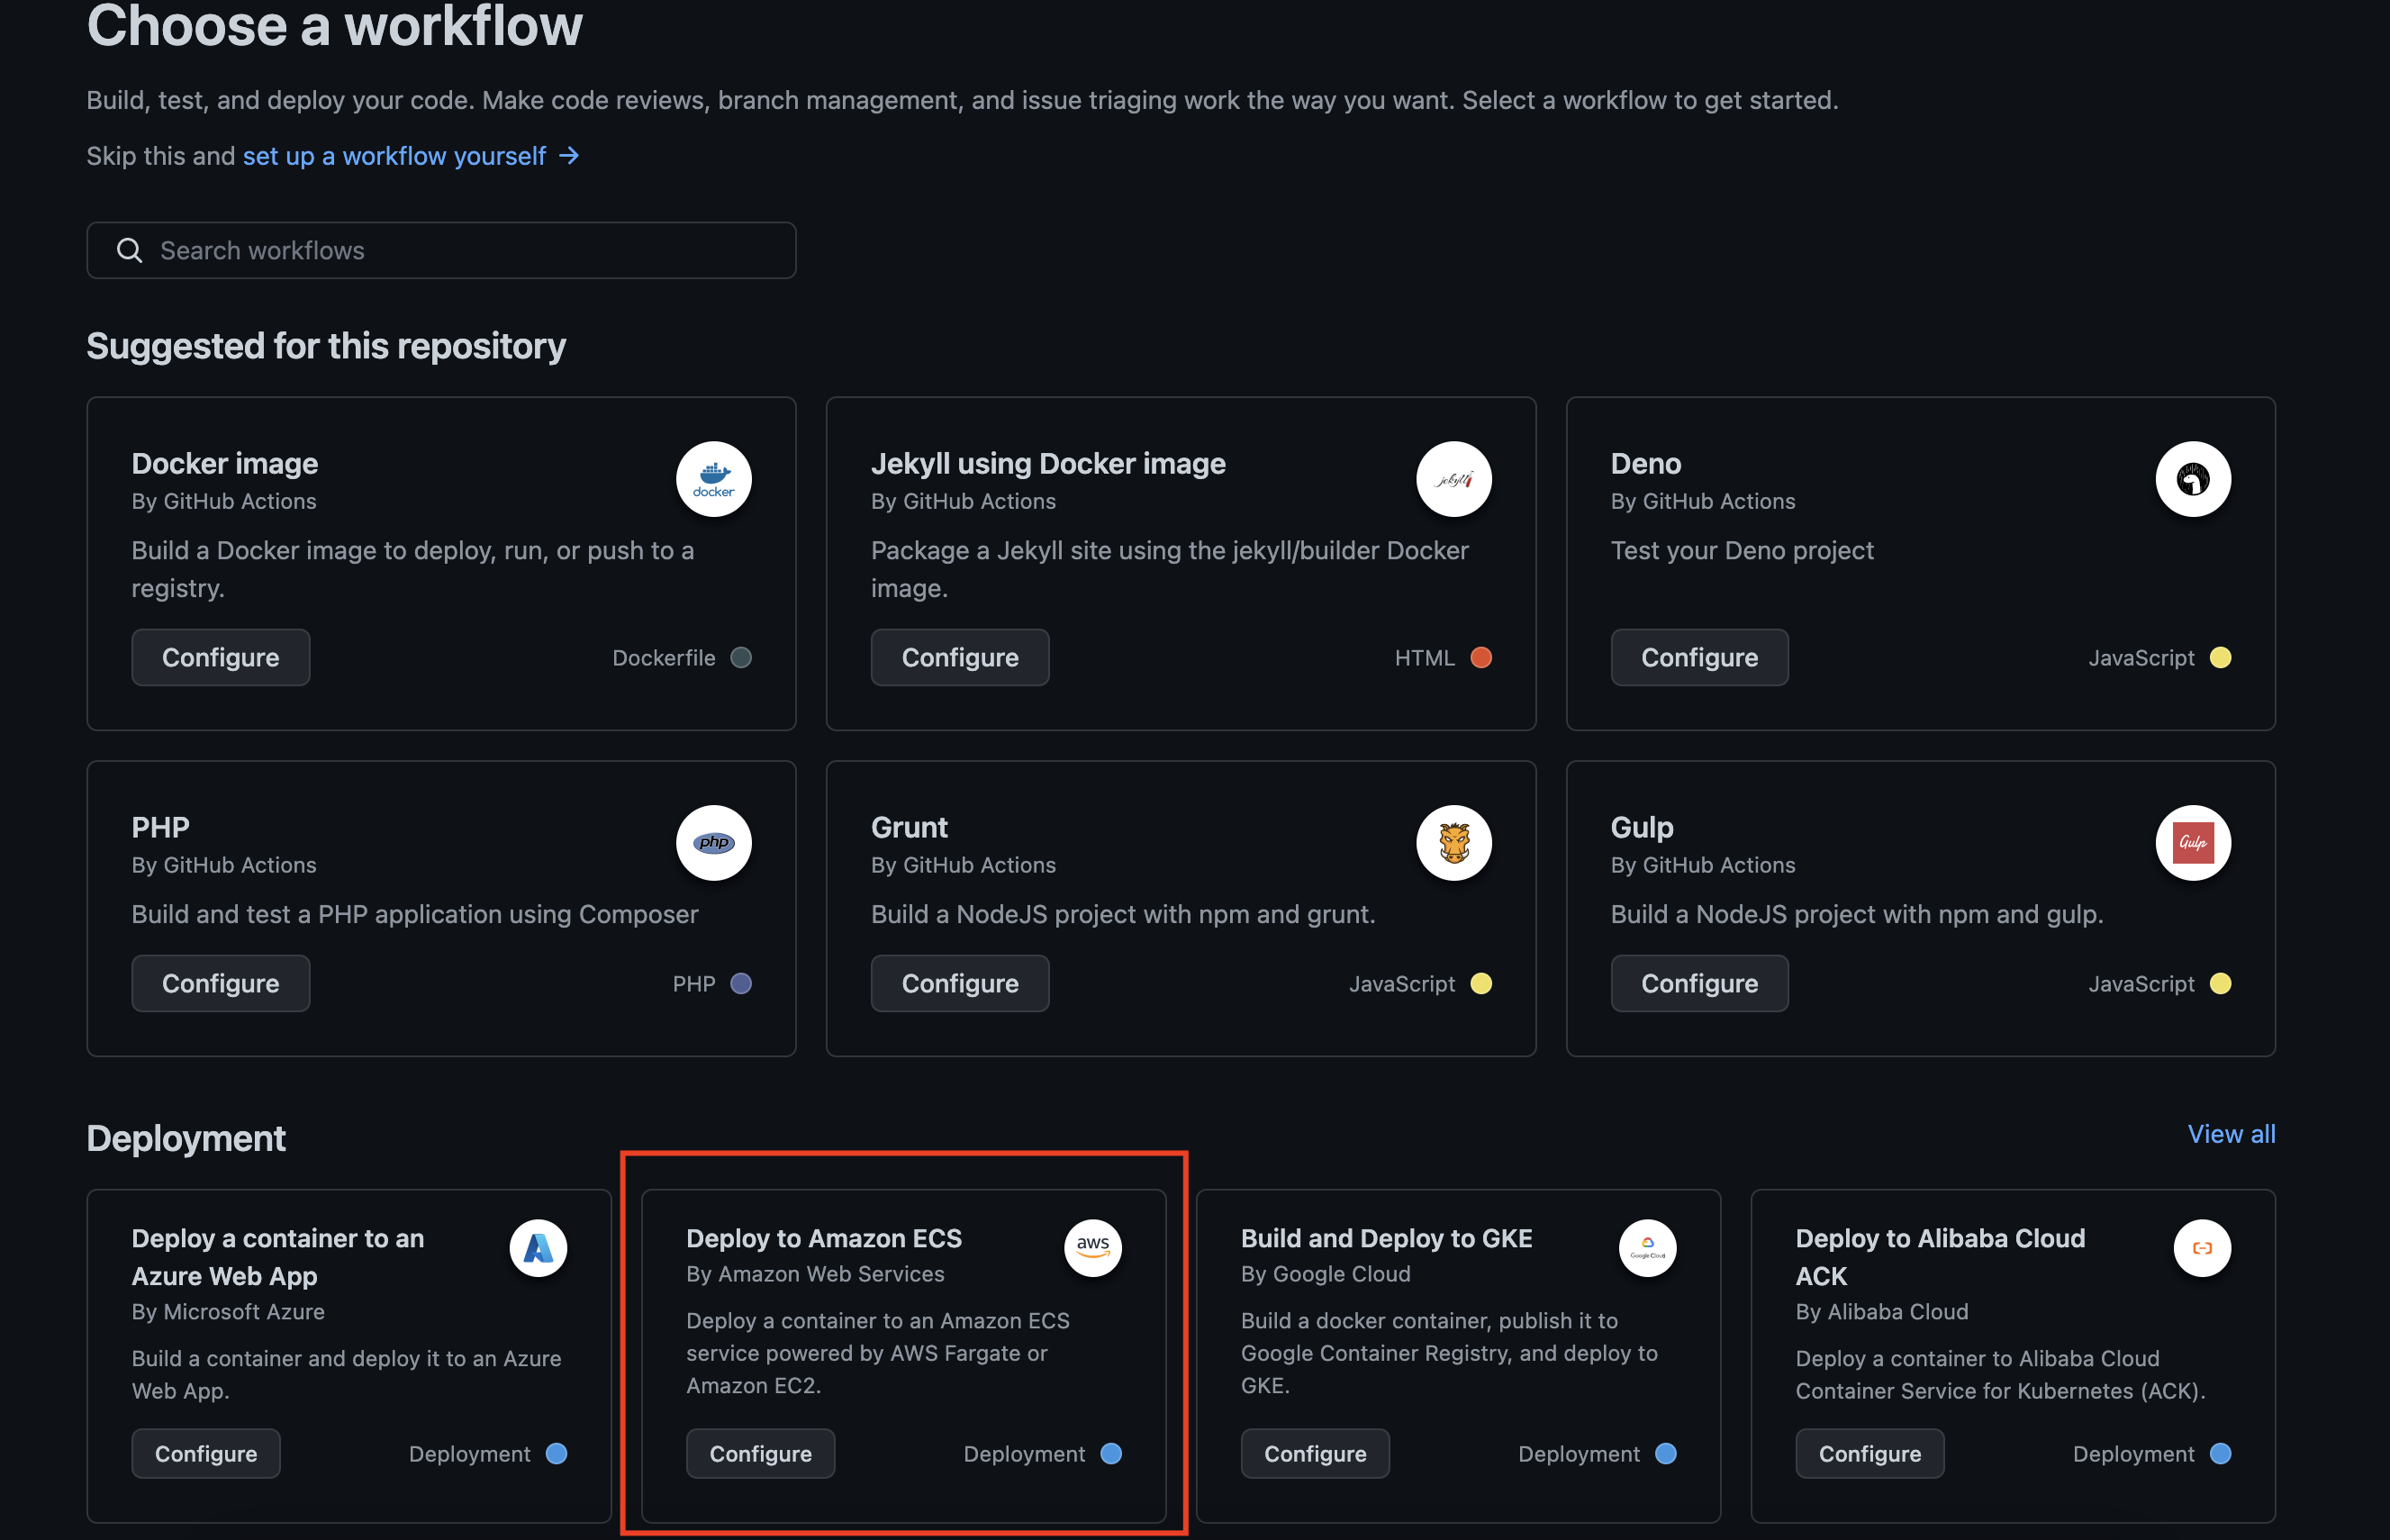
At this point, you have two options: you can either select any of the workflow examples/templates or create a new one from scratch. Here, the Deploy to Amazon ECS example was chosen under the Deployment template. This workflow example essentially deploys a container to an Amazon Elastic Container Service (Amazon ECS):

The GitHub workflow configuration is always in YAML format, and you’ll see many of the following popular parent key-value pairs in your workflows:
namedefines a unique name for the workflow.onspecifies the trigger for the workflow, such as when a push is made to the repository or a pull request is opened.jobscontains one or more jobs that make up the workflow.stepsspecifies a list of steps to run in a job.envdefines environment variables that will be used in the workflow.runs-onspecifies the type of runner to use for a job.
Set Up a Runner
Once you’ve created your workflow, you need to set up a runner. A runner, in this context, is the environment or operating system that processes the actions when the workflow is executed. There are two types of runners in GitHub Actions: self-hosted runners and GitHub-hosted runners.
To set up a runner, open your workflow YAML file. Following the Deploy to Amazon ECS workflow template, you should see the jobs key with a deploy child key, followed by the runs-on key. The runs-on key is what defines the runner to be used for executing the job. See the following code snippet as an example:
jobs:
  deploy:
    name: Deploy
    runs-on: ubuntu-latest
    environment: production

    steps:
    - name: Checkout
      uses: actions/checkout@v3
…
In this code snippet, the runner is the ubuntu-latest runner, which is a GitHub-hosted runner provided by GitHub Actions. Aside from ubuntu-latest, there are several other GitHub-hosted runners, such as windows-latest, macos-latest, and centos-8, that you can use in GitHub Actions.
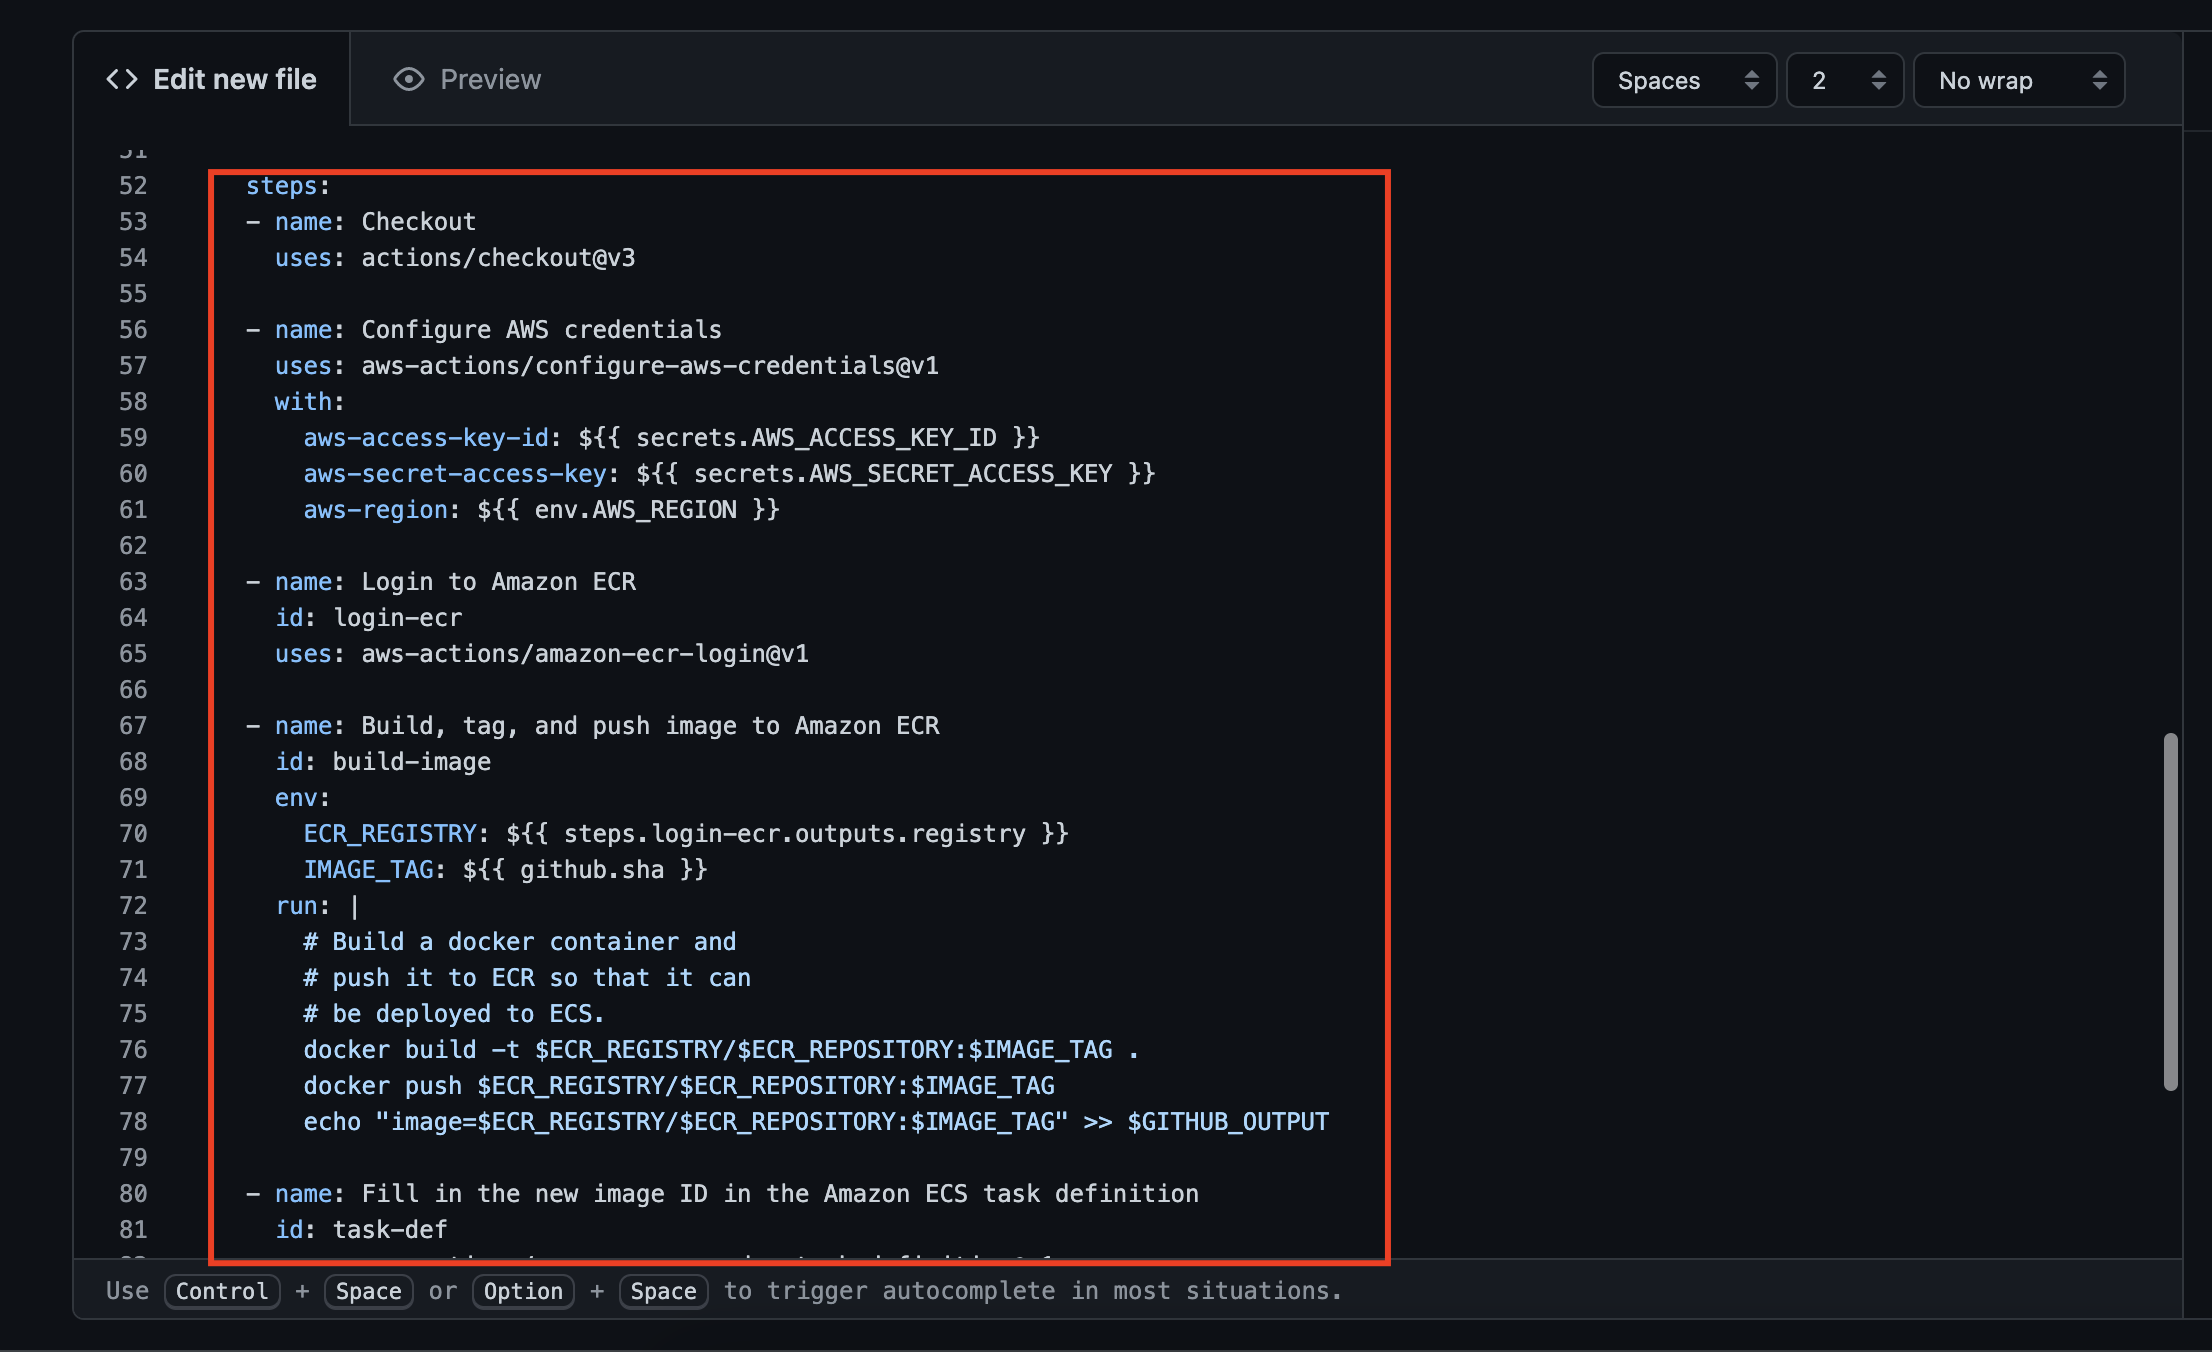
When the workflow is triggered, GitHub Actions will allocate an available runner of the specified type ubuntu-latest. The runner will then execute each step defined in the steps key, starting with the Checkout step. You can review the steps section in the Deploy to Amazon ECS as an example:

Set Up GitHub Actions Locally
Considering the limited build minutes that GitHub Actions provides, it’s recommended that you conduct a test run of the workflow locally as the workflow will fail to complete if the allotted build time is exceeded. Additionally, setting up GitHub Actions locally allows you to test your workflow locally before you push it to your GitHub repository. This helps ensure that your workflow is working as expected and will run successfully on a GitHub Actions runner.
To set up GitHub Actions locally, you need to first clone or pull the latest changes from your GitHub repository that contains the workflow you want to run locally. Then change the directory to the root directory of the code.
Then install Act on your local machine. Act is a tool that will enable you to run your GitHub Actions locally. After the installation, connect your GitHub token to Act by logging into your GitHub account and navigating to Settings > Developer settings > Personal access tokens (classic). You can either use an existing token if you still have access to it or generate a new token:

Copy the generated token and run the following command:
act -s GITHUB_TOKEN=Make sure to replace `with your generated token. If it is your first time running the command, you will be asked to select the default image you want to use withact`. You can select the “medium” image.
❗Act Problems?
Act can run simple GitHub Action workflow locally using a fairly large docker container. But not all features of GitHub Actions work well with Act.
An alternate approach covered in other articles is to write your workflow in an Earthfile. An Earthfile can be run locally or in any CI.
When finished, clone your GitHub repo with the workflow file if you haven’t, and proceed to use Act to run your GitHub Actions locally by running the act -n command to dry run the workflow. You should see the run log:

You can also run other commands, including the command that runs a specific job, lists all actions for all events, or runs a specific event. You can check out the documentation to see a list of all the available commands.
Set Up the Build Stage
Now that you’ve gotten your GitHub Actions to work locally, you can use it to debug and test your workflow locally, make any necessary changes to the workflow, and rerun it until you’re satisfied with the results before pushing your code to GitHub.
Once each step defined in the steps key of your workflow file is tested and working as expected, you need to run your docker-compose file or build your Docker images. To do that, add a new value to the steps key with a name, id, and run key. It may also have an env key if the Docker image requires a passkey.
The name key can be Build docker images, the id key will have any unique string, and the run key will contain the build command as the value:
- name: Build docker images
  Id: build-image
  run: |
    echo ---Building images and starting up docker---
    {{docker build [image-url] or docker-compose -f \
    [docker-compose file] up -d }}
    echo ---Containers up—
Following the Deploy to Amazon ECS workflow template that’s been used here, the build step can be found on line 67:
- name: Build, tag, and push image to Amazon ECR
      id: build-image
      env:
        ECR_REGISTRY: ${{ steps.login-ecr.outputs.registry }}
        IMAGE_TAG: ${{ github.sha }}
      run: |
        # Build a docker container and
        # push it to ECR so that it can
        # be deployed to ECS.
        docker build -t $ECR_REGISTRY/$ECR_REPOSITORY:$IMAGE_TAG .
        docker push $ECR_REGISTRY/$ECR_REPOSITORY:$IMAGE_TAG
        echo "image=$ECR_REGISTRY/$ECR_REPOSITORY:$IMAGE_TAG" >> \
        $GITHUB_OUTPUT
This template’s build step uses the env key since ECR_REGISTRY requires a login and SHA key.
Set Up the Test Stage
Once you’re done setting up the build stage, the next thing you need to do is set up the test stage. Because the Deploy to Amazon ECS workflow template is primarily a deployment template, the test stage isn’t factored into it. However, the test stage is the recommended phase since it helps you verify the functionality and connections of your applications (including the workflow file) before pushing to GitHub to run the workflow actions.
To set up the test stage, you can either create a test folder in your application or in a different folder outside your application, then develop all your test cases. Afterward, ensure your test folder is containerized in the same network as your application. If you’re using Docker Compose, GitHub Actions will run the workflow in a user-defined network. And for communication to happen, your application and test folder must be in the same network. The network in this context is the Docker Compose network.
The purpose of this network is to provide a Docker network for the containers defined in the docker-compose file, allowing them to communicate with each other and with the host system. Containers in separate networks cannot communicate, which means that API test cases won’t be able to get a response from the services in other networks. You can learn more about creating a docker-compose file with a network in this article.
When you’re done adding the test cases folder to the same container network, you need to add a new value to the steps key of your workflow file. The new value will contain a name, id, and run key:
- name: Run test cases
   id: run-test-cases
  run: |
    echo --- Running test cases ---
    docker-compose -f  -p  \
    up --build --exit-code-from
    echo --- Completed test cases ---
In this code, is the name of your `docker-compose` file, is the project name, and [ is the container name.
As an alternative to using a docker-compose file, you can leverage Earthly, which lets you define your containers and their dependencies, as well as specify your entire build process, including testing and deployment, in one Earthfile.
In addition, Earthly allows you to define reusable builds that you can use across different machines, making it easier to collaborate and enabling you to run your builds anywhere.
Moreover, Earthly caches your build components, making the process efficient and fast. Check out the official documentation to learn more about getting started with Earthly.
Run the Action
After you’ve set up the test stage, the final step is to run the action. To do that, you need to push the changes made to your workflow file to your GitHub repository. The workflow will be triggered based on the branches you set it to monitor on the on key of your workflow file.
You can also monitor the progress of the workflow by visiting the Actions tab in your repository on GitHub and selecting a workflow that has previously been run or the currently running workflow:

Conclusion
In this tutorial, you learned how to create a new workflow, edit an existing workflow, set up the runner for your workflow, and locally set up and work with GitHub Actions. At this point, you should be confident that you can build GitHub Actions for your projects and speed up the development processes.
And if you’re looking to continue building out your GHA workflows, consider using Earthly. Earthly runs everywhere, including GitHub Actions and can improve the reliability of your CI/CD pipelines. It works great with GitHub Actions and docker.
If you enjoyed this tutorial you might want to grab a copy the free eBook “Docker Fundamentals”. It covers the essentials of Docker, including volumes, networking, secrets management, logging, multistage builds, debugging, and even practical use cases like integration with Visual Studio Code and GitHub Actions. Download the free Docker Fundamentals ebook right now.


