How to Create and Remove a Virtual Environment with conda

Table of Contents
Python is one of the most ubiquitous programming languages today, and because of its history and popularity, a lot of tooling has been created over the years to help Python developers achieve their goals.
One of these tools is virtual environments.
Simply put, a virtual environment encapsulates your application or project with all the necessary packages already included in the environment, without the need for an end user to install a bunch of dependencies or, worse, mess with their own development environment.
Python virtual environments are an effective way to avoid dependency conflicts between different Python projects because they allow you to install various versions of the same package dependency in different projects. You can even run different versions of Python inside a virtual environment if your project requires a specific version of Python for a feature that might be available in an earlier or later version of Python.
In this article, you’ll learn a bit more about Python virtual environments, why they’re so important, and how you can use conda to manage different Python virtual environments for your different projects.
What Is a Python Virtual Environment?
When you create a Python virtual environment for your project, you essentially end up with a “containerized” version of your entire project, which includes a specific Python interpreter, all the necessary libraries that your project needs to import, and any precompiled binaries that might be needed by your application.
While it’s “containerized,” it’s not the same as a Docker container. A Docker container encapsulates an entire, virtualized operating system around a project or application, including the file system, user-space libraries, and network interfaces.
In contrast, the Python virtual environment encapsulates all of the project’s package dependencies, but you’re still stuck with the same operating system constraints.
A Python virtual environment can help you overcome or avoid the following problems:
- Conflicts between dependencies of different projects: Each project has its own copy of the required packages without interfering with one another.
- Different versions of the same package on the system: Because each project has its own environment, each environment can also have the exact required version of said package.
- Running different versions of Python: Since the virtual environments encapsulate Python as well as the required packages, you can specify which version of Python you want to load/run inside the particular project’s environment. This is especially useful for older projects that have not been upgraded to newer versions of Python.
Why You Need conda
You probably know that Python has native support for virtual environments, so why use another tool to manage your virtual environments?
The following are a few features offered by conda that go beyond what you would normally get from a native virtual environment solution:
- It supports multiple programming languages, not just Python.
- It does not fully rely on the Python package manager.
- It’s fully cross-platform, and you can manage your environments on many different operating systems.
- Conda is widely used by the data science community due to its simplicity when packaging an environment for other data scientists to use.
- It simplifies the installation of challenging tools like TensorFlow.
How to Create a Virtual Environment Using conda
Now that you’re more familiar with the benefits that conda offers, let’s use it to manage the virtual environments for your Python applications.
Install conda
Conda has different installation instructions depending on your operating system (OS). In this tutorial, you’ll learn how to install conda on a Linux-based OS (specifically Ubuntu).
Conda comes in two installation “flavors.” You can choose to install either Miniconda or Anaconda. Miniconda is a minimal installation of conda that contains Python, some dependency packages, and a small number of useful utility packages. On the other hand, Anaconda focuses on data science usage and comes preinstalled with a large number of packages that many data scientists use when analyzing data sets. Conda has a documentation page that can help you choose between the two distributions, but for this tutorial, you’ll use Anaconda.
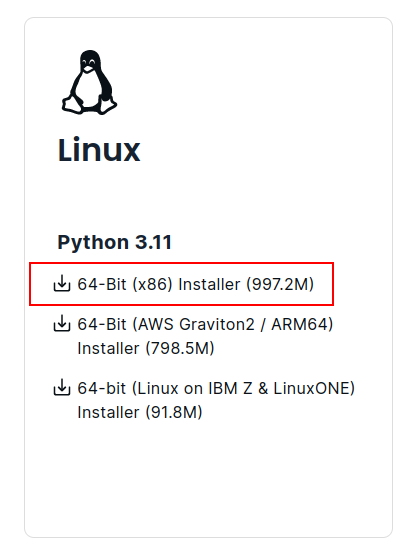
First, download the 64-bit Anaconda installer package for Linux from conda’s website.
If you don’t want to register, you can just skip the registration:

You’ll be taken straight to the download:
Once you’ve registered (or skipped registration), run the bash command and reference the installer package you downloaded. Depending on your browser settings, the file will most likely be downloaded to your home directory’s Downloads location, but change the file location in the command if your setup is different from the norm. Then, follow the prompts, and if you’re unsure about any of the settings, it’s fine to accept the defaults:
~ bash Downloads/Anaconda3-2024.02-1-Linux-x86_64.sh

Welcome to Anaconda3 2024.02-1

In order to continue the installation process, please review the license
agreement.
Please, press ENTER to continue
>>>
After accepting the license agreement, you’ll be asked a few questions to determine things like the installation location as well as whether or not Anaconda should be added to your default shell profile.
The default installation location should be fine, and whether or not you load up conda as part of your shell comes down to personal preference. For this tutorial, you can stick with the default install location and answer yes when the installer asks whether you want to include conda in your default shell profile.
Once the installer is complete, you should be greeted by this message: “Thank you for installing Anaconda3!”
You might have to close and open your shell again to ensure that conda loads on startup. Run conda -V to confirm that the installation was successful:
(base) ~ conda -V
conda 24.1.2
You’ll see that your shell has a new prefix called (base). This is the base conda environment, and it confirms that conda is successfully installed and running when you open up a new shell.
Create a Project and Your First Virtual Environment
To create a Python project, start by creating a directory for it:
~ mkdir condatest
~ cd condatest
Inside this directory, create an environment.yml file. This YAML file will be the main configuration file that controls the creation of the conda virtual environment as well as which dependencies get installed in that environment:
name: condatest
channels:
  - defaults
dependencies:
  - python
The name is simply the name of your environment, and the channels section points to defaults.
Channels in conda are locations where packages are stored. For now, the default channel should be good.
The dependencies section tells conda that you’ll be building a Python project.
Run the following command to generate a conda environment inside your project directory using your environment.yml file:
(base) ~ conda env create --file environment.yml
Channels:
 - defaults
Platform: linux-64
Collecting package metadata (repodata.json): done
Solving environment: done

Downloading and Extracting Packages:

Preparing transaction: done
Verifying transaction: done
Executing transaction: done
#
# To activate this environment, use
#
#     $ conda activate condatest
#
# To deactivate an active environment, use
#
#     $ conda deactivate
Once it’s completed, you can activate your newly built virtual environment like this:
(base) ~ conda activate condatest
(condatest) ~
The moment you activate your new environment, the environment indicator changes from (base) to (condatest) to give you visual feedback that you’ve switched environments.
Next, create a basic Python program in your project directory. A simple “Hello, World!” should do. Call this file hello.py:
def main():
    print("Hello, conda!")

if __name__ == "__main__":
    main()
Run this file from inside the virtual environment:
(condatest) python hello.py
Hello, conda!
Wait a minute, then make sure that your script runs with the Python interpreter that’s part of the virtual environment and not the system default interpreter. To do so, run the which command to see which version of the interpreter was used:
(condatest) which python
/home/username/anaconda3/envs/condatest/bin/python
As you can see, it uses the Python interpreter that’s part of the condatest virtual environment you created.
Install Packages in Your Environment
To install packages in your environment, modify your hello.py file to look like this:
from faker import Faker

def main():
    fake = Faker()
    print(fake.name())

if __name__ == "__main__":
    main()
Faker is a small Python module that generates fake data. It’s useful for quickly generating large amounts of fake usernames or fake addresses so you can test your application using fake data instead of production (read: potentially sensitive) data.
Now, run this code:
(condatest) ~ python hello.py
Traceback (most recent call last):
  File "/home/username/projects/condatest/hello.py", line 1, in <module>
    from faker import Faker
ModuleNotFoundError: No module named 'faker'
Python immediately tells you that it cannot find the faker package.
Modify your environment.yml file to include it in your project:
name: condatest
channels:
  - defaults
dependencies:
  - python
  - faker
Update your environment to include the new package:
(condatest) ~ conda env update --file environment.yml
Channels:
 - defaults
Platform: linux-64
Collecting package metadata (repodata.json): done
Solving environment: done

Downloading and Extracting Packages:

Preparing transaction: done
Verifying transaction: done
Executing transaction: done
If you run the Python script now, you should get the following output:
(condatest) ~ python hello.py
Shawn Alexander
Keep in mind that you’re generating a random name with this code, so your output will look slightly different from the example.
Remove a Virtual Environment
Managing your virtual environments is easy with conda. The environment.yml file in your project lets you safely remove the environment and rebuild it later when you need it.
To remove a conda environment, first make sure the environment you want to remove is not active:
(condatest) ~ conda deactivate
(base) ~
As you can see, you dropped back to the base environment. That means you can remove the condatest environment that you created with the following command:
(base) ~ conda remove --name condatest --allThe --name parameter requires the name of the environment that you created (here, condatest). The --all parameter tells conda that you also want to remove all the packages from the environment.
Once you execute it, the command reviews the list of packages that are installed inside your virtual environment and asks you to confirm. Reply y to proceed.
It’ll ask you if you’re sure. Reply y again to complete the removal of your environment:
Everything found within the environment
(/home/thinus/anaconda3/envs/condatest), including any
conda environment configurations and any non-conda files,
will be deleted. Do you wish to continue?
 (y/[n])? y

(base) ~
Remember, you can always rebuild the environment from the environment.yml file in your project directory.
Conclusion
In this tutorial, you learned how to:
- Install conda
- Create your first project and virtual environment
- Update your virtual environment with dependencies for your project
- Remove your virtual environment
Conda makes it easy to manage your packages for your Python project.
If you’re interested in trying an alternative method, consider using Earthly for your project’s build system. It offers robust build automation that guarantees repeatable builds, no matter which environment you might find yourself in.
You can read more about Earthly’s solution to the environment problem on the Earthly blog.
Turn your engineering standards into automated guardrails that provide feedback directly in pull requests, with 100+ guardrails included out of the box and support for the tools and CI/CD systems you already have.