Running Python on Docker
Table of Contents
This article explains how to Dockerize Python applications. Earthly significantly speeds up CI pipelines for Python apps in Docker. Learn how.
Python is a versatile programming language, but running it can be a handful when you have to manage its dependencies—especially when you are sharing projects with other developers.
One solution is to use Docker. The containerization tool runs applications in an isolated system and manages dependencies. It is cost-effective, efficient for CI/CD deployments, scalable, and easy to use, making it a good choice for your Python applications.
This tutorial will show you how to build a Docker container for running a simple Python application. If you’d like to follow along with this project, you can clone the GitHub repo.
Prerequisites
You’ll need the following for this tutorial:
- Python 3.9.9
- Docker 20.10.5, using build 55c4c88
Setting Up the Dockerfile
First, you’re going to set up the Dockerfile, which is a sequential set of commands used in building the Docker image. For this, you’ll use pythonunbuffered, a Python environmental variable that allows the Python output to be sent straight to the terminal when set to a non-empty string or executed with the -u option on the command line.
This is useful when log messages are needed in real time. It also prevents issues such as the application crashing without giving relevant details due to the message being “stuck” in a buffer.
Create a project directory and change into the directory using cd <directory_name>:

Run the commands below to create a virtual environment. This isolates the environment for the Python project, so that it won’t affect or be affected by other Python projects running on the local environment. Any dependencies installed won’t interfere with other Python projects.
python3 -m venv <directory_name>
source <directory_name>/bin/activate
Using the following code, create a new file called Dockerfile in the empty project directory:
FROM python:3.8-slim-buster
ENV PYTHONUNBUFFERED=1
WORKDIR /app

COPY requirements.txt requirements.txt
RUN pip install -r requirements.txt

COPY . .

EXPOSE 5000

CMD [ "python3", "-m" , "flask", "run", "--host=0.0.0.0", "--port=5000"]
This code pulls the base image from python:3.8-slim-buster and ensures the output is sent straight to the terminal. It confirms the current working directory location, the Python app to be copied to the current directory, and the packages in requirements.txt to be installed.
Save and close the file.
Creating the Python App
Create an app.py file and copy the below code:
 from flask import Flask
 app = Flask(__name__)

 @app.route('/')
 def hello_world():
     return 'Hello, Docker!'
Save and close. This creates a simple Python web app that shows Hello, Docker! text.
Create the requirements.txt file. This should contain the dependencies needed for the app to run.
The working directory should now look like this:

Run the following command in the terminal to install the Flask framework needed to run the Python app and add them to the requirements.txt file. pip3 freeze shows all packages installed via pip.
pip3 install Flask
pip3 freeze | grep Flask >> requirements.txt
The requirements.txt file should no longer be empty:
Flask=2.0.3
pylint
Test the app to see if it works by using python3 -m flask run --host=0.0.0.0 --port=5000 and then navigating to http://localhost:5000 in your preferred browser:


Building the Docker Image and Container
Now that the Dockerfile, requirements.txt, and app.py have been created, you should test the Python app on your local environment to make sure it works.
You’re going to build the Docker image from the created Dockerfile. This image is a set of read-only commands used in the building and deployment of Docker containers.
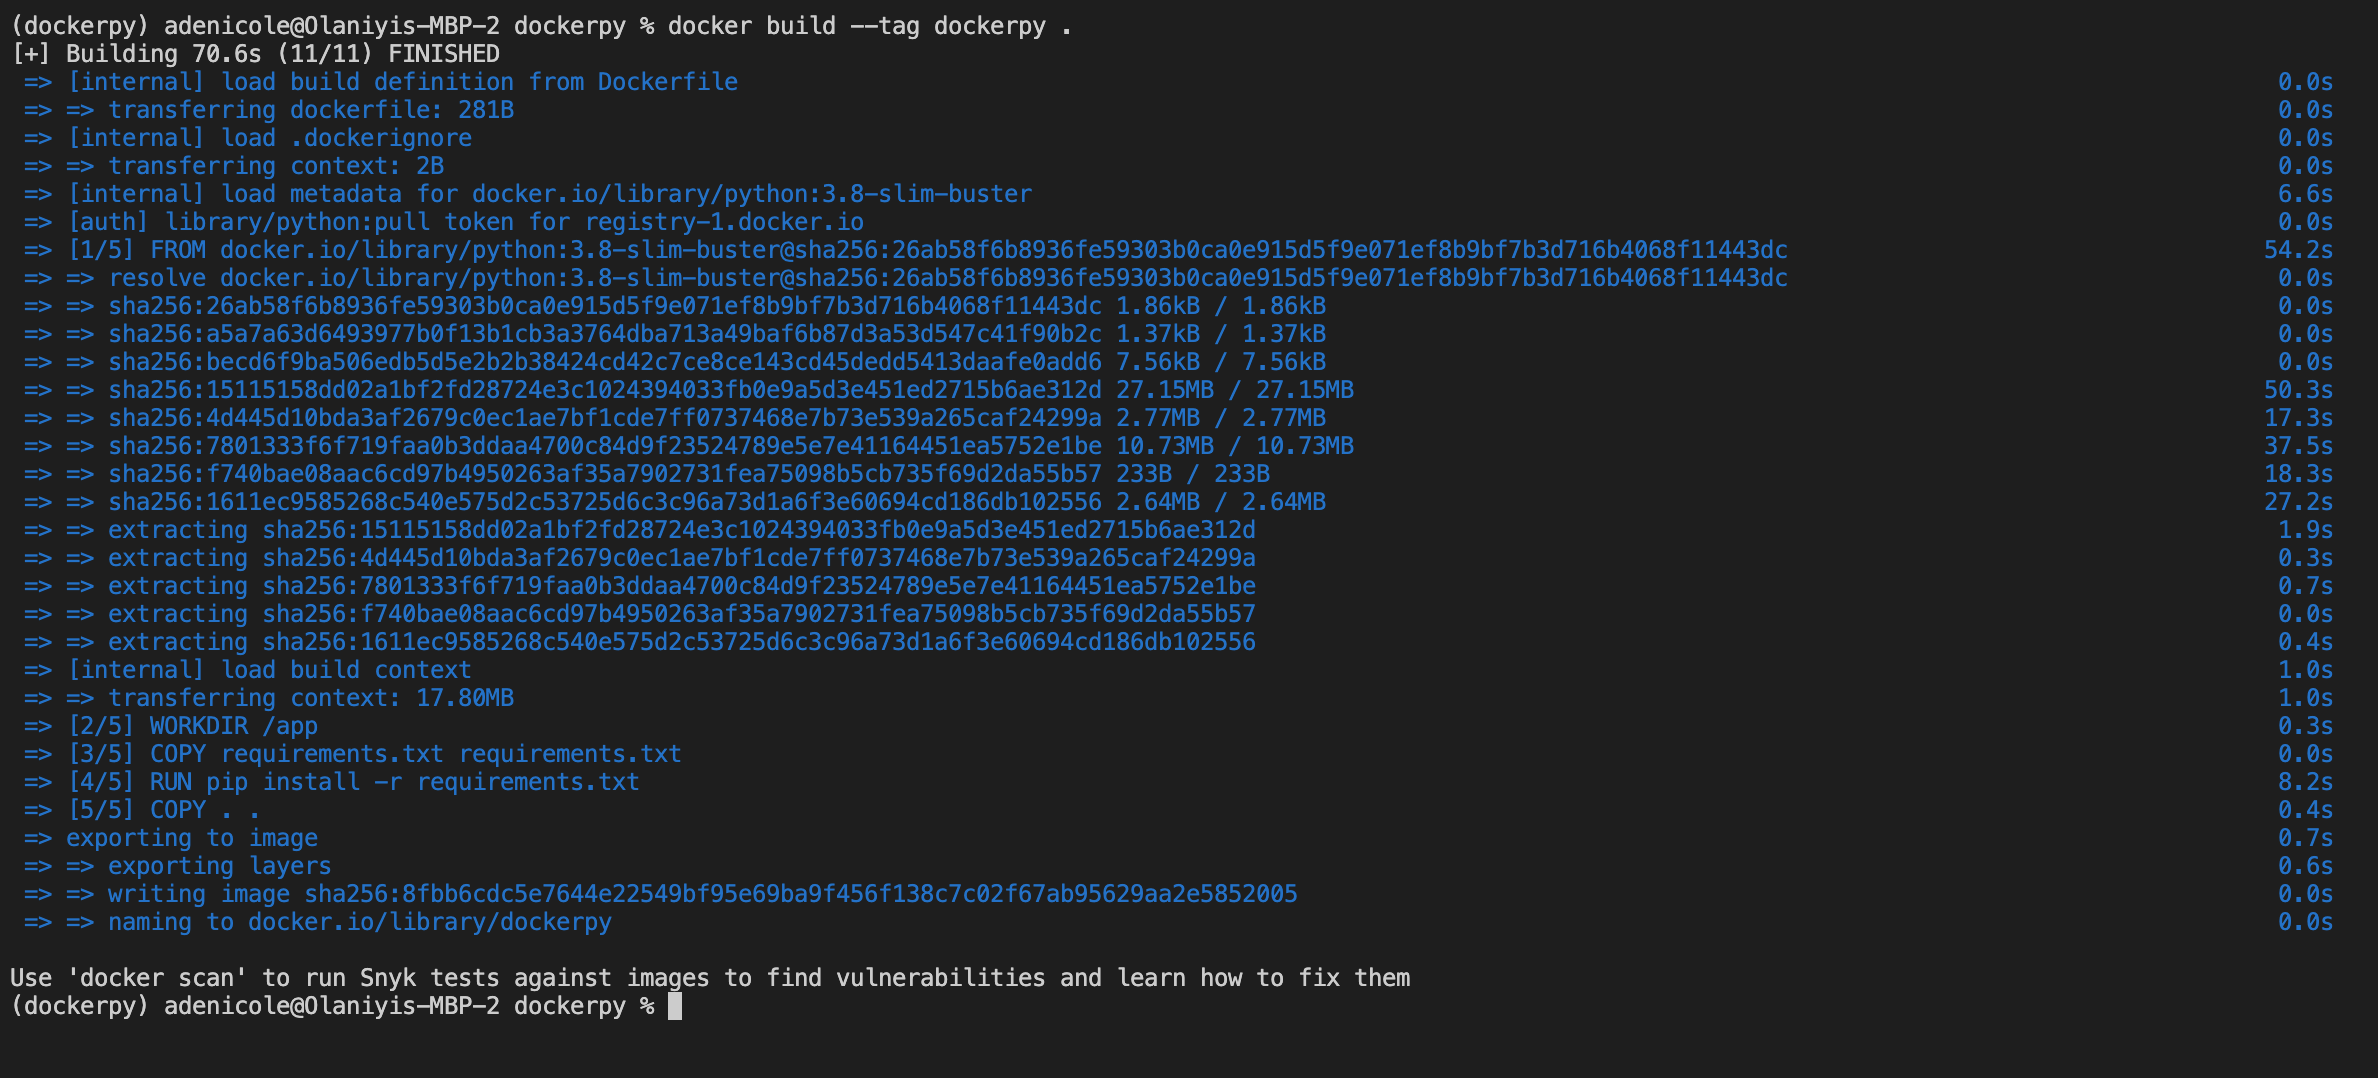
To build the Docker image, use the docker build --tag dockerpy . command. It is common practice to use tags; Docker will give the image a default latest tag.
You should see something like this:
Type docker images into the terminal to view the newly created image:

Tag the image using docker tag <imageId> <hostname>/<imagename>:<tag>:
$ docker tag 8fbb6cdc5e76 adenicole/dockerpy:latestNow that the Docker image has been created and tagged, run the image using docker run --publish 5000:5000 <imagename> to build the container:

Then, use docker ps to see the list of containers present:

You can now test your application using http://localhost:5000 on your preferred browser. You’ve run your Python app inside a Docker container.
Running Docker Push
The container image can be pushed and retrieved from the Docker Hub registry. Docker Hub is an open source library and community for container images. Pushed images can be shared among teams, customers, and communities. It uses a single command, docker push <hub-user>/<repo-name>:<tag>.
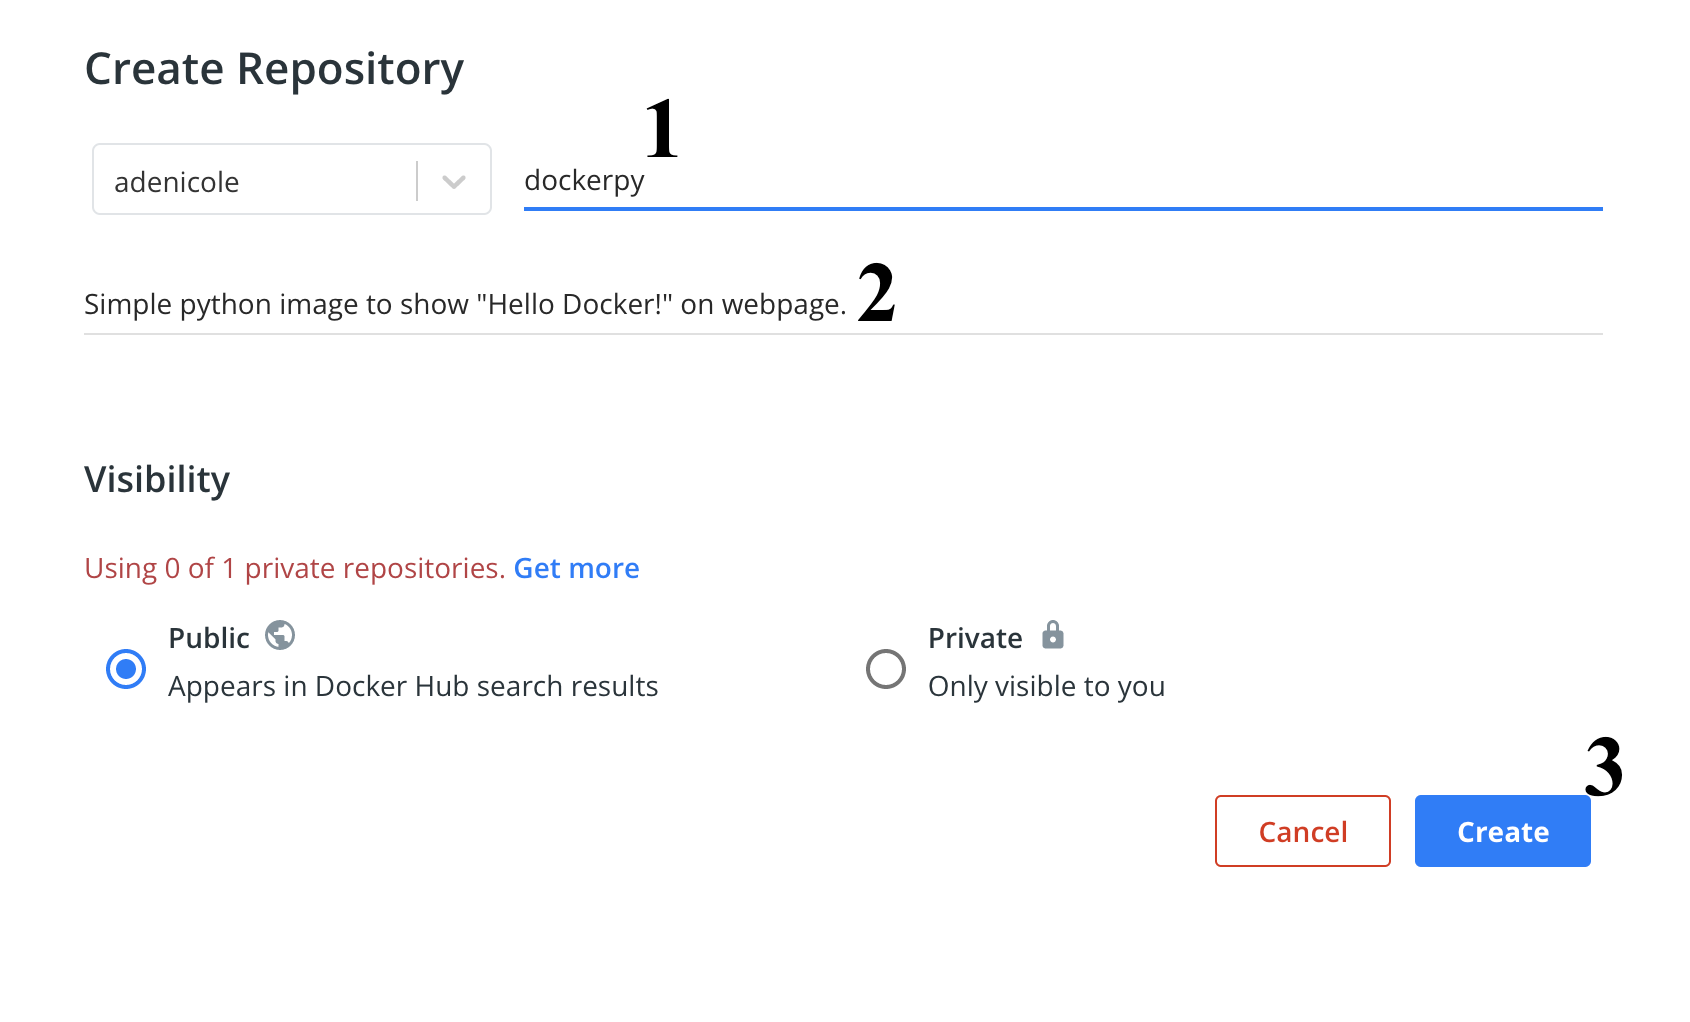
To get a hub username, sign up on the website. Then, click Create Repository at the top right corner of the page:

Give the repo a name and description, then click Create:
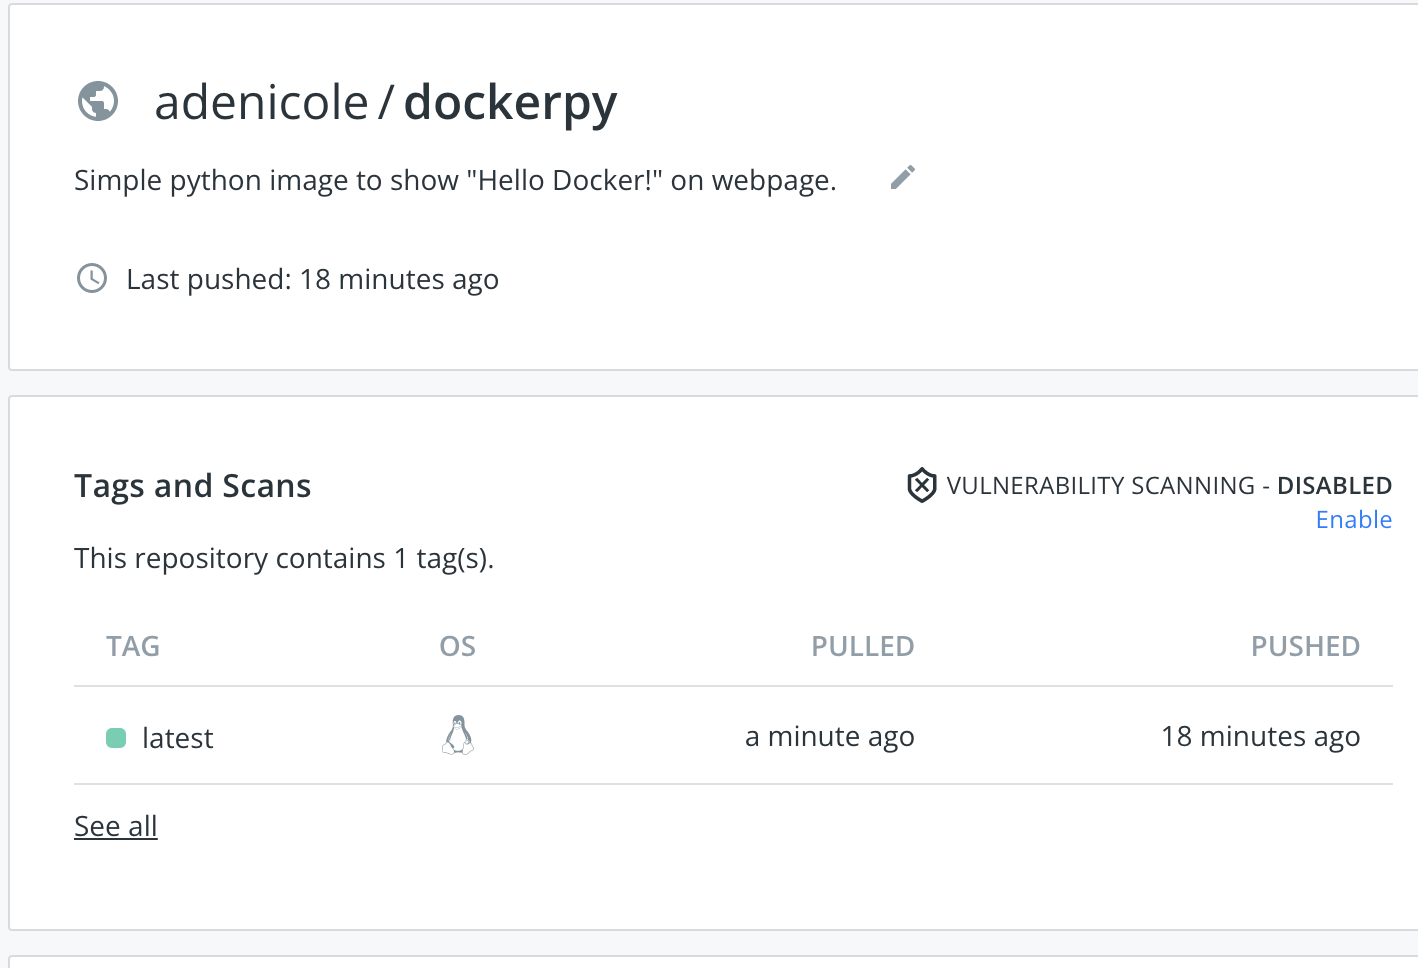
You’ll be automatically directed to the page shown below:

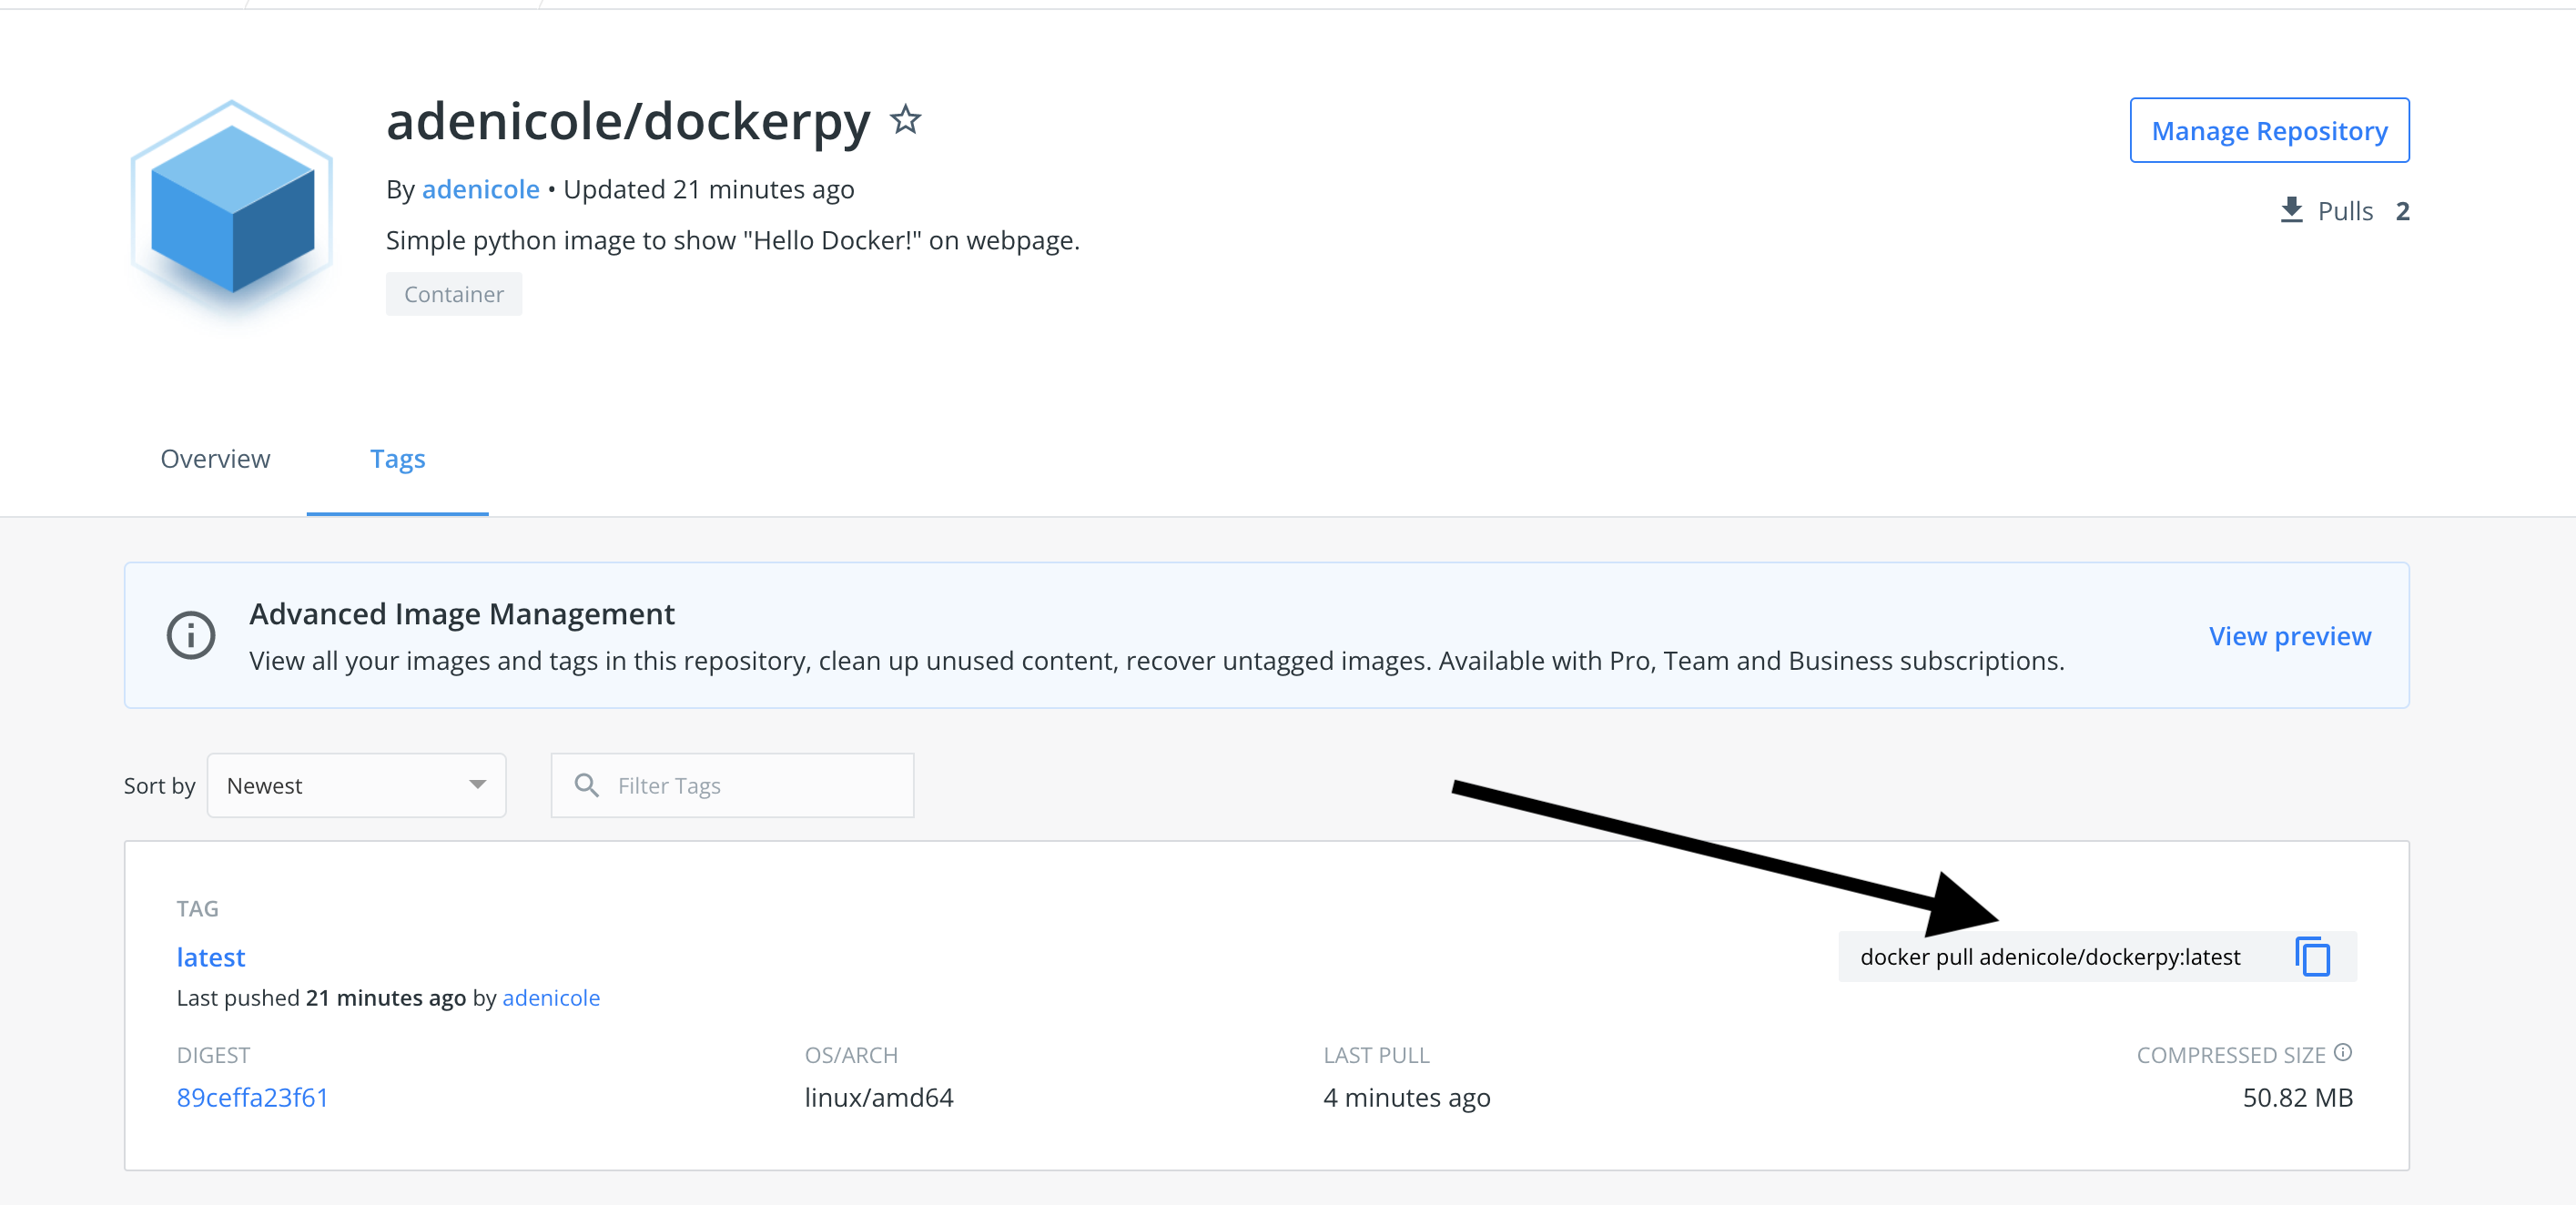
Copy the command on the right side of the page to your terminal, replacing tagname with a version or with the word latest.
In your terminal, run the command docker login to connect the remote repository to the local environment. Add your username and password to validate your login, as shown below:

Run the command docker push <hub-user>/<repo-name>:tagname:

Confirm that your image has been pushed by reloading the Docker Hub page:
In any terminal, run docker pull <hub-user>/<repo-name>:latest to pull the Docker image:
Running Docker Compose
You can now build, run, push, and pull a Docker image. What about building multiple containers? Docker Compose is a tool written in YAML to develop, define, and share multi-container applications on the same host.
Docker Compose is used during:
- Automated testing environments: Docker Compose makes it easy for isolated environments to be created and destroyed during tests for continuous integration and continuous delivery (CI/CD) using simple commands like
docker-compose up -d. - Development environments: An important aspect of software development is the isolation of environments. Docker Compose creates these environments and enables you to interact with, document, and configure all of the application’s service dependencies.
A simple docker-compose.yml file looks like this:
version: "3.9"
services:
  web:
    build: .
    ports:
      - "5000:5000"
    volumes:
      - .:/app
      - logvolume01:/var/log
    links:
      - redis

 redis:
     image: redis
 volumes:
   logvolume01: {}
Using Docker Volumes
Sometimes Docker images and containers are accidentally deleted. Docker volumes help persist these containers and images to store data, so you don’t lose anything in case of accidental deletion.
To show volumes, use docker volume ls:

There are currently no volumes on this system. To create a volume in the terminal, run docker volume create <volumename> and use docker volume ls again to confirm the volume has been created:

Using docker volume inspect <volumename>, inspect the volume to view important information about it:
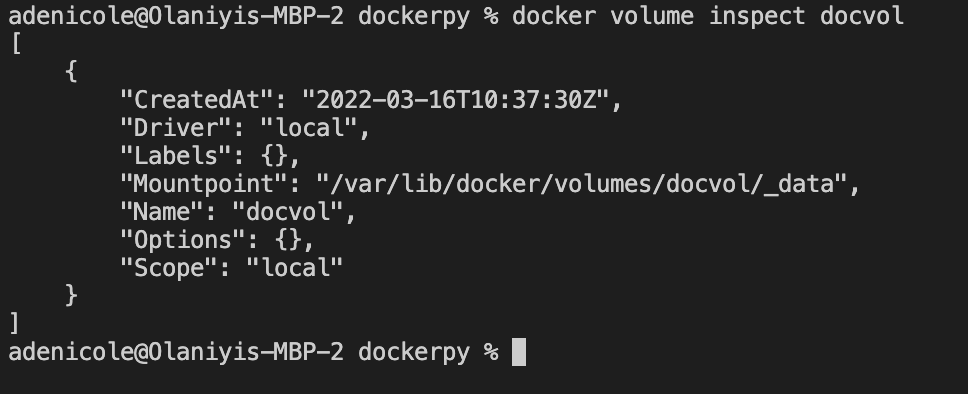
There are currently no containers attached to this volume. Attach the container to the volume using the following:
docker run -d \
  --name devtest \
  -v <volumename>:/app \
  nginx:latest
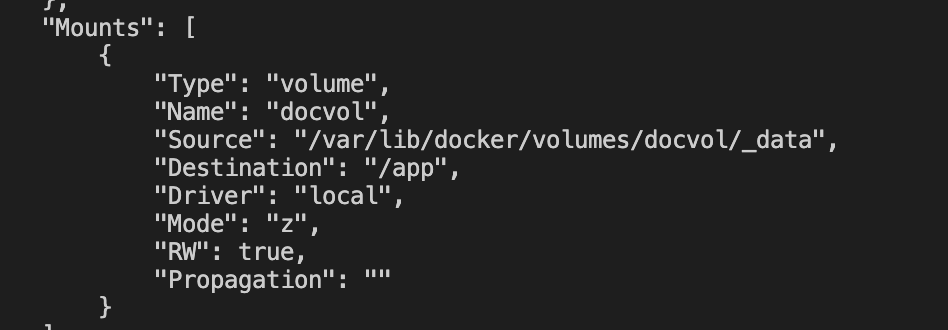
Run docker inspect devtest and scroll down to the "Mounts" section to confirm if the volume has been attached to the container:
Testing Persistence
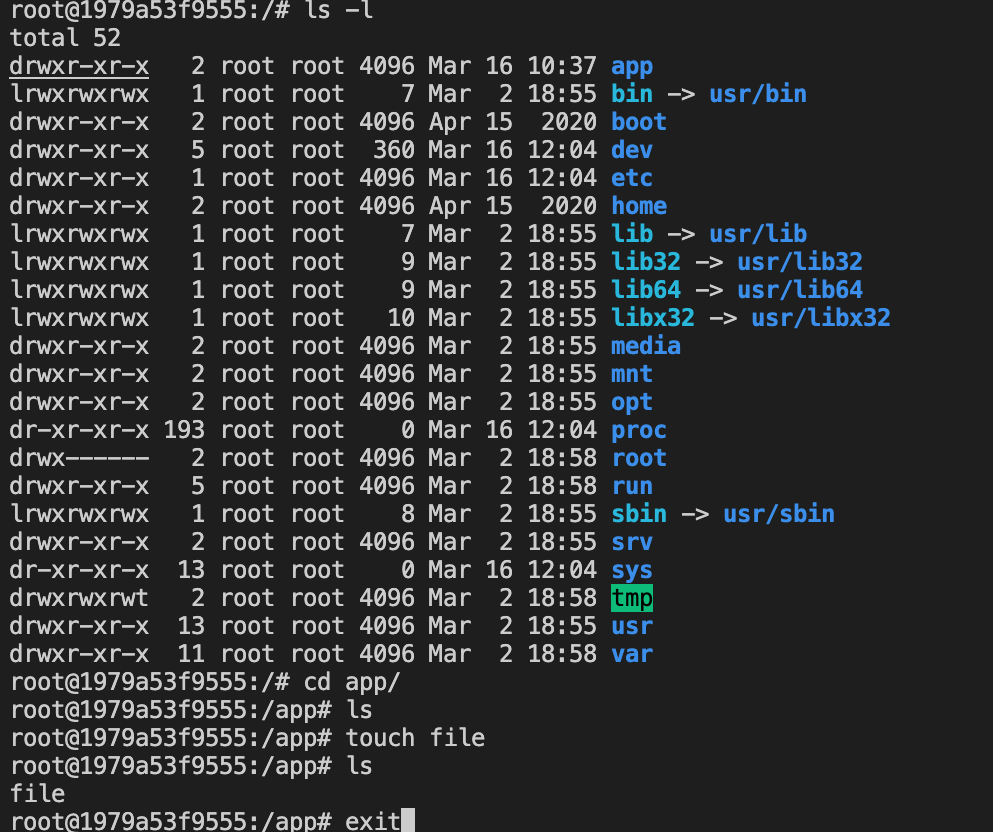
Run docker run -it -v <volumename>:/app ubuntu bash to run an interactive session with the container using Ubuntu as the base image:

To check the file system, cd into the app directory, create a file, and exit:
List Docker containers and remove the dockerpy container using docker rm -f <container id>:

$ docker rm -f 1979
  1979
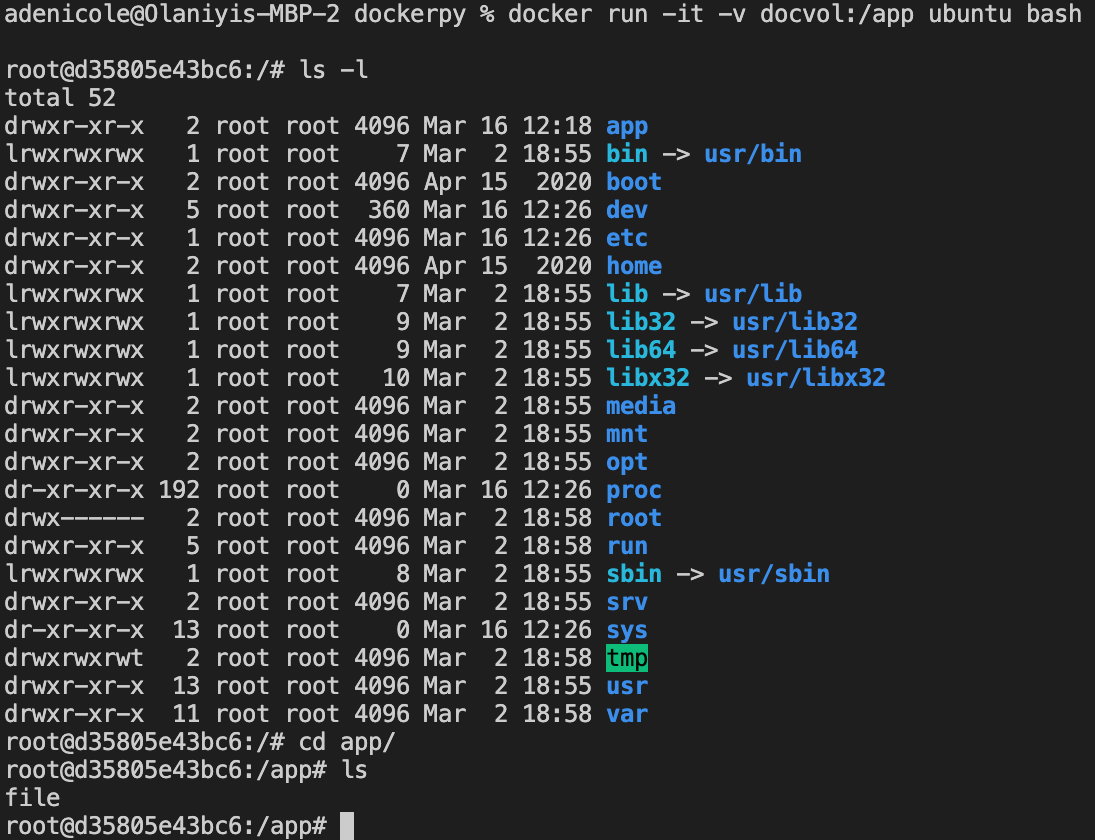
Create another interactive container using the same volume, cd into the container app, and view its files. You’ll find that the file still exists even though the container was destroyed:
Conclusion
Using Docker gives you a lot of options for your Python applications. As you’ve seen in this tutorial, you can use Docker to test and store your app and even protect your data in case of accidental deletion. Docker container images are flexible and can be cached to use anywhere.
You can optimize your use of containers even more with Earthly, a syntax for repeatable builds. Its automated, self-contained builds make you life easier by improving your workflow.
To see the entire tutorial project at once, check out the GitHub repo.
Earthly Lunar: Monitoring for your SDLC
Achieve Engineering Excellence with universal SDLC monitoring that works with every tech stack, microservice, and CI pipeline.


