Securing Kubernetes Secrets Effectively
Table of Contents
The article provides insights into securing Kubernetes secrets. Earthly ensures DevOps professionals have access to consistent and isolated build environments. Check it out.
Storing application passwords, usernames, authentication tokens, and SSH keys as secret objects when building in Kubernetes is safer than hard coding sensitive information into the application codebase. But here’s the big question: Are these secrets secure? No, they aren’t!
In this tutorial, you will learn why Kubernetes secrets aren’t secure by default and also learn how to keep your secrets in Kubernetes sealed to protect your application from cyber vulnerabilities.
Prerequisites
To follow along, you’ll need to have the following:
- Three or more Linux servers
- This demo uses three Ubuntu 22.04 servers with one server as the master node and two worker nodes.
Why Kubernetes Secrets Are Not Secure by Default
All secrets and other Kubernetes configuration data are stored in a key-value store called ETCD. Kubernetes uses this store to keep track of updates, configurations, and other resources like pods, services, and deployments within a cluster.
Any change made in the Kubernetes cluster gets updated in the ETCD data store and any change made directly in the ETCD store will lead to changes in the Kubernetes cluster.
When an unauthorized person or an attacker gets access to the ETCD store, they automatically have unlimited access to the entire cluster, having the ability to change the cluster configuration settings and resources.
Talking about secrets in Kubernetes, they are stored in the Kubernetes ETCD in an unencrypted form (plain text). Anyone with access to your Kubernetes data-store potentially has access to your secrets. This is why you’ll need to ensure the safety of your secrets in Kubernetes because they are clearly not secure by default.
Ensuring Safety for Kubernetes Secrets

In order to ensure that your cluster resources (pods, deployments, services) and secrets don’t fall into wrong hands, you need to be sure your secrets are fully secure. You can consider Enabling Encryption at Rest,Configuring RBAC Rules, and/or Securing the ETCD Data-store itself.
Enabling Encryption at Rest
Note: The manifest files used in this tutorial can be found on Github.
Enabling encryption at rest means encrypting your secrets’ data before they are stored in the ETCD data store. Since the ETCD data store doesn’t provide encryption at rest, Kubernetes has its own solution to tackle this using a resource called EncryptionConfiguration.
By default, Kubernetes secrets are base64 encoded which can also be easily decoded. For example, the code snippet below will create a secret object called demo that will contain a username of myapp and a password of 123456:
kubectl create secret generic demo --from-literal=username=myapp \
--from-literal=password=123456
When you try to use the kubectl describe command to see the full details of this secret demo, you will have the below output of which you can’t actually see the content or value of this secret:
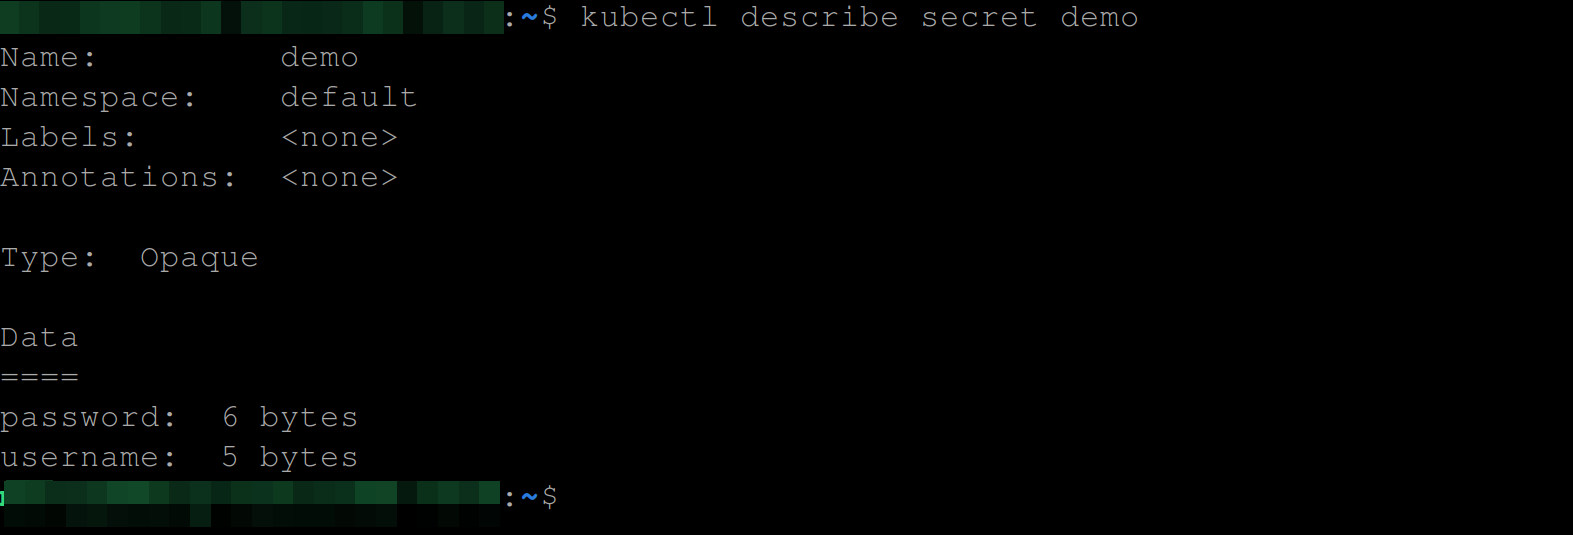
But since Kubernetes secrets are base64 encoded, anyone with knowledge of Kubernetes will know they’ll have to simply get the encoded value and then decode it, which is what the command below does.
This command retrieves the demo secret object from the cluster and outputs the information in YAML format alongside the keys this secret contains with their base64 encoded values.
kubectl get secret demo -o yaml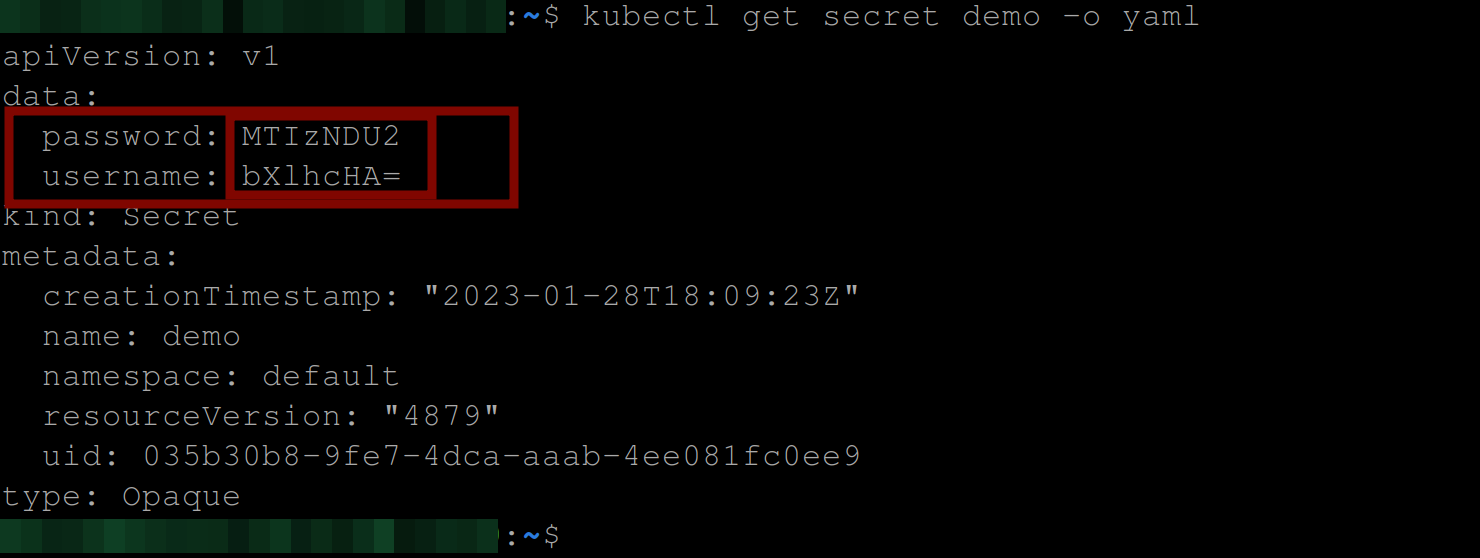
To get the actual value of this secret, you’ll need to run the commands below.
These commands will output the decoded values for both the password and username keys.
echo MTIzNDU2 | base64 --decode #Get the actual value of the password key
echo bXlhcHA= | base64 --decode #Gets the actual value of the username key
Now, this is why you’ll need to enable encryption at rest.
Configuring the EncryptionConfiguration Manifest File
To create an EncryptionConfiguration resource, you need to first create a key and base64 encode it. This key is usually called the Customer Key. This is a locally managed key that the EncryptionConfiguration resource will use to encrypt your secret data and it has to be at least fifteen characters long.
Execute the command below from your master node to create this key. This command will generate a 32-byte random key and base64 encode it.
head -c 32 /dev/urandom | base64
Next, create a file to store the configuration settings for the EncryptionConfiguration resource and paste in the following code snippets.
You can name it whatever you like - this tutorial uses enc.yaml.
apiVersion: apiserver.config.k8s.io/v1
kind: EncryptionConfiguration
resources: #specifies the lists of resources that should be encrypted
  - resources:
      - secrets #specifies that secrets should be encrypted
    providers: #specifies a list of encryption providers that should be used to encrypt the specified resources
      - aescbc: #This provider uses the Advanced Encryption Standard (AES) in Cipher-Block Chaining (CBC) mode to encrypt the data.
          keys: #field specifies a list of keys that should be used to encrypt the data. In this case, it is specifying a single key named key, with a secret value of "YOUR_CUSTOMER_KEY".
            - name: key
              secret: "YOUR_CUSTOMER_KEY"
      - identity: {} #This provider is an identity transform, meaning that it does not encrypt the data. When set as the first provider, the resource will be decrypted as new values are written
This EncryptionConfiguration resource above specifies that secrets should be encrypted using the AES-CBC encryption algorithm (provider) with a specific key (customer key) and that the data should not be encrypted using an identity transform. There are many other providers, too. Next, you need to configure the encryption configuration in your API server. If you are working in a cluster with multiple nodes, this configuration should only be on the master node.
Move this file into the following directory - /etc/kubernetes/pki/ .
mv enc.yaml /etc/kubernetes/pkiIf you’d like to store this file in any other directory, be sure to add that file as a volumeMount in the kube-apiserver manifest file.
The /etc/kubernetes/pki/ directory in Kubernetes stores Public Key Infrastructure (PKI) components that are used to secure the communication between various components of a Kubernetes cluster, such as SSL/TLS certificates, private keys, and public keys. These components are essential to ensuring the security and reliability of the cluster by establishing secure and encrypted connections between the different components of the cluster and are mounted on the kube-apiserver Pod already.
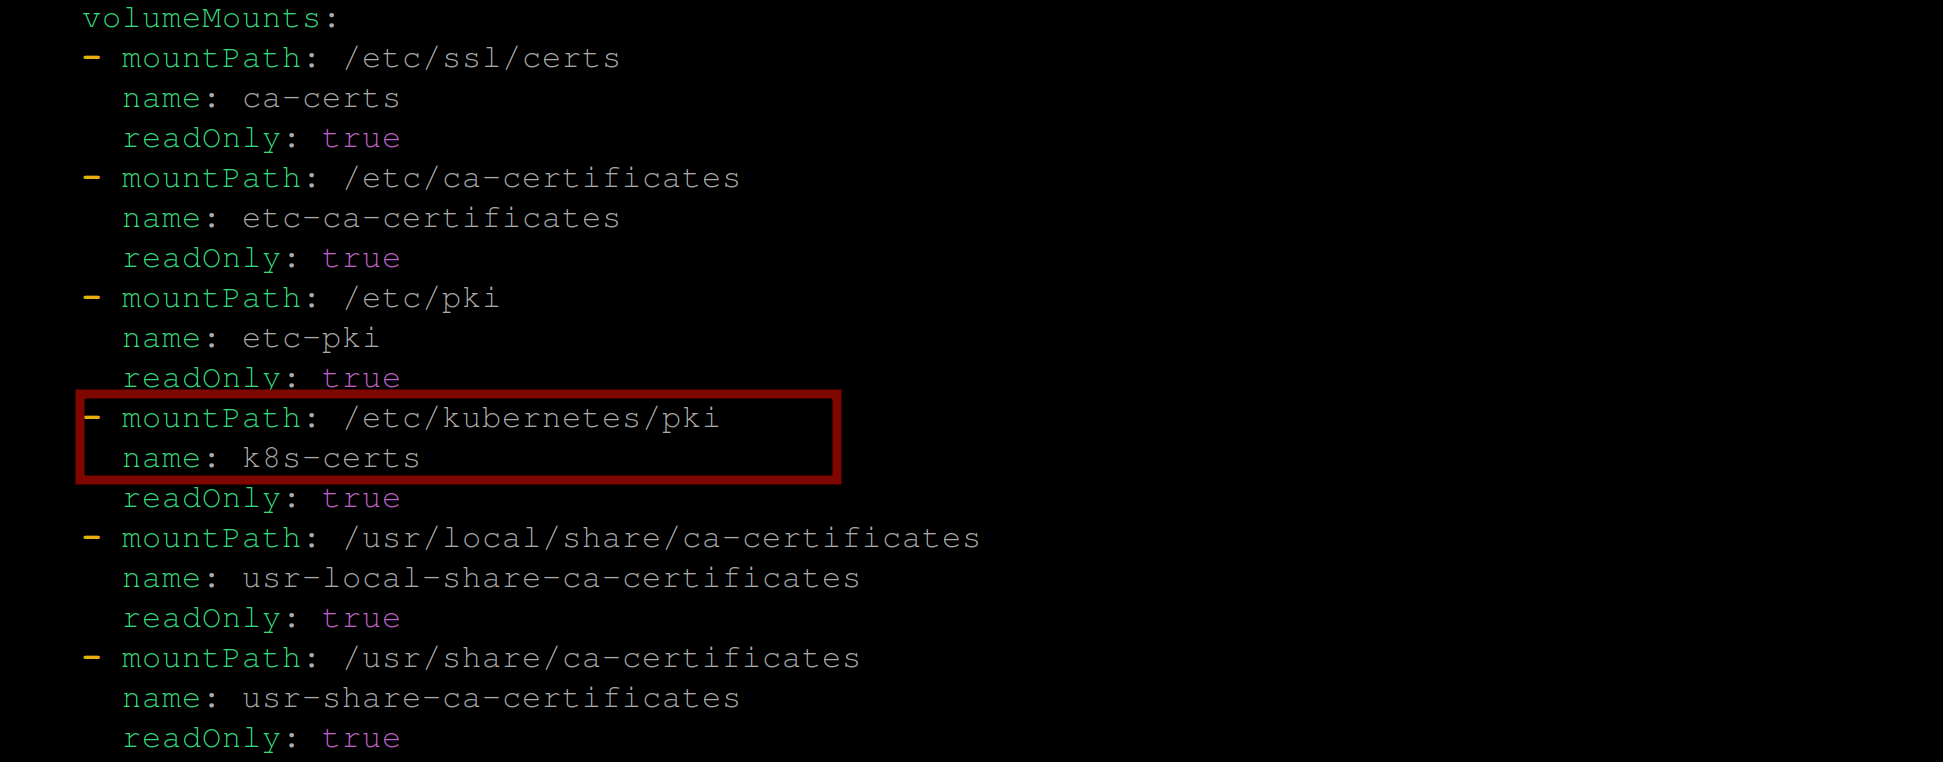
/etc/kubernetes/pki/ as volumeMountTo confirm if the file was successfully moved, execute the command below:
cat /etc/kubernetes/pki/enc.yaml
/etc/kubernetes/pki/ directory on master nodeNext, you’ll need to edit the manifest file for the kube-apiserver static pod. Run the commands below to locate the kube-apiserver manifest file:
cd /etc/kubernetes/manifests
ls
Open up the kube-apiserver manifest file using a code editor (nano or vim) and add the following configuration into the command section in the containers level of the manifest specification configuration settings:
- --encryption-provider-config=/etc/kubernetes/pki/enc.yamlIf this is added correctly go ahead and save this setting. On saving the setting your kube-apiserver will be down for some minutes.

After a while, it will be back up—showing the configuration setting was successful—without errors:

Any secret object you create from now on will be automatically encrypted at rest, but previously created secret objects will not. You need to replace them so the new secret specification will take effect on them.
Confirming Encryption at Rest
Since you have already created a secret demo, go ahead to replace it using the newly configured specification.
This command essentially retrieves the secrets in the default namespace, updates them with the latest information, and replaces the existing secrets in the cluster with the updated information.
kubectl get secrets --namespaces=default -o json | kubectl \
replace -f - #replace for a particular namespace
#or
kubectl get secrets --all-namespaces -o json | kubectl \
replace -f - #replace across all namespaces
Now, you’ll need to go into the ETCD data store to confirm your secrets are encrypted at rest. The ETCD pod runs in the kube-system namespace. You can run the below command to confirm:
kubectl get pods -n kube-system
To see how the demo secret is stored in the ETCD data store, execute the following command:
kubectl -n kube-system exec -it etcd-master \
   -- sh -c "ETCDCTL_API=3 etcdctl \
   --cacert=/etc/kubernetes/pki/etcd/ca.crt   \
   --cert=/etc/kubernetes/pki/etcd/server.crt \
   --key=/etc/kubernetes/pki/etcd/server.key  \
   get /registry/secrets/default/demo"
The code above retrieves the demo secret stored in the etcd registry in the defaultnamespace using the etcd command-line client and secure communication via SSL/TLS certificates.

In the image above, you can see the encrypted value of the demo secret. This shows that your secret is encrypted at rest.
Since your customer key is stored locally, it can still be compromised or stolen. You might consider using a KMS provider in your EncryptionConfiguration resource. It is considered the safest, strongest and fastest provider. It uses an envelope encryption scheme to encrypt data in ETCD.
Configuring RBAC Rules
Enabling encryption at rest is just the tip of the iceberg in keeping your secrets safe. It’s essential to also control access to secrets using RBAC. RBAC stands for Role-Based Access Control. It answers the questions of who has access to the cluster and what their privileges and limits are. With RBAC, you can create roles with certain permissions in Kubernetes.
Let’s say your company has a new senior DevOps engineer named John, who needs to be able to view all secrets in the marketing namespace within the cluster and might also need to access all other resources too within the marketing namespace. How will you create John as a user and grant him access to your secrets? You can do this using Kubernetes certificates, a role, and a role-binding Kubernetes resource.
Since you only need John to access secrets within a particular namespace marketing you will need to create a Role and RoleBinding, else you can consider using ClusterRole and ClusterRoleBinding which works across all namespaces.
Kubernetes on its own has no clear idea of what the concept of a user is or what a group is. It simply takes it as a string (the name of the user or group, or the id of the user or group). To identify a user or group, Kubernetes uses a certificate, a certificate signed by the Kubernetes certificate authority (CA). To add John as a user, you’ll need to create a client certificate and add John as the common name in that certificate, and then sign that certificate with the Kubernetes CA and the Kubernetes CA key. Then you create a role to allow John some permissions and privileges and bind that role to the certificate using the same common name John.
So when John tries to access the cluster, Kubernetes will check for the trusted certificate and check if the user intent matches any of the roles where the role-binding user is John.
Creating the User’s Private Key and Certificate Signing Request (CSR)
Let’s continue with the same example. We will start by creating the namespace we want John to only have access to which in this case is the marketing namespace using the below command:
kubectl create ns marketing
kubectl get ns marketing
Then we create a certificate private key for the user, John:
This command uses OpenSSL to generate a new RSA private key with a length of 2048 bits and outputs the resulting private key to the “john.key” file.
openssl genrsa -out john.key 2048
cat john.key
The parameters in the command stand for the following:
genrsa: This parameter tells OpenSSL to generate a new RSA private key.-out john.key: This option specifies the filename of the output private key. The resulting private key will be stored in the file named “john.key”.2048: This parameter specifies the key length of the private key in bits. In this case, the private key length is 2048 bits, which is considered a good length for RSA keys in modern use cases.
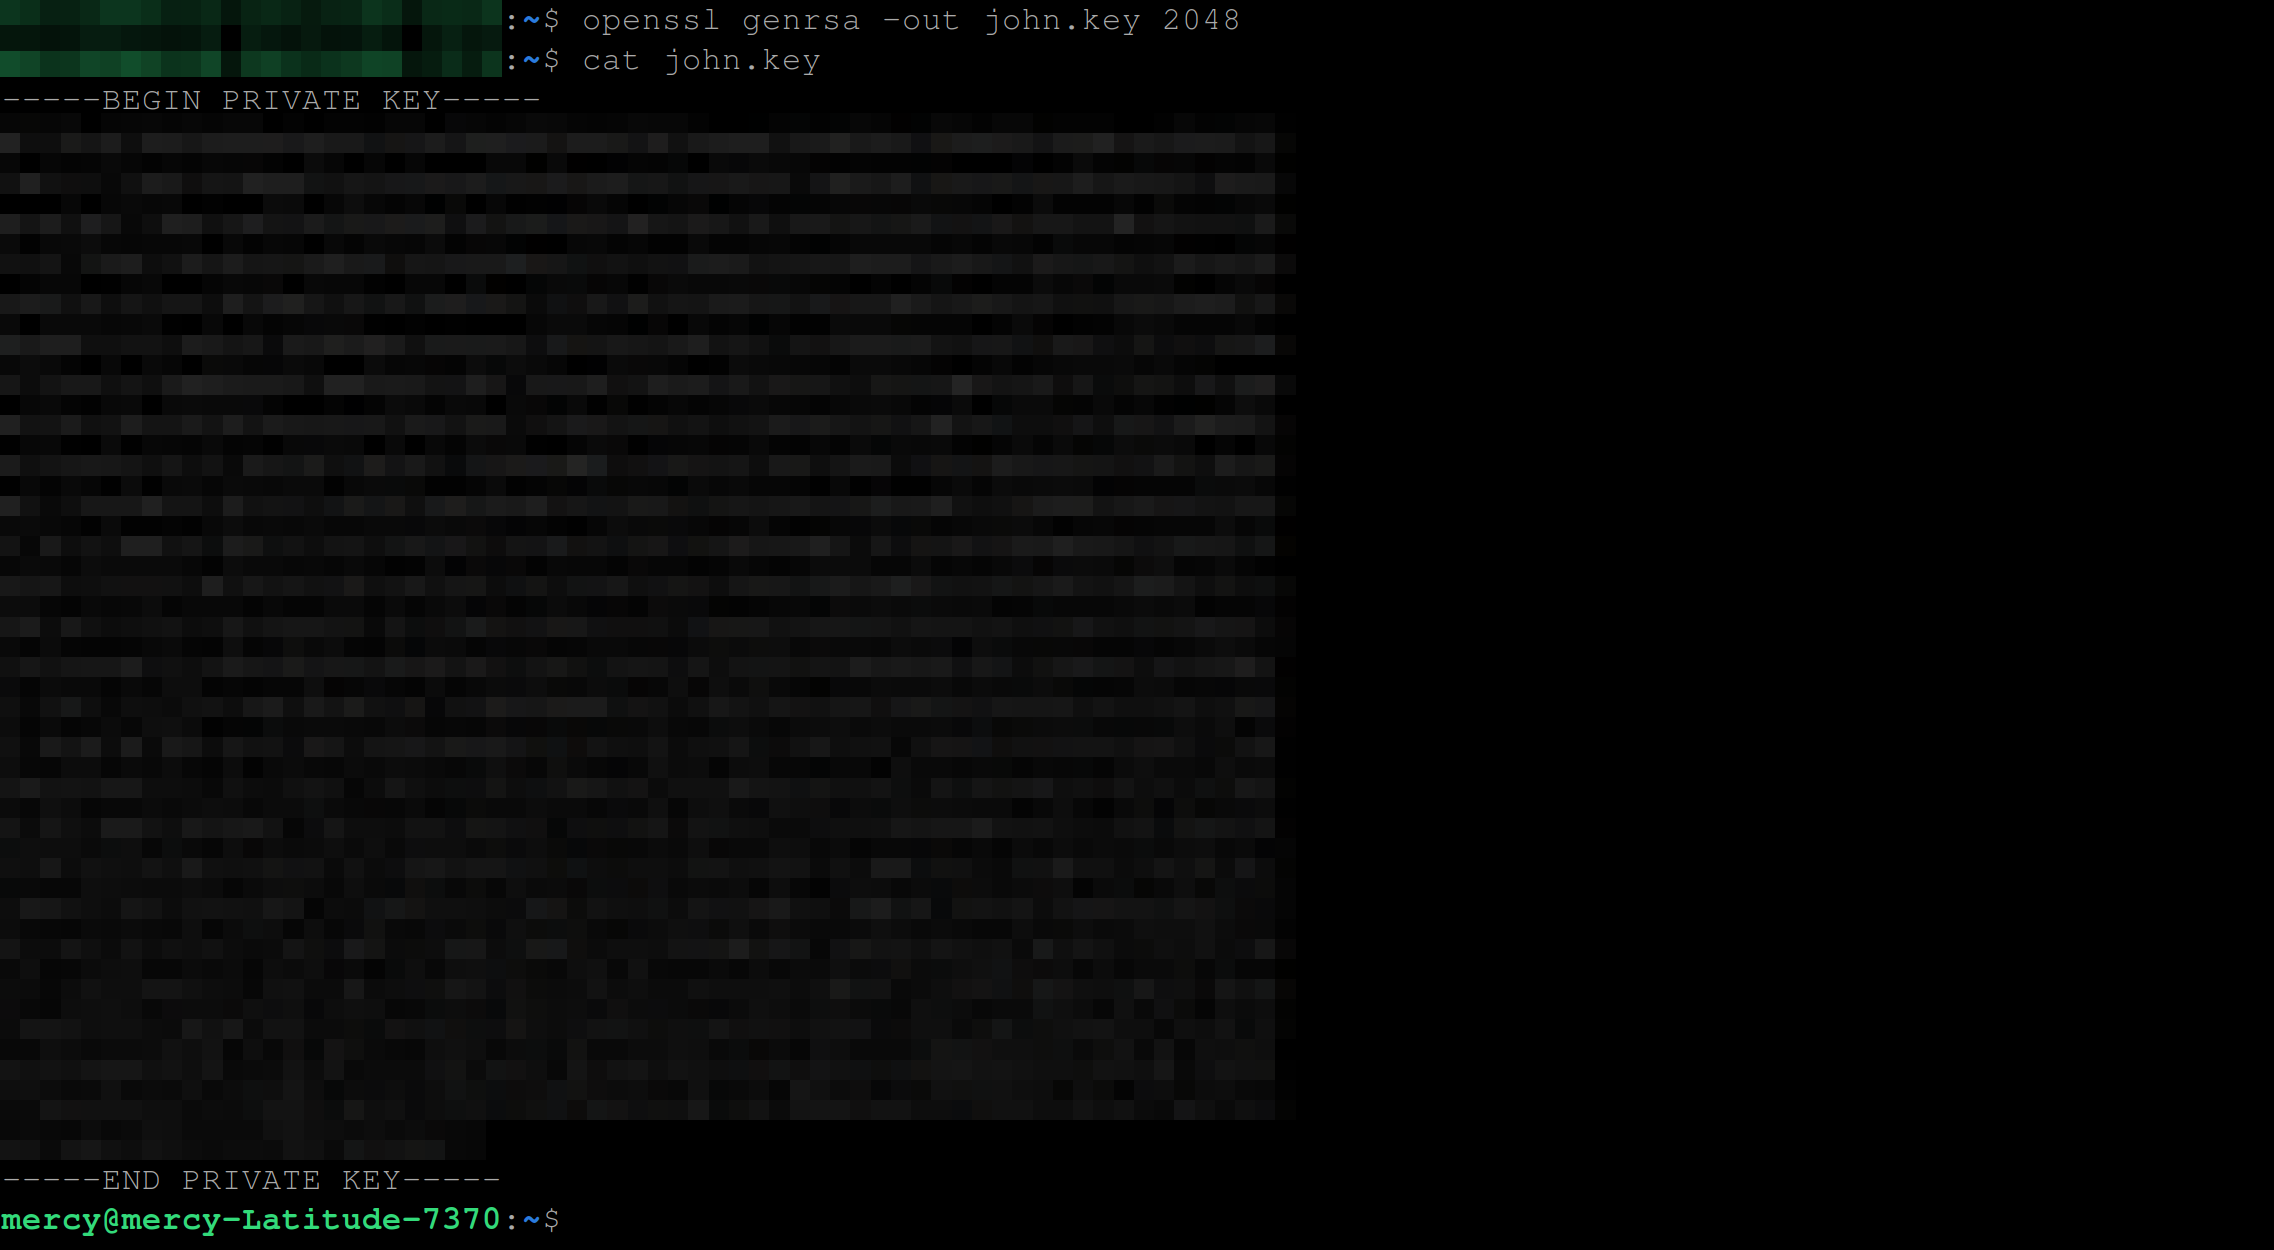
Once we have successfully created John’s certificate private key, we will create a [certificate signing request (CSR) for John:
This command generates a new CSR using the private key stored in the john.key file and outputs the resulting CSR to the john.csr file. The subject of the CSR specifies the certificate will be issued to an entity with a common name of john and an organization name of marketing (namespace in this context).
openssl req -new -key john.key -out john.csr -subj "/CN=john/O=marketing"
cat john.csr
The parameters in the command stand for the following:
req: This parameter tells OpenSSL to generate a new CSR.-new: This option generates a new CSR.-key john.key: This parameter specifies the private key to use when generating the CSR. Here, the private key is stored in the file named “john.key”.-out john.csr: This option specifies the filename of the output CSR. The resulting CSR will be stored in the file named “john.csr”.-subj "/CN=john/O=marketing": This parameter specifies the subject of the CSR. The/CN=johnpart of the subject shows the Common Name (CN) of the entity that the certificate will be issued to. The/O=marketingpart of the subject specifies the name of the organization that the entity belongs to.
Copy the ca.crt and ca.key securely (SCP) from the /etc/kubernetes/pki directory from your master node using the below command, you will need the ca.crt and ca.key on your local machine to sign John’s certificate:
scp root@96.126.114.208:/etc/kubernetes/pki/ca.{crt,key} .
ls
Now we’ll need to sign John’s CSR using the Kubernetes cluster’s certificate authority (CA).
The following command creates a new X.509 certificate based on the certificate signing request stored in the john.csr file. The certificate is signed by the root CA specified in the ca.crt and ca.key files. The newly generated certificate is stored in the “john.crt” file and is valid for 365 days.
openssl x509 -req -in john.csr -CA ca.crt -CAkey ca.key \
 -CAcreateserial -out john.crt -days 365
The parameters in the command above stand for the following:
x509: This parameter tells OpenSSL to create an X.509 certificate.req: This option specifies that a certificate is to be created based on a certificate signing request (CSR).in john.csr: This parameter specifies the input file that contains the CSR. Here, the file named “john.csr” is used as the input.CA ca.crt: This parameter specifies the root certificate authority (CA) certificate that will sign the CSR. The file “ca.crt” contains the root CA certificate.CAkey ca.key: This parameter specifies the private key of the root CA that will sign the CSR. The file “ca.key” contains the root CA private key.CAcreateserial: This option tells OpenSSL to create a new serial number file for the root CA.out john.crt: This option specifies the output file name for the newly generated certificate. The resulting certificate will be stored in the file named “john.crt”.days 365: This parameter specifies the number of days for which the certificate will be valid. Here, the certificate will be valid for 365 days.
For additional security you can enable Just-in-Time access for a user by reducing the specified number of days for which the certificate should be valid.
If John’s CSR was signed successfully, you should have the following output:

Creating the User’s KubeConfig File
Since we now have John’s certificate private key and certificate signed, we will need to create a Kubernetes config file for John with the certificate and private key so John can access the Kubernetes cluster.
First, you need to get the base64 encoded value for John’s certificate (john.crt) and John’s private key (john.key). Execute the below commands to achieve this.
Paste the keys where you can easily access them.
cat john.crt | base64 -w0
kubectl --kubeconfig john.kubeconfig get \
 pods --namespace marketing
Now, create a config file for John, for instance, john.kubeconfig, and paste in the below configuration settings:
apiVersion: v1
clusters:
- cluster:
    certificate-authority-data: <BASE64 ENCODED ca.crt>
    server: https://<YOUR API SERVER ENDPOINT>
  name: kubernetes
contexts:
- context:
    cluster: kubernetes
    user: john
  name: john@kubernetes
current-context: john@kubernetes
kind: Config
preferences: {}
users:
- name: john
  user:
    client-certificate-data: <base64 encoded john.crt>
    client-key-data: <base64 encoded john.key>
💡 Instead of hardcoding John’s config file, you can run the command **cp ~/.kube/config john.kubeconfig** to copy your current config into John’s. That way you only have to edit the following under the **contexts** block - user(john), context name(john@kubernetes), current-context(john@kubernetes), name(john) and then the **client-certificate-data and client-key-data** for John where the configuration settings in the cluster block is left untouched.
Now that you have John’s config file, you can send it to them and they can add it to their .kube directory as a file to gain access to the cluster via kubectl commands.
But that’s not all, you just created a user John. John isn’t authenticated to run kubectl commands on the cluster yet, this is where role and role binding come in.
Creating Role and RoleBinding for the User
At this point, if you execute the following command, you will see that John isn’t authenticated yet:
kubectl --kubeconfig john.kubeconfig get pods --namespace marketing \
#Gets pods from the marketing namespace
kubectl --kubeconfig john.kubeconfig get pods
#Gets pods from the default namespace
So we will create a role named “john-marketing” in the Kubernetes cluster with permissions to perform “get”, “list”, and “watch” actions on pods and secrets resources in the “marketing” namespace using the command below:
kubectl create role john-marketing --verb=get,list,watch \
 --resource=pods,secrets --namespace marketing
Create a role binding named john-marketing-rolebinding that binds the role “john-marketing” to the user john in the “marketing” namespace.
kubectl create rolebinding john-marketing-rolebinding \
 --role=john-marketing --user=john --namespace marketing
Confirm that the Role and RoleBinding for John were created using these commands:
kubectl get role -n marketing
kubectl get rolebinding -n marketing
Create a secret named marketing-secret in the marketing namespace containing two key-value pairs: username with value myapp and password with value 123456.
kubectl create secret generic marketing-secret \
 --from-literal=username=myapp --from-literal=password=123456 \
 -n marketing
💡 While you are still here, you can confirm if your newly created secret is encrypted at rest with the following commands :
kubectl -n kube-system exec -it etcd-master -- sh -c "ETCDCTL_API=3 etcdctl \ --cacert=/etc/kubernetes/pki/etcd/ca.crt \ --cert=/etc/kubernetes/pki/etcd/server.crt \ --key=/etc/kubernetes/pki/etcd/server.key \ get /registry/secrets/marketing/marketing-secret"
Confirm if John can access this secret using the command below:
kubectl --kubeconfig john.kubeconfig get secrets --namespace marketing
Optionally, you can edit the john.kubeconfig file to set the default namespace for John to the marketing namespace:
apiVersion: v1
clusters:
- cluster:
    certificate-authority-data: <BASE64 ENCODED ca.crt>
    server: https://<YOUR API SERVER ENDPOINT>
  name: kubernetes
contexts:
- context:
    cluster: kubernetes
    user: john
        namespace: marketing
  name: john@kubernetes
current-context: john@kubernetes
kind: Config
preferences: {}
users:
- name: john
  user:
    client-certificate-data: <base64 encoded john.crt> #John's certificate
    client-key-data: <base64 encoded john.key> #John's private key
That way the following command only accesses the secrets in the marking namespace for John without you specifying the namespace explicitly:
kubectl --kubeconfig john.kubeconfig get secrets
💡 If you’d like to have multiple users access the secret in the marketing namespace then you can do the following: - create new users using the steps above, - delete the current RoleBinding resource, and - create a new one using the following command:**kubectl create rolebinding marketing-group-rolebinding --role=john-marketing --group=marketing --namespace marketing**
Securing ETCD
For securing ETCD, you need to limit access to ETCD by granting access only to the kube-apiserver, secure data by restricting node access and use TLS with valid client certificates to secure communication between the API server and ETCD.
See the following guide to achieve this and also, the Kubernetes docs for more information.
Conclusion
In this tutorial, we’ve covered Kubernetes secrets security. You now have the tools to safeguard your sensitive info, including enabling data encryption, setting up role-based access control, and securing ETCD. Now it’s your turn to keep your secrets under wraps. You’ve totally got this!
After mastering the security of your Kubernetes secrets, why not take the next step in streamlining your builds? Give Earthly a try. It could be the perfect tool to further enhance your development process.
Earthly Lunar: Monitoring for your SDLC
Achieve Engineering Excellence with universal SDLC monitoring that works with every tech stack, microservice, and CI pipeline.


