Using Bazel with TypeScript

In this Series
Table of Contents
Bazel is an open source project originally created by Google, refined, and tested for years to run heavy-duty, mission-critical services, and applications. It is a great choice for building, and testing projects. Bazel’s advanced distributed caching execution creates fast incremental and customizable builds by only rebuilding what is necessary. It works across several languages and platforms, such as Java, Go, and JavaScript, and across operating systems, such as IOS, Android, Linux, and Windows.
Bazel automates software builds and tests for tasks like running compilers and linkers to produce executable programs and libraries, such as transforming a JAVA file into a JAR executable. Bazel can be compared to tools like Apache Maven, Apache Ant, GNU Make, or Gradle, but it rises above the crop due to its multilanguage and multiplatform support. It comes with a customizable high-level language, Starlark, that describes how a project should be built. Bazel’s scalability allows it to grow along with your codebase and organization. It can handle codebases of any size, whether huge monolith repositories or multiple repositories.
TypeScript builds with Bazel are much faster when used with Bazel’s remote execution feature, which allows you to build and test in parallel across multiple machines, such as a data center. This means that you can horizontally scale your builds. Bazel also supports remote caching, which can greatly improve the development experience by avoiding discrepancies between development environments, like one user using macOS and another using Windows.
This tutorial explores how experienced developers can add Bazel for a TypeScript project to run fast and customizable builds. You’ll learn to customize Bazel to suit your needs with the use of Bazel rules. You’ll also learn to add tests, run them with Bazel, and then publish them to npm.
TypeScript and Bazel
TypeScript is a language built with JavaScript as a base. It is a superset of JavaScript, which means it inherits every possible feature in JavaScript. TypeScript comes with two advantages. First, it transpiles TypeScript into JavaScript so that all the advanced ECMAScript features not available across all browsers can be provided with a polyfill. Second, it enforces static typing to catch potential issues and errors earlier in the software development lifecycle.
While using Bazel, you will come across several Bazel rules built around the TypeScript compiler that can be used while configuring Bazel. Bazel rules, which are usually called BUILD files, are defined as a set of commands that operate on input files to produce an output, for instance, transpiling a TypeScript file to a JavaScript file. These rules often come as part of a Bazel package; for instance, rules_nodejs. Some of these rules are as follows:
tsc: This is the built-in TypeScript compiler developed by the team at Microsoft. After loading rules_nodejs,tsccan be exposed in the BazelBUILDfile by adding the load statementload("@npm//typescript:index.bzl", "tsc")to it. Here’s an example usage oftscin the Bazel config file.ts_config: This rule is used for adding your TypeScript configuration file to Bazel. With this rule, you can pass atsconfig.jsonfile to it or even add an additional JSON config file with it via thedepsoption.ts_project: This is a Bazel rule that can serve as a replacement for thetscrule. It allows for a lot of options, such assrcs, the source data to be transpiled;out_dir, the directory where the output files should go;tsconfig, the TSConfig file to use; or a JSON object containing transpiling rules. Any rule that works withtscshould work withts_project. See the docs to learn more aboutts_project.
See the rules_nodejs docs for more Bazel TypeScript rules.

Build a TypeScript App with Bazel
For the purpose of this tutorial, you’ll will put together a basic TypeScript application and then build and test it with Bazel. Ensure that you have Node.js installed on your computer.
Start by creating a directory called demo_bzl_app:
$ mkdir demo_bzl_app && cd demo_bzl_appStart a Node.js project by running the following command:
$ npm initNext, install TypeScript:
$ npm config set save-prefix=''
$ npm install typescript@4.9.5 --save-dev
In your directory, you should now have a package.json file and a package-lock.json file.
Next, you will create a tsconfig.json file, which is where you will define the TypeScript compiler options. This can be done automatically by running the following:
npx tsc --init --rootDir src --esModuleInterop --resolveJsonModule \
--lib 'es6, dom' --module commonjs --allowJs true --noImplicitAny true
To learn more about what these options mean, see the TSConfig Reference doc. At this point, you should have the tsconfig.json file in the root directory.
Now create an src directory where the application code will live. Inside it, create a file called index.ts. The .ts extension indicates that the file is a TypeScript file:
$ mkdir src && touch readme.MD && touch src/index.tsIn the index.ts file, add the following code:
#!/usr/bin/env node

"use strict";
export function adder (one: number, two: number) {
    return one + two
}

export function concatenate (one: string, two: string) {
    return one + two
}


console.log("Hello! Welcome.");
Ordinarily, TypeScript .ts files have to be compiled into .js files in order to be executed. Usually, you would use npx tsc to compile the code. tsc would read the tsconfig.json file and apply the configurations while compiling the JavaScript code. But in this tutorial, you will see how to use Bazel instead.
To start using Bazel, install it on your computer. Bazel can be installed on Linux, macOS, and Windows. To learn how to install it for your platform, use their installation guide. Confirm that you have it installed by typing bazel in your command line:

To define a Bazel project, you need to turn it into a workspace. A workspace is a directory that holds the project’s source code and Bazel’s build outputs. There are two important files that make this possible: the WORKSPACE file and the BUILD file.
The WORKSPACE file helps Bazel identify a directory as a Bazel project, while the BUILD file helps Bazel identify a directory as a Bazel package. A Bazel project can have one or more packages within it, and a package can contain subpackages or subdirectories containing BUILD files, thus forming a hierarchy.
Create a WORKSPACE file and a BUILD file in the demo_bzl_app root directory:
touch WORKSPACE && touch BUILDIn future projects, you can designate a directory as a Bazel workspace by creating an empty file named WORKSPACE in that directory. The WORKSPACE file can be empty, but it can also contain instructions for Bazel to download the dependencies needed for the Bazel project.
In your WORKSPACE file, add the following code:
load("@bazel_tools//tools/build_defs/repo:http.bzl", "http_archive")
http_archive(
    name = "aspect_rules_ts",
    sha256 = "7d964d57c6e9a54b0ce20f27e5ea84e5b42b6db2148ab7eb18d7110a082380de",
    strip_prefix = "rules_ts-1.2.4",
    url = "https://github.com/aspect-build/rules_ts/releases/download/v1.2.4/rules_ts-v1.2.4.tar.gz",
)

##################
# rules_ts setup #
##################
# Fetches the rules_ts dependencies.
# If you want to have a different version of some dependency,
# you should fetch it *before* calling this.
# Alternatively, you can skip calling this function, so long as you've
# already fetched all the dependencies.
load("@aspect_rules_ts//ts:repositories.bzl", "rules_ts_dependencies")

rules_ts_dependencies(
    # This keeps the TypeScript version in-sync with the editor, \
    which is typically best.
    ts_version_from = "//:package.json",

    # Alternatively, you could pick a specific version, or use
    # load("@aspect_rules_ts//ts:repositories.bzl", "LATEST_VERSION")
    # ts_version = LATEST_VERSION
)

# Fetch and register node, if you haven't already
load("@rules_nodejs//nodejs:repositories.bzl", "DEFAULT_NODE_VERSION", \
"nodejs_register_toolchains")

nodejs_register_toolchains(
    name= "node",
    node_version = DEFAULT_NODE_VERSION,
)

# Register aspect_bazel_lib toolchains;
# If you use npm_translate_lock or npm_import from aspect_rules_js \
you can omit this block.
load("@aspect_bazel_lib//lib:repositories.bzl", \
"register_copy_directory_toolchains", \
"register_copy_to_directory_toolchains")

register_copy_directory_toolchains()

register_copy_to_directory_toolchains()
A BUILD file contains several instructions for Bazel on how to build the package; these instructions are called rules. In the BUILD file, add the following rules for building the TypeScript file in src/index.ts:
load("@aspect_rules_ts//ts:defs.bzl", "ts_project")

ts_project(
    name="transpile",
    srcs = ["src/index.ts"],
    tsconfig= "//:tsconfig.json",
    allow_js=True,
    resolve_json_module=True
)
The previous rules in the BUILD file tell Bazel the following:
- The rule is named
transpile. - The input files that need to be compiled are to be found in the path
src/index.ts. - Bazel should fetch the compiler configuration from the
tsconfig.jsonfile in the current directory, as denoted by//. allow_jsis set asTrue, which means that TypeScript should allow JavaScript files to be imported within the.tsproject files.resolve_json_moduleis set asTrue, which means that Bazel should allow the import of.jsonextension files within the.tsproject files.
To build this package, run the following command:
$ bazel build //:transpile
$ bazel build //:transpile terminal outputThis will compile the TypeScript file in src/index.js to JavaScript files. By now, you should have freshly generated Bazel folders, such as bazel-bin and bazel-out. These are the folders where Bazel places your build outputs. If you ever need to get rid of them, you can just run bazel clean which will delete outputs from your build and reset internal caches.
The output of the previous build can be found in bazel-bin/src/index.js, which is a symlink of bazel-out/darwin-fastbuild/bin/src/index.js. This is the output of your build, which mirrors the src directory in the root folder.
Run the output file by running bazel-out/darwin-fastbuild/bin/src/index.js. You should get a Hello! Welcome. output in the console.
Add Tests With Jest

In this tutorial, you’ll be using Jest to add tests to the demo_bzl_app project. Start by adding Jest to npm:
npm install --save-dev jest ts-jest @types/jestNext, you need to configure Jest by running the following:
npx ts-jest config:initThis will create a jest.config.js file, which tells Jest and ts-jest how to handle .ts files. Also, in your WORKSPACE file, you have to load a dependency called rules_jest. This is a Bazel library that makes it easier to use Jest with Bazel. Append the following to your WORKSPACE file:
http_archive(
    name = "aspect_rules_jest",
    sha256 = "9f327ea58950c88274ea7243419256c74ae29a55399d2f5964eb7686c7a5660d",
    strip_prefix = "rules_jest-0.15.0",
    url = "https://github.com/aspect-build/rules_jest/archive/refs/tags/v0.15.0.tar.gz",
)

####################
# rules_jest setup #
####################
# Fetches the rules_jest dependencies.
load("@aspect_rules_jest//jest:dependencies.bzl", "rules_jest_dependencies")

rules_jest_dependencies()

# Fetches the npm packages for jest-cli.
load("@aspect_rules_jest//jest:repositories.bzl", "jest_repositories")

jest_repositories(name = "jest")

load("@jest//:npm_repositories.bzl", jest_npm_repositories = \
"npm_repositories")

jest_npm_repositories()
Next, create a test folder and a test file:
mkdir tests && touch tests/index.test.tsIn index.test.ts, add the following:
let { adder, concatenate } = require('../src/index.ts');

describe('adder module', () => {
    test('test_adder', ()=> {
        expect(adder(1,2)).toBe(3)
    });
});

describe('concatenate module', () => {
    test('test_concatenate', ()=> {
        expect(concatenate('mary',' had a little lamb'))\
        .toBe('mary had a little lamb')
    });
});
The code above add test cases for the functions in src/index.ts.
You still need to add a way for Bazel to call Jest. In the BUILD file, add the following:
load("@aspect_rules_jest//jest:defs.bzl", "jest_test")

jest_test(
    name = "test",
    config = "jest.config.js",
    data = [
        "src/index.ts", # the test file below depends on this file
        "tests/index.test.ts",
    ],
)
jest_test is a rule function loaded from the dependencies previously loaded in your Bazel WORKSPACE file. It names the rule test and tells Bazel where to find the Jest config file. It also lists the test file, index.tests.ts, and the file being tested, index.ts.
Now you can run your tests with Bazel using the following code:
$ bazel run //:test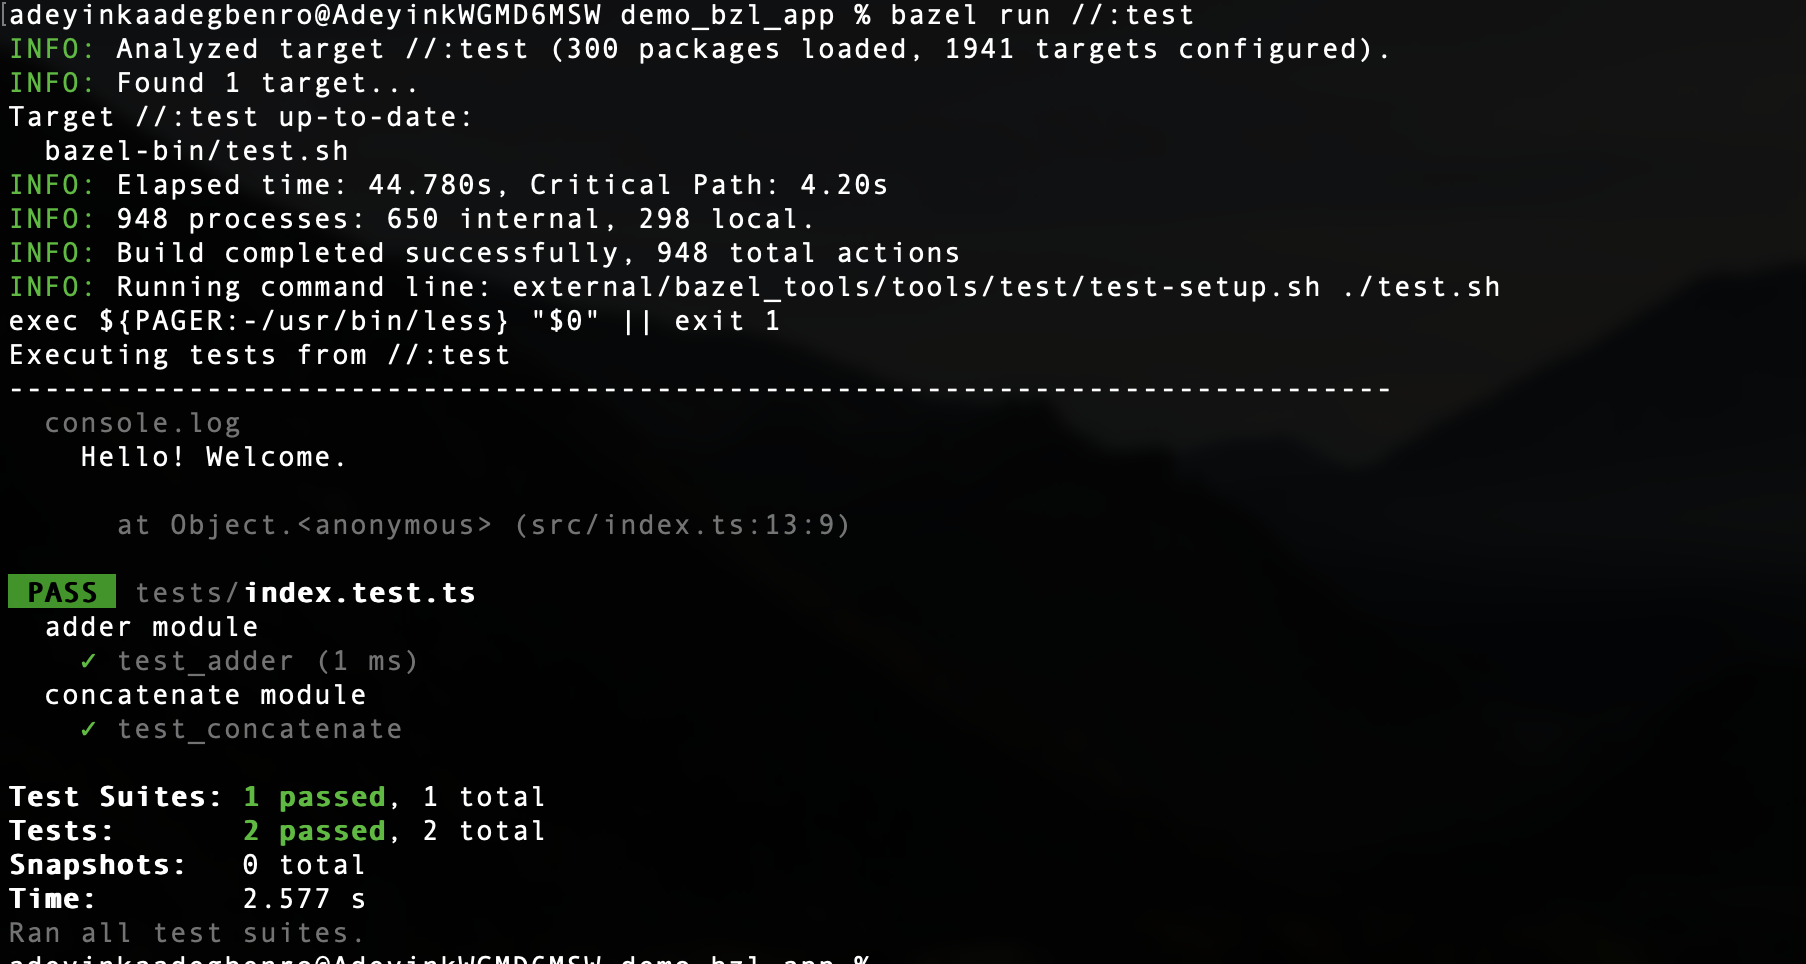
$ bazel run //:test terminal outputPublish to npm
To publish this package to npm, you’ll first make some changes to the BUILD file by adding a new rule. Append the following to your BUILD file:
load("@aspect_rules_js//npm:defs.bzl", "npm_package")

npm_package(
    name="demo_bzl_app",
    srcs = [":transpile", "readme.md", "package.json"],
    package="demo_bzl_app",
)
Here, the rule is named demo_bzl_app. srcs is asking Bazel to use the output files from the transpile rule. Remember that the transpile rule is the first rule in the BUILD file. This makes sure that transpile converts the TypeScript files to .js before the package is named. The rule is also asking Bazel to include the readme.md and package.json files since these will be needed to publish to npm.
Now all you need to do is run the following command:
$ bazel build //:demo_bzl_appNavigate to the bazel-out/darwin-fastbuild/bin/ folder. You should see a folder named demo_bzl_app, which contains the library’s compiled .js source files as well as the readme.md and the package.json files. This is the folder that will be published to npm.
Next, create a .gitignore file and add the following to it:
bazel-*
node_modules
Then run git init, git add, and git commit to initialize a Git repository, add and commit all relevant files to Git respectively.
Before you can publish your package, you’ll need to create an npm account at https://www.npmjs.com/signup. Log into your npm account using npm login.
Next, create a file called publish.sh and add the following:
#!/bin/bash

echo "Removing old Bazel outputs"
bazel clean

echo "Running tests"
bazel run //:test

echo "Building package"
bazel build //:demo_bzl_app

echo "moving to output dir"
cd bazel-out/darwin-fastbuild/bin/demo_bzl_app

while true; do
    read -p "Are you ready to publish to NPM? " yn
    case $yn in
        [Yy]* )
          echo "Now publishing package to NPM";
         npm publish; break;;
        [Nn]* ) exit;;
        * ) echo "Enter yes or no.";;
    esac
done

echo "Done!"
The previous script will remove old Bazel outputs and then run the tests and build the output files before publishing to npm. Only the demo_bzl_app folder will be included in the published package. (README.md and package.json are included by default.)
Now, you can publish:
$ bash publish.sh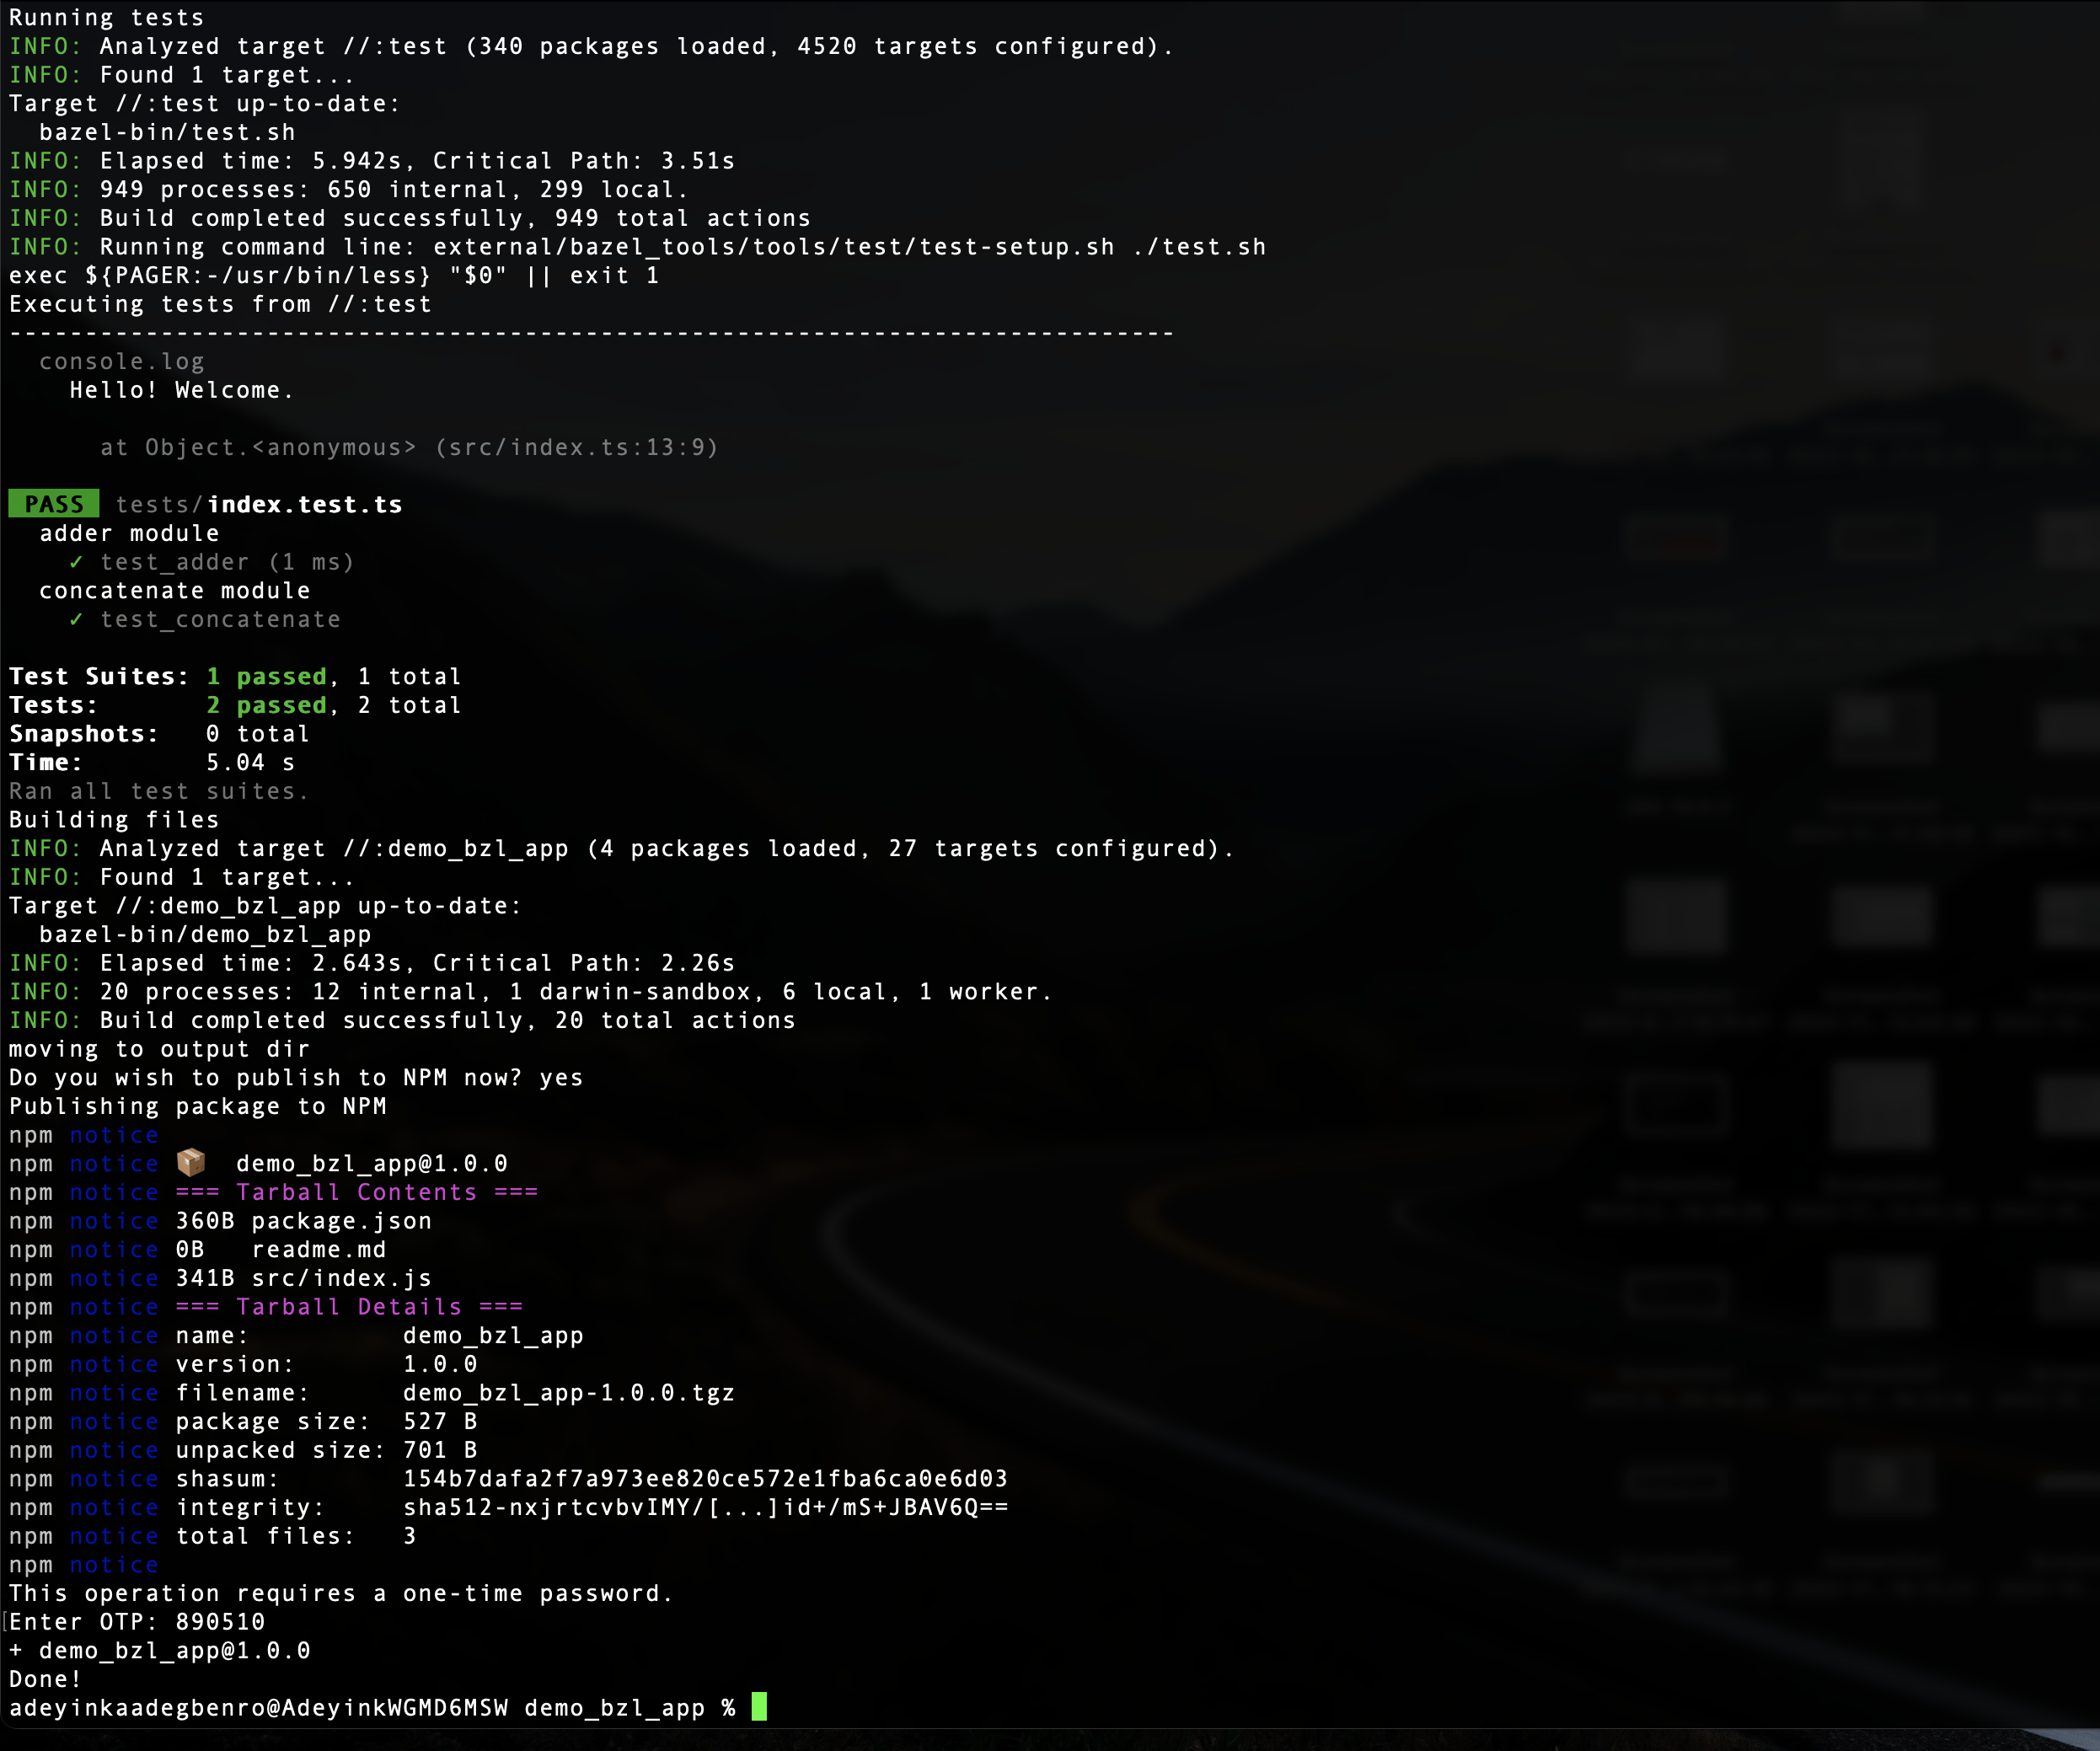
npmYou can browse your package on npm. The URL is https://npmjs.com/package/<your-package-name>. For this tutorial, it is https://npmjs.com/package/demo_bzl_app. Make sure you increase the version of your release in package.json the next time you attempt to publish to avoid getting an error.
If you’d like to see the complete source code from this tutorial, visit this GitHub repository.
Conclusion
You’ve now completed a basic build of a TypeScript application with Bazel. You learned how to define a workspace as well as a package. You also learned how to load dependencies, add rules, build, and test a project, and publish to npm, all using Bazel.
Bazel is indeed a powerful and flexible build system that can be used to manage projects of any size and complexity. By leveraging its caching and parallelization features, Bazel can provide significant speed improvements in building and testing large projects.
However, despite all these advantages, Bazel’s complex configuration and steep learning curve can sometimes be a hurdle for developers, especially when dealing with large monorepos. This is where Earthly comes into the picture. As a simpler, more intuitive alternative to Bazel, Earthly aims to make building software easier and faster. Our philosophy revolves around simplicity and usability without compromising on performance.
Earthly supports most languages and CI systems, and it also works with monorepos, microservices, and everything in between. So, while you’ve explored the capabilities of Bazel through this tutorial, you might also want to consider checking out Earthly. It may just be the tool you need to streamline your software building process, irrespective of the scale and complexity of your projects.
Remember, the right tool for your needs will always depend on your specific context, requirements, and constraints. Therefore, knowing your options will only make you more prepared to make the best choices for your software development endeavors. Happy building!
Turn your engineering standards into automated guardrails that provide feedback directly in pull requests, with 100+ guardrails included out of the box and support for the tools and CI/CD systems you already have.