Uploading and Downloading Artifacts with GitHub Actions

Table of Contents
If you’ve worked with projects hosted on GitHub, you’re probably aware of GitHub Actions. GitHub Actions is GitHub’s recommended way of setting up build automation and workflows from your GitHub-hosted repo. It supports multiple triggers and operations, including uploading and downloading artifacts.
Artifacts represent the final or intermediate products of these build pipelines. In a build pipeline, the artifacts typically consist of executable binaries created at its end. Conversely, a test pipeline might generate artifacts in the form of test logs and results as files. These artifacts can then be used to update statuses across pull requests or commits. Some more use cases where uploading/downloading artifacts might come in handy include the following:
- Test results and coverage reports: to review test outcomes, track code coverage trends, and share test reports with your team.
- Deployment packages: to store the deployable assets and facilitate subsequent deployment steps or manual releases.
- Logs and diagnostics: for troubleshooting and investigating issues that occur during the workflow runs.
- Generated documentation or reports: to make these accessible for review, dissemination, or archiving.
- Storage of intermediate results: to allow subsequent steps or workflows to access and use the data.
- Sharing of artifacts across workflows or jobs.
In this article, you’ll learn how to use artifacts with GitHub Actions to capture data from workflows and how to upload and download them as necessary using the actions/upload-artifact@v3 and actions/download-artifact@v3 actions.
How to Use Artifacts with GitHub Actions
In this tutorial, you’ll learn how to use the upload and download artifacts actions to upload build results from one job and download them in another. This creates a release for every tag created in a GitHub repo.
To follow along, all you need is a GitHub account. Because you’ll write the workflow in the GitHub web app, you don’t need any local development setup. However, you do need git installed on your local system so that you can clone the demo repo you will create in the tutorial and create tags in it.
How to Use Artifacts to Capture Data from Workflows
Start by uploading artifacts from GitHub Actions workflows. You need to fork this repo to your GitHub account. This repo contains a Vite-based Vue app that you can use. You’ll generate a production build of this app using the workflow you create in this section. The static build output files are packaged and uploaded to GitHub for every workflow run using the actions/upload-artifact@v3 action.
Set Up the Workflow
To get started, click on Add file > Create new file on the home page of the forked repo:
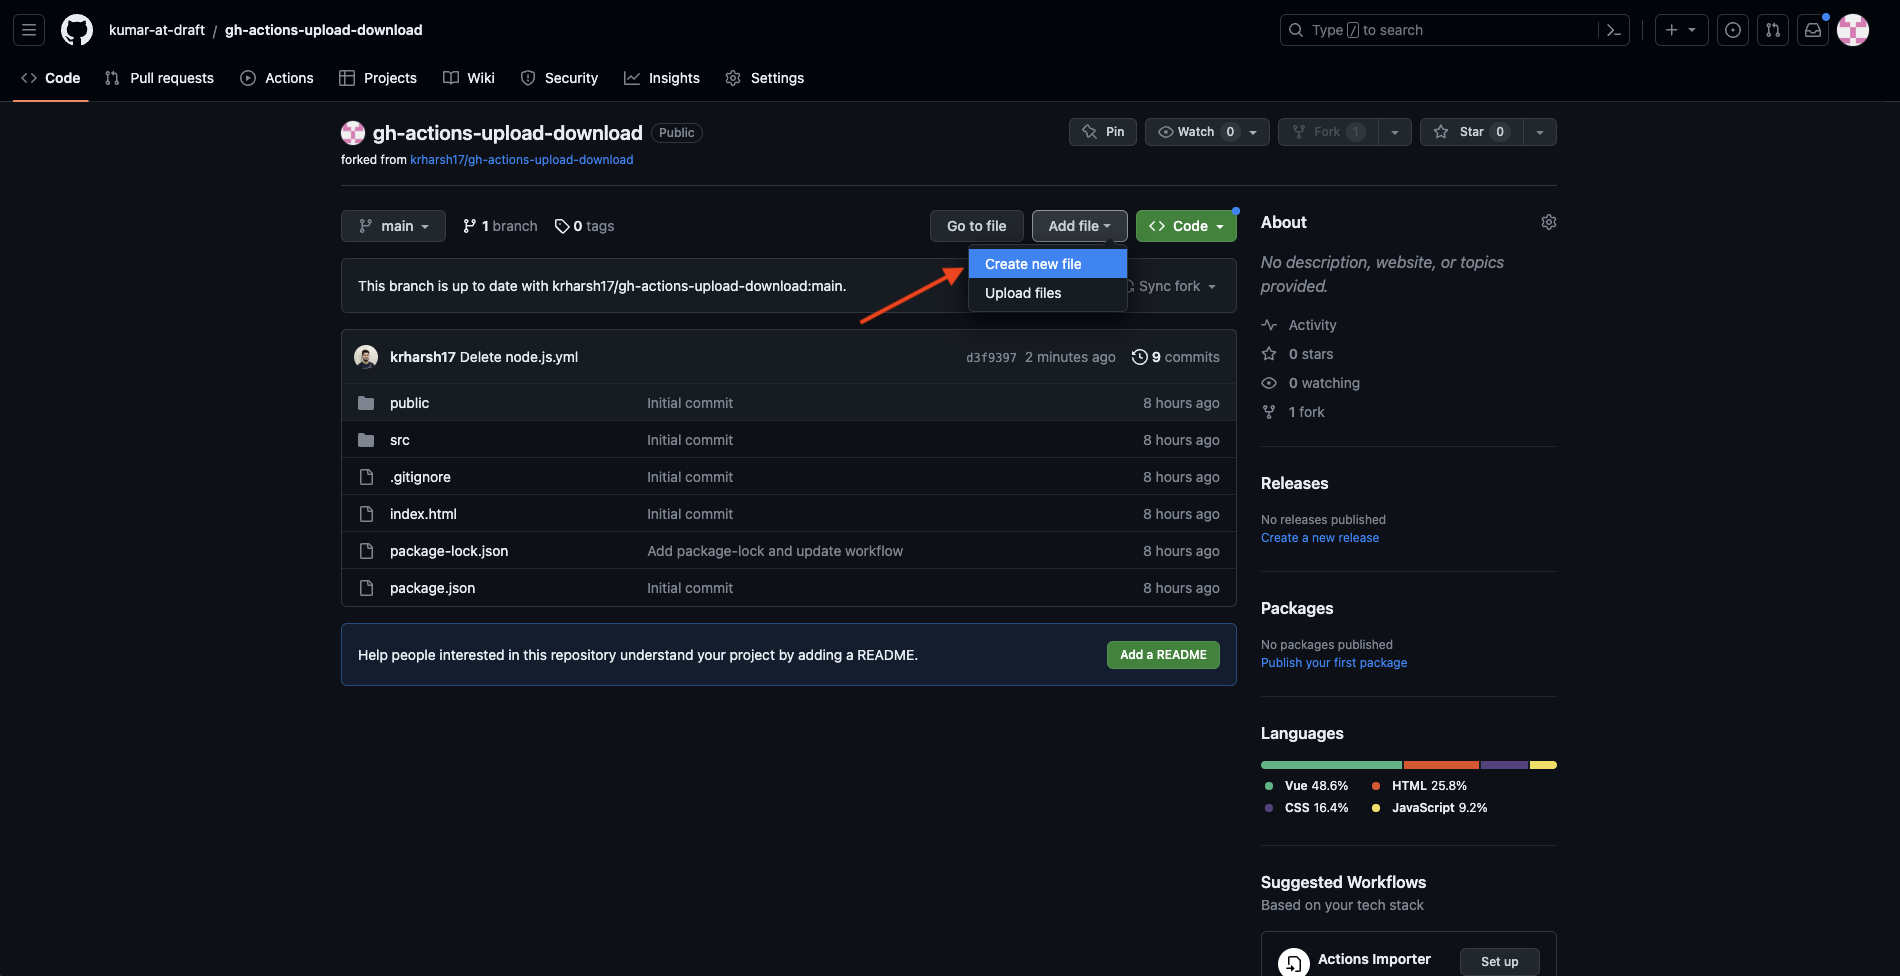
On the new file page that opens, set the file’s location and name as .github/workflows/node.js.yaml and add the following code to it:
name: Node.js CI

on:
  push:
      branches: [ "main" ]

jobs:
  build:
    runs-on: ubuntu-latest

    steps:
    - uses: actions/checkout@v3
    - name: Use Node.js
      uses: actions/setup-node@v3
    - run: npm ci
    - run: npm run build --if-present
This sets up a basic workflow that uses the actions/checkout@v3 action to check out code from your repo and the actions/setup-node@v3 action to set up a Node.js build environment. It then runs the npm ci command to clean and install the project’s dependencies and the npm run build command to run the build script from the project (which is essentially just vite build behind the scenes).
Identify the Data To Capture
Before you can upload artifacts, you need to identify and locate them in your workflow’s runtime. In this project, once the build command finishes executing, the resulting static web app is saved in a directory called dist. This is because the vite build command inherently directs its output to the dist folder as its default behavior.
As part of the build artifacts, you need to upload everything stored in the dist folder after the build runs to your workflow runs page.
Define the Artifacts in Your Workflow
To upload the output generated in the dist folder, add the following step to your workflow file:
- uses: actions/upload-artifact@v3
      with:
        name: Build
        path: dist
The actions/upload-artifact@v3 action takes in the name of the artifact to be uploaded and the path where you need to upload it as input to the action. If you don’t provide a name via the input argument, the uploaded artifact is named artifact by default. The path argument is mandatory and can use wildcards to filter files inside directories (such as dist/**/*.html to upload all HTML files from the dist directory).
Other input arguments that you can pass to this action are if-no-files-found and retention-days. The if-no-files-found argument lets you define the behavior in the case of the path argument not pointing to any files or directories that can be uploaded as artifacts. In other words, if the path you’ve defined is empty or does not exist, the action follows the behavior you set in the if-no-files-found argument. You can set it as warn for printing a warning as output (which is also the default behavior), error for marking the workflow run as failed and showing the error description in the run details, or ignore for ignoring and not showing any warnings or errors. retention-days lets you control how many days the artifacts remain available (between one to ninety days).
The upload action can be included multiple times in the same job or workflow, and it accumulates all uploaded files in the same run’s details page. If you choose to upload the same file twice, it retains the latest copy of the file.
Here’s what your workflow file should look like at this point:
name: Node.js CI

on:
  push:
      branches: [ "main" ]

jobs:
  build:
    runs-on: ubuntu-latest

    steps:
    - uses: actions/checkout@v3
    - name: Use Node.js
      uses: actions/setup-node@v3
    - run: npm ci
    - run: npm run build --if-present
    - uses: actions/upload-artifact@v3
      with:
        name: Build
        path: dist
Commit this file to your repo and wait for the workflow run to be completed.
How to Access the Uploaded Artifacts After the Workflow Runs
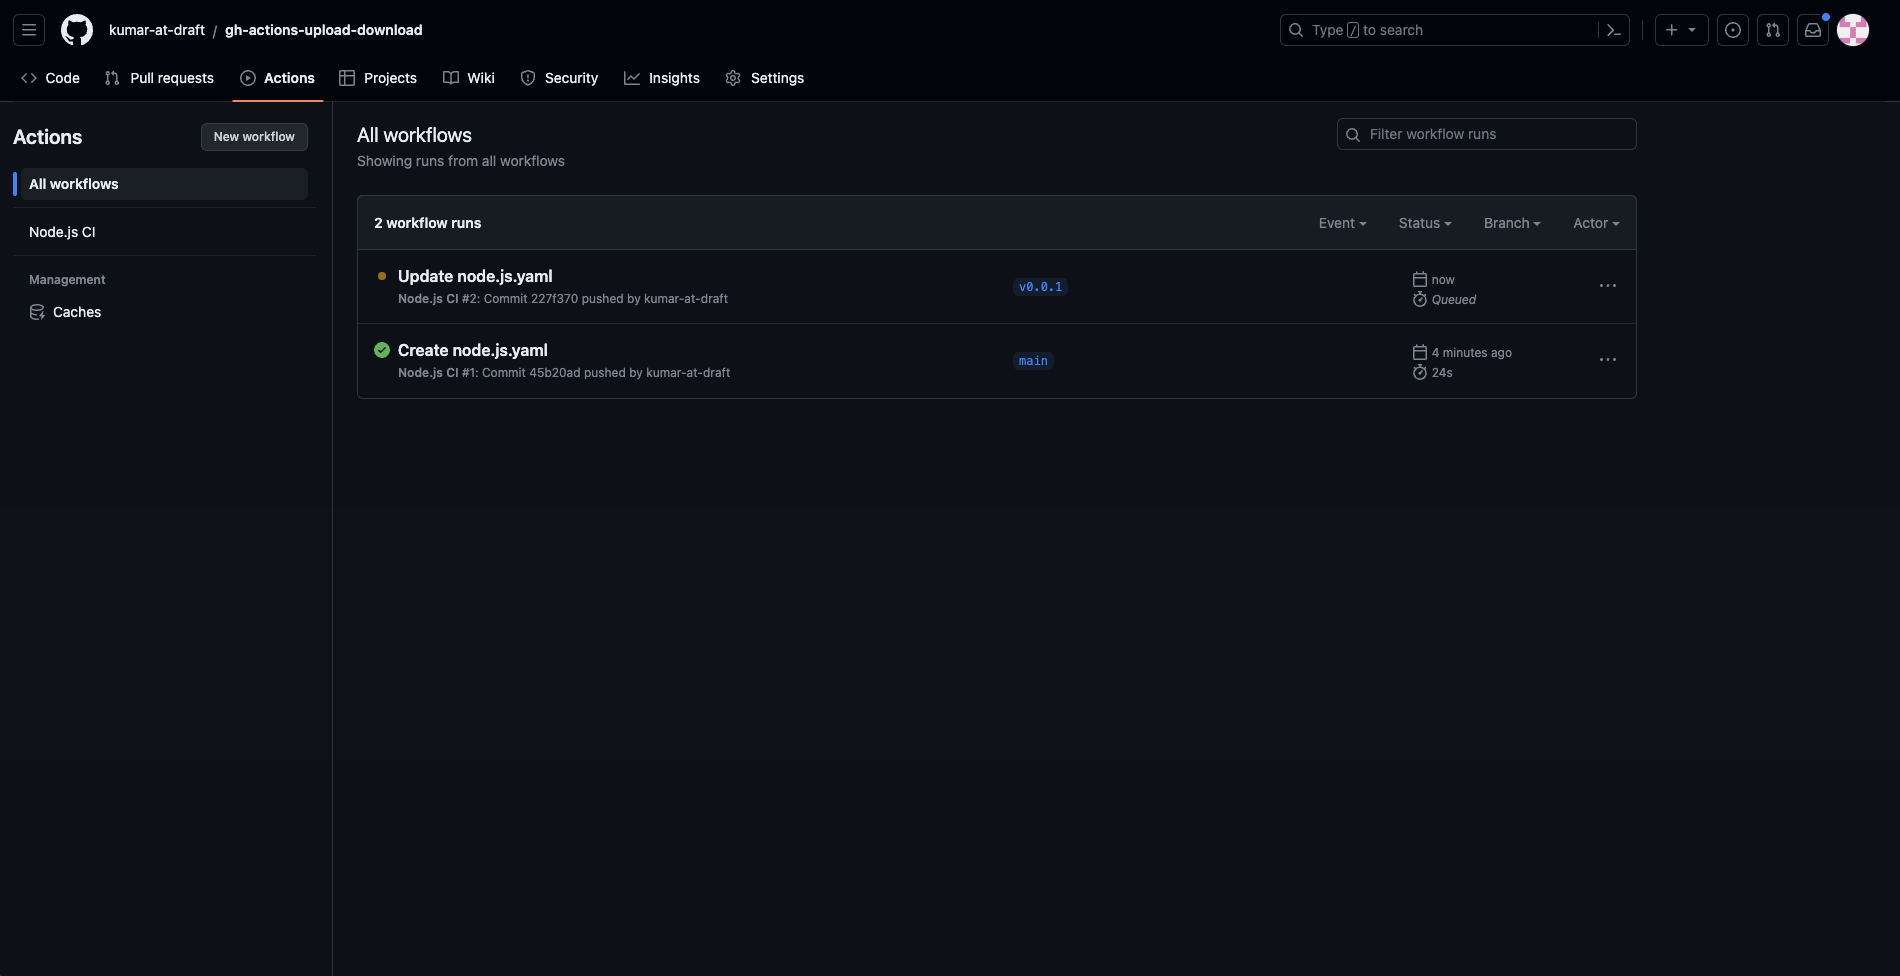
This is what the GitHub Actions runs page will look like when it completes:
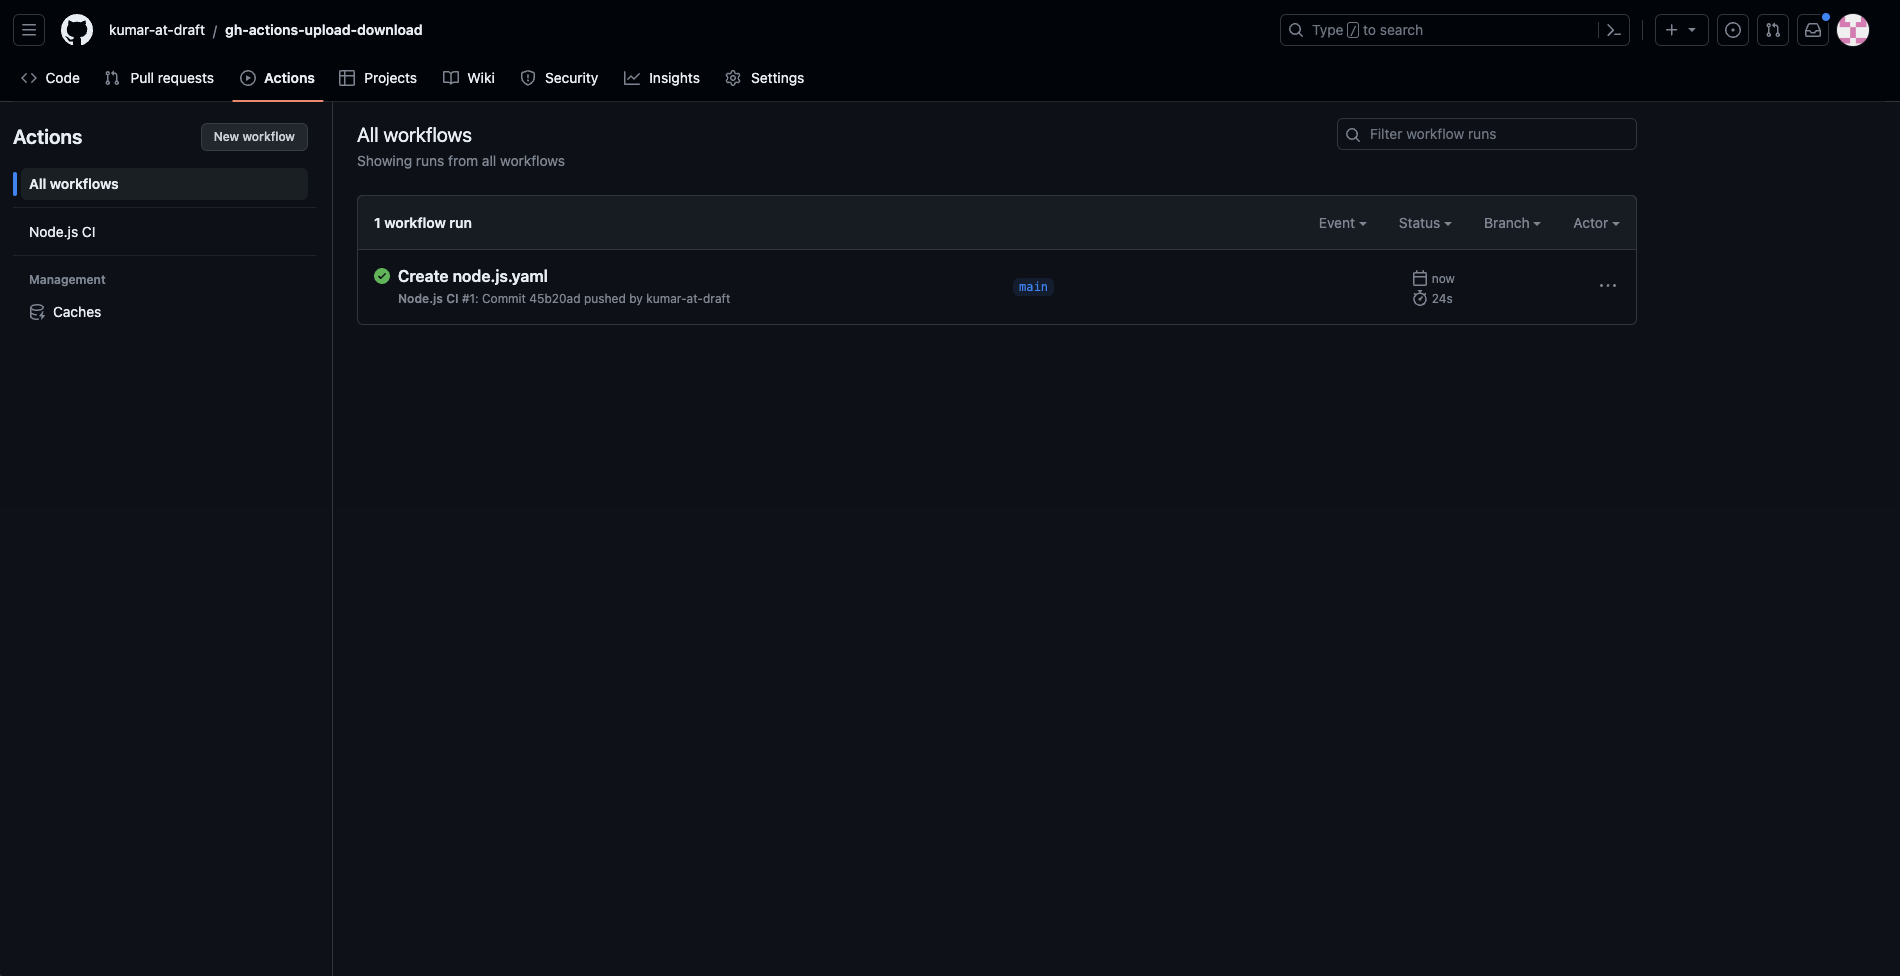
Click on the run to view its details:
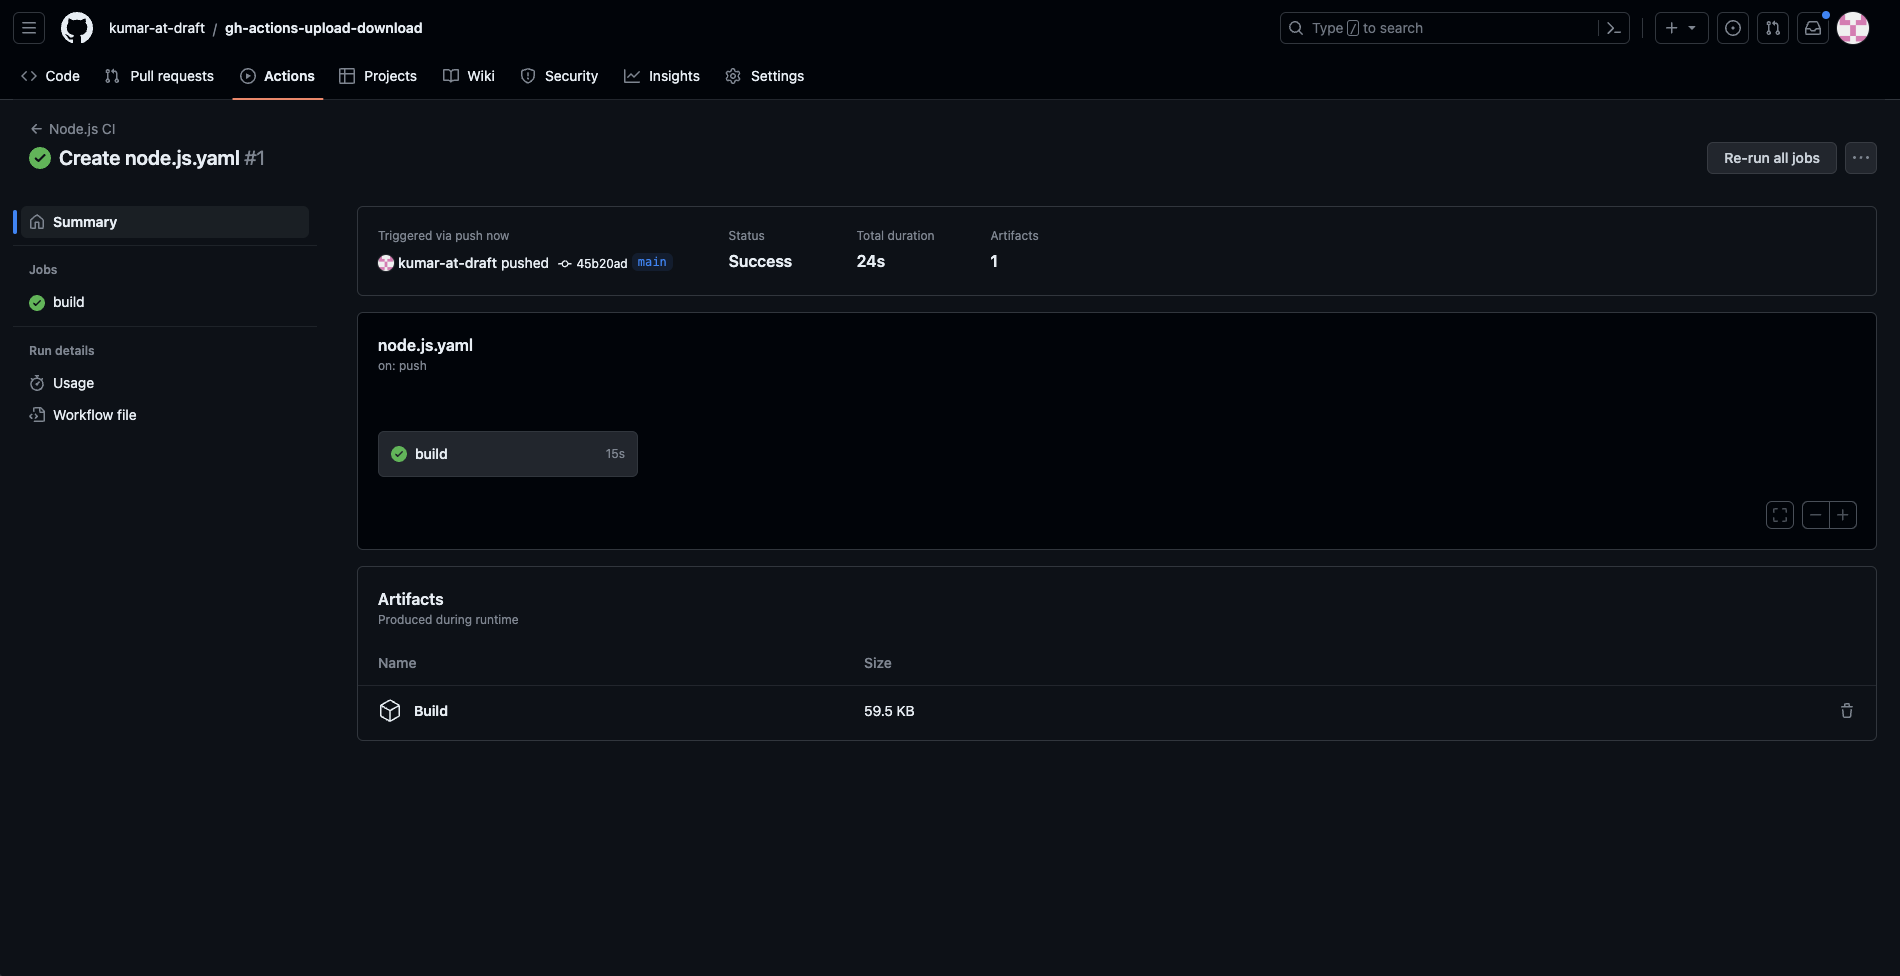
You can view the uploaded artifact at the bottom of the page, under the Artifacts section.
How to Upload and Download Artifacts to Transfer Data Between Runs

Now that you know how to upload artifacts from workflows, the next step is to learn how to download them in the same workflow when needed. In this section, you’ll create a new job that waits for the build job to complete, downloads the build artifacts, and uploads them to a new GitHub release. You’ll also update the workflow to be triggered only when pushing new tags so that releases can be created successfully.
Update the Workflow
To make the workflow run only on pushing new tags, update it to the following:
name: Node.js CI

on:
  push:
    tags:        # Remove the `branches` node and add this one
      - '*'

jobs:
  build:
    runs-on: ubuntu-latest

    steps:
    - uses: actions/checkout@v3
    - name: Use Node.js
      uses: actions/setup-node@v3
    - run: npm ci
    - run: npm run build --if-present
    - uses: actions/upload-artifact@v3
      with:
        name: Build
        path: dist
Now, you’re ready to add the next job that downloads the artifact and creates a release with it.
Download Artifacts Using the actions/download-artifact Action
Create a new job in your workflow with the name release. Here’s what the config for the release job looks like:
 release:
      runs-on: ubuntu-latest
      permissions:
        contents: write

      needs: build

      steps:
        - uses: actions/download-artifact@v3
          with:
            name: Build
            path: build
        - run: zip -r build.zip build/
        - uses: ncipollo/release-action@v1
          with:
            artifacts: "build.zip"
This job makes use of the needs node to define a dependency on the build job, which means that it will not start running until the build job completes running. This lets the artifacts upload successfully before the job tries to download them.
It also defines a permissions node and requires the contents: write permission. This allows the ncipollo/release-action@v1 action to create a release on your GitHub repository successfully.
The job starts by using the actions/download-artifact@v3 action to download the artifact named Build (specified by the name input argument) at the location build (specified by the path input argument).
Please note that the
pathhere does not refer to the path from which the files need to be downloaded. Rather, thepathstores the destination location, where the downloaded files need to be saved.
Neither of those arguments is mandatory. Omitting the name argument means that the action downloads all artifacts that are available for download. Omitting the path argument means that the action downloads the artifacts to the current working directory of the actions runtime.
Once the artifact named Build is downloaded at the location build/, the next step packages it into a ZIP file using the zip command. Finally, the ncipollo/release-action@v1 action is used to upload the build.zip file to a new release created and associated with the tag that triggered this workflow run.
Run the Workflow
Commit this config file to your repo. Since you changed the trigger for the workflow, it will not run on this push. To trigger this workflow, you need to manually create a tag locally and push it to GitHub.
To do that, clone your repo by running the following command (after replacing <username> with your GitHub username):
git clone https://github.com/<username>/gh-actions-upload-download.gitInside the cloned repo, run the following command to create a tag:
git tag -a v0.0.1 -m "Version 0.0.1"Finally, run this command to push the tag:
git push origin v0.0.1This creates a new tag on your forked repo. Go to the Actions tab to see the newly triggered workflow run:
How to Access the Artifacts
You can look into the logs of the two jobs to understand how the upload and download worked. Here are the upload logs from the build job:
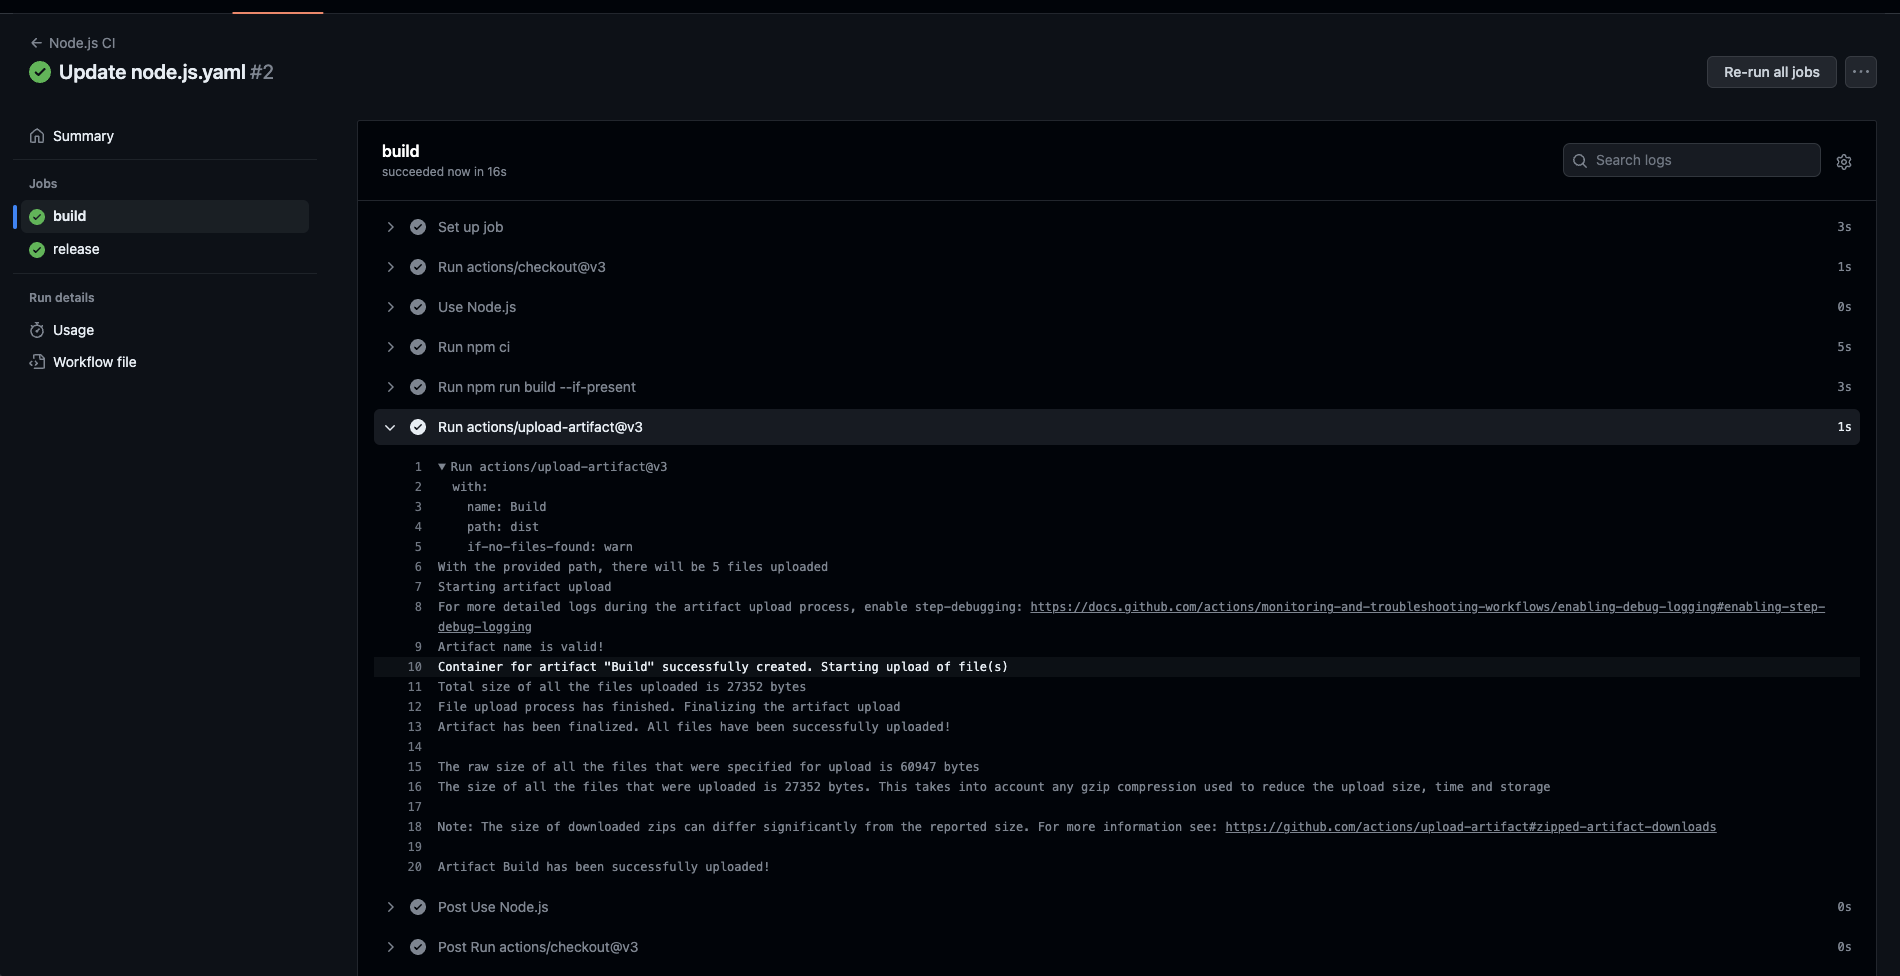
Similar to the previous run, the upload-artifacts job uploads the artifacts to the build/ folder.
Here are the download logs from the release job:
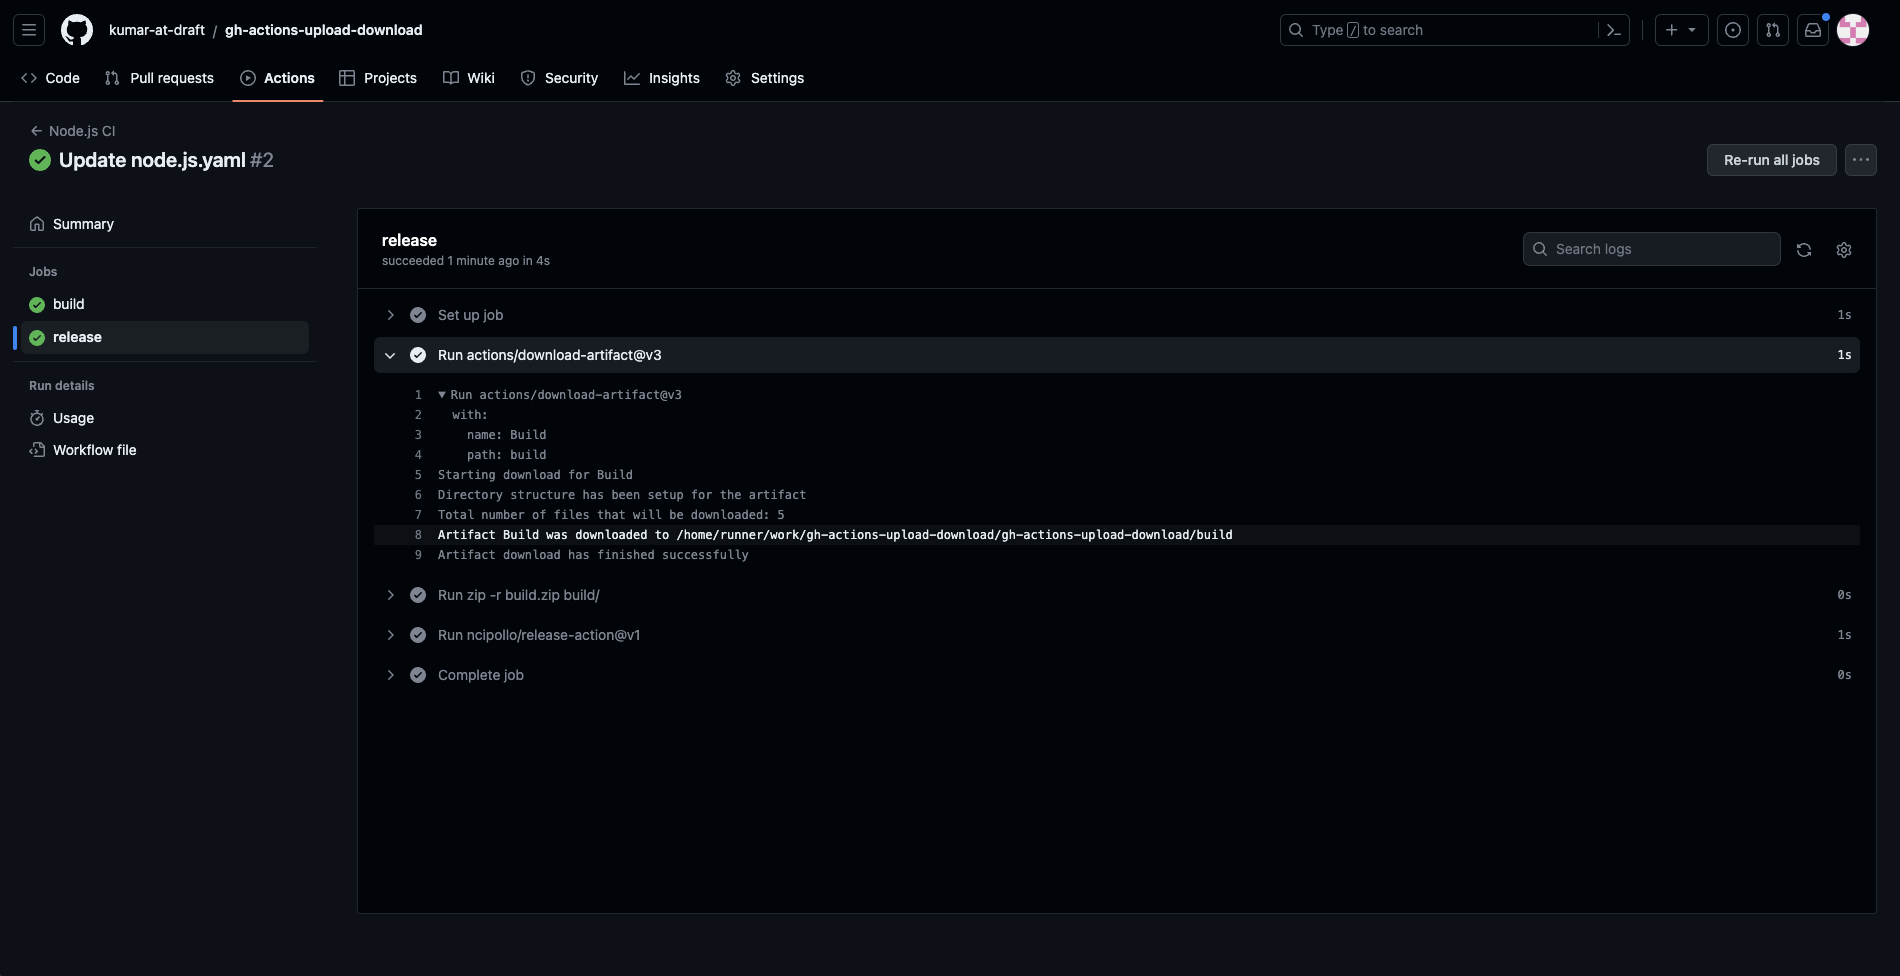
The download-artifacts job first looks for the artifact to download using its name (ie Build) and sets up the directory structure for it (ie creates the destination path build/ where the downloaded files are stored), counts the number of files to download, and then downloads them. You can further explore the logs of the other steps to see how the files were packaged and added to the new release.
You’ll also notice that the uploaded files from the build job are available as artifacts on the workflow run page:
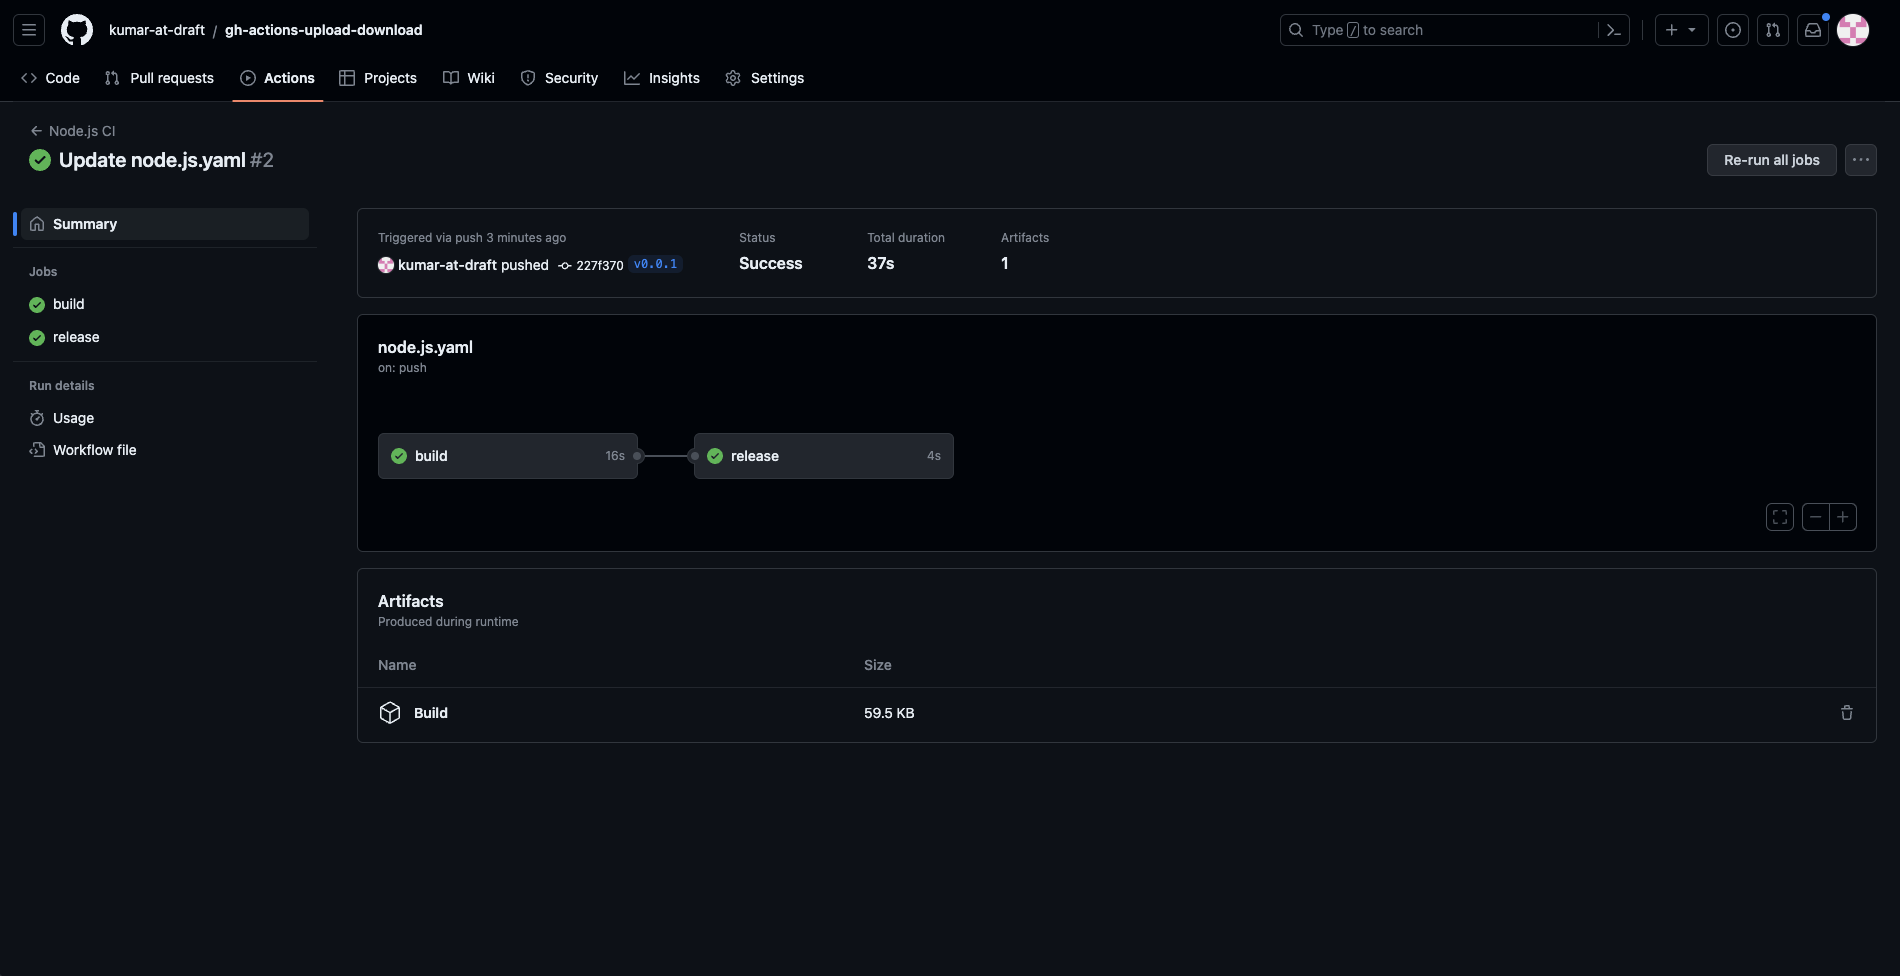
However, the build.zip file created in the release job is not available because it was not uploaded using the upload-artifacts action.
Navigate to the Releases page to see the newly created release with the build.zip file listed in its assets:
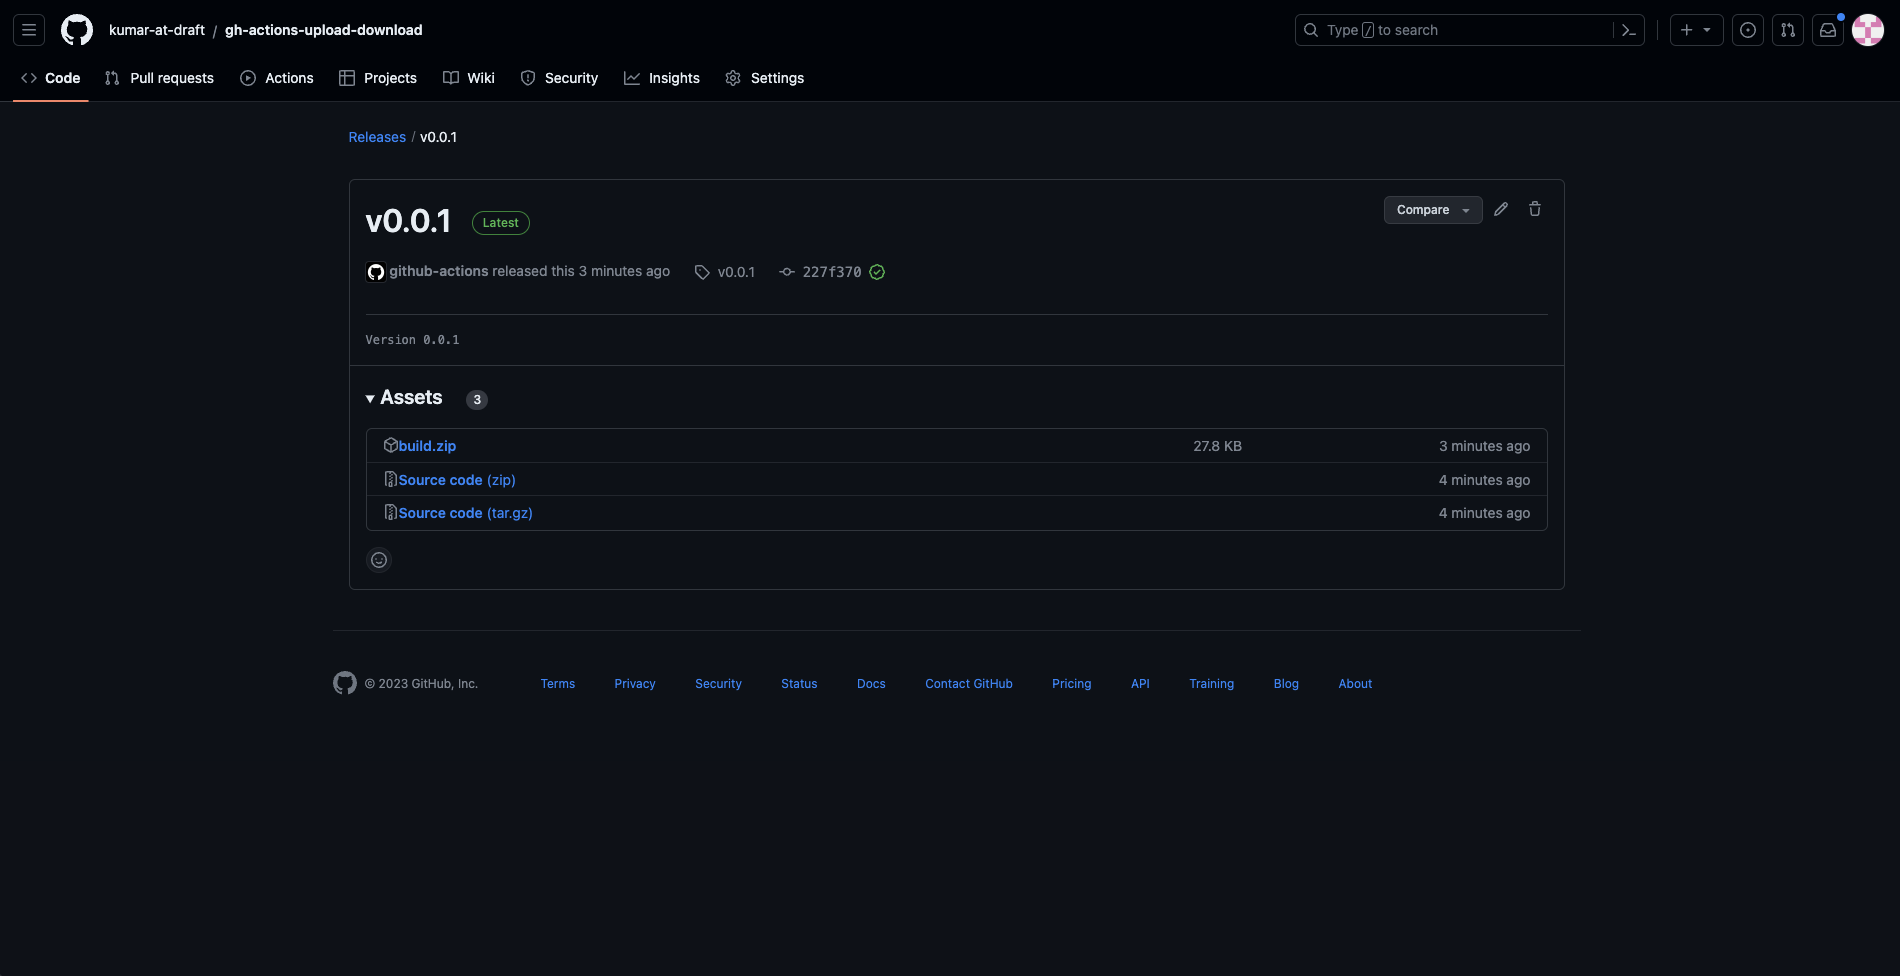
This demonstrates that the artifacts were successfully downloaded from the GitHub runtime and uploaded to GitHub releases. The workflow created in this tutorial can be used as a simple workflow for creating releases on your Node.js-based projects. You can learn more about the upload and download actions from the GitHub documentation (upload-artifacts and download-artifacts).
Conclusion
GitHub Actions is a popular solution for build pipelines. Actions such as upload-artifacts and download-artifacts allow you to easily upload and download build artifacts and other files in between workflows. Additionally, they allow you to collect artifacts as workflow run results as well as use artifacts across multiple jobs in a workflow.
With these new tricks up your sleeve, you’re officially an expert at using GitHub Actions to share and grab those artifacts from your workflows!
Turn your engineering standards into automated guardrails that provide feedback directly in pull requests, with 100+ guardrails included out of the box and support for the tools and CI/CD systems you already have.