Introduction to GitLab's CI/CD for Continuous Deployments
In this Series
Table of Contents
This article provides a guide to setting up GitLab CI/CD. Earthly ensures consistent and portable build environments for GitLab CI/CD users. Check it out.
Among the many benefits of GitLab are how it facilitates CI/CD practices, that is continuous integration and continuous deployment. In CI, frequent software updates are immediately tested as they are added to the codebase. In CD, those changes are automatically uploaded to a repository and then deployed to production.
Creating and managing CI/CD pipelines can be difficult, however. GitLab’s CI/CD tools can simplify this process by helping teams manage software builds, testing, and releases with automatic check-ins at each stage to identify and fix any problems in the development cycle.
This tutorial will explore GitLab’s CI/CD tools and offer some use cases for helping you to automate your deployments.
How Does GitLab Enable CI/CD?
Some of the CI/CD practices that developers mostly rely on are continuously adding their code to a shared repository, running automated tests to confirm the build is ready for release, and automatically deploying every change to the production environment.
Deployment pipelines are central to CD, enabling teams to organize their work so that it’s consistently high-quality and allowing them to better control the process. CI/CD practices answer two questions: “Are we building the right things?” and “Are we building things right?”
GitLab is well designed for CI/CD purposes. The single-application DevOps platform aims to streamline your workflow with security scans, quality tests, compliance checks, review/approval processes, and enhanced team collaboration. Here are some use cases for GitLab:
Managing releases: Release management is a vital part of CI/CD as it helps you to keep a record of your source code history, which makes processes more efficient. Each release should have a title, tag name, and description so you can track it.
GitLab takes a snapshot of data when each release is created and saves this data as a JSON file called release evidence, which contains information such as the name, tag name, description, project details, and reports artifact if it has been included in the .gitlab-ci.yml file.
To view release evidence, on the Releases page, click the link to the JSON file that’s listed under the Evidence collection heading.
Automating releases: GitLab’s automated testing reduces the time you spend on each new iteration of your software, while its automated delivery pipelines allow you to deliver your product to the market as quickly and precisely as possible.
Implementing GitLab’s CI/CD Tools
In order to set up GitLab’s CI/CD tools, you need a project in which to implement them. For this tutorial, you need the following:
A server where your project will be deployed
A repository hosted on GitLab
GitLab runner installed on the server
Create a Droplet for Deployment
Create a Droplet on DigitalOcean for deploying your application. This tutorial uses an Ubuntu server on DigitalOcean. Follow these instructions if you don’t already have an existing server.
Create a Non-Root User
After you have created your server, SSH into your server and create a non-root user. You can follow these instructions . You’ll need to pass super admin privileges to the newly created user and log in as the new user, which in this case will be deploying your application. Use this code:
su - <name of non-root user>Install Dependencies
As the non-root user, you’ll need to install all necessary dependencies for this project to be deployed successfully:
Node and npm (run the command
sudo apt install nodejs npm)Docker
Create SSH Keys
Now you’ll create an SSH key as a non-root user and copy necessary variables into the GitLab CI/CD variables settings.
To generate the SSH key, enter this command:
ssh-keygen -b 4096You don’t need to enter a passphrase when asked for one. You might want to save the newly generated keys in the default location so you just need to click Enter.
After the key has been generated, authorize the keys for the current non-root user by using this command:
cat ~/.ssh/id_rsa.pub >> ~/.ssh/authorized_keysTake note of your private key, since you’ll need it later.
Create a Project on GitLab
First, create a project (or use an existing project) and push it to GitLab. You can also create one directly on GitLab.
Go to gitlab.com, log in, and click on the New Project button at the top right section of the Your Projects tab:

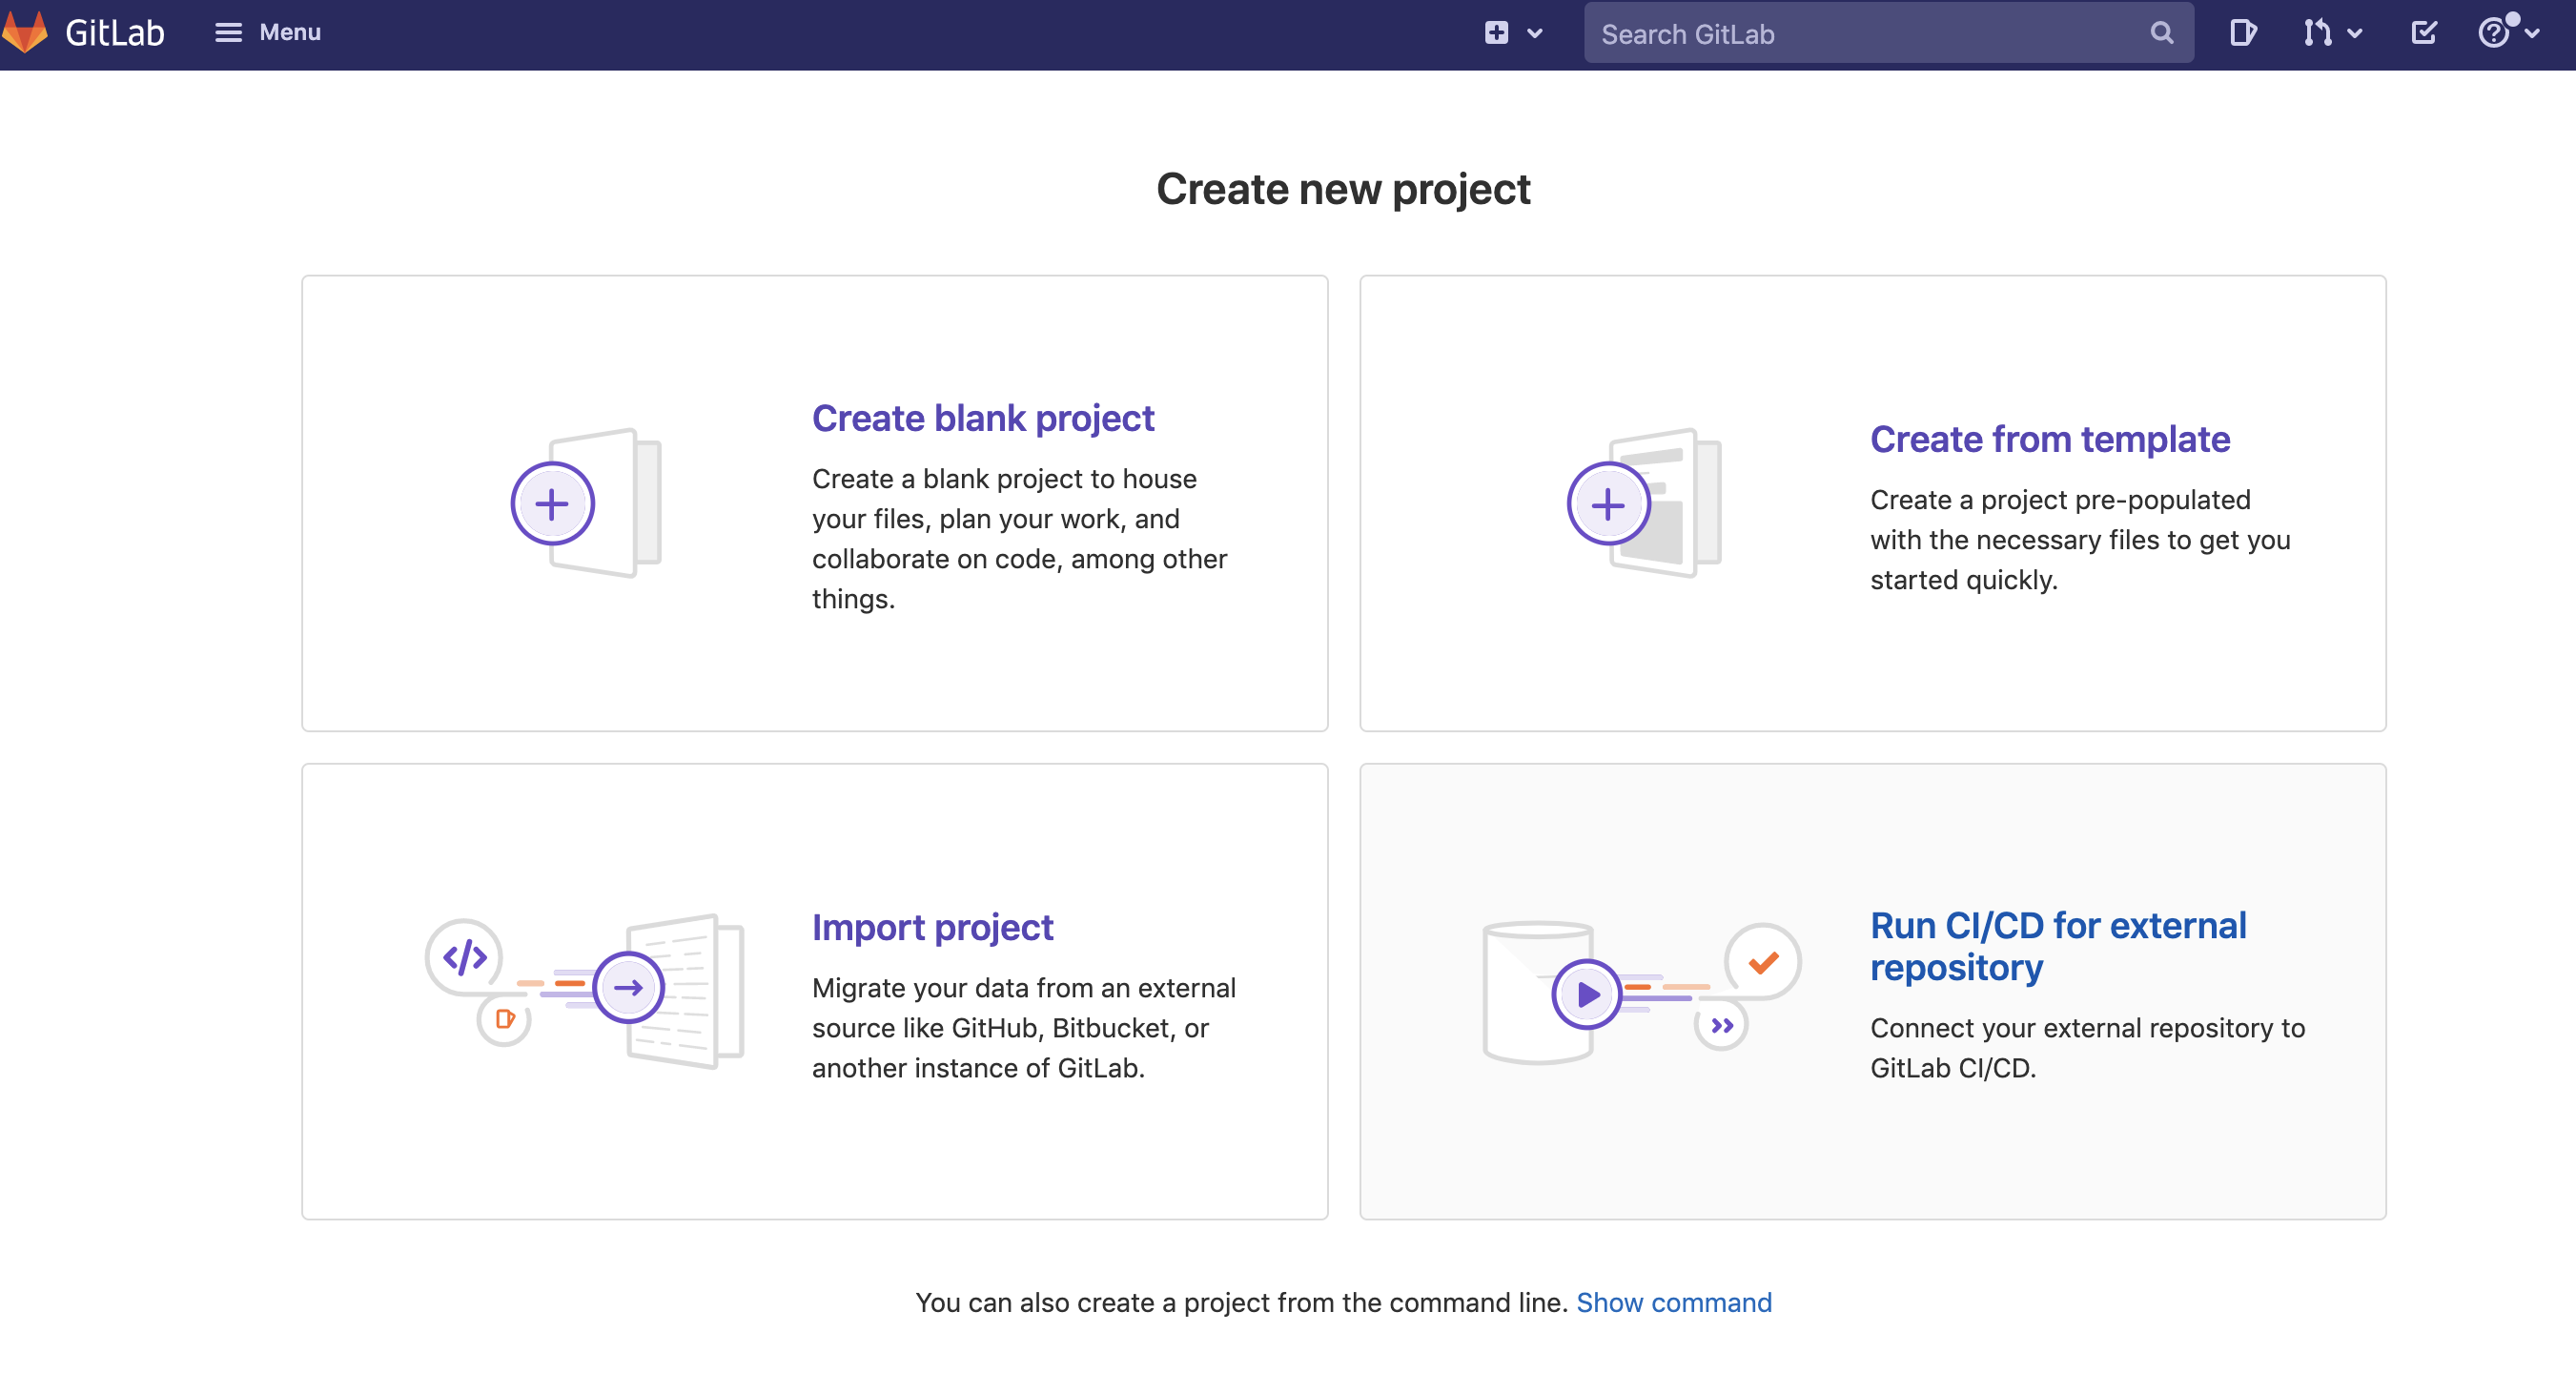
You’ll be taken to the next page to create a project:

Click on Create Blank Project to initialize a new repository.
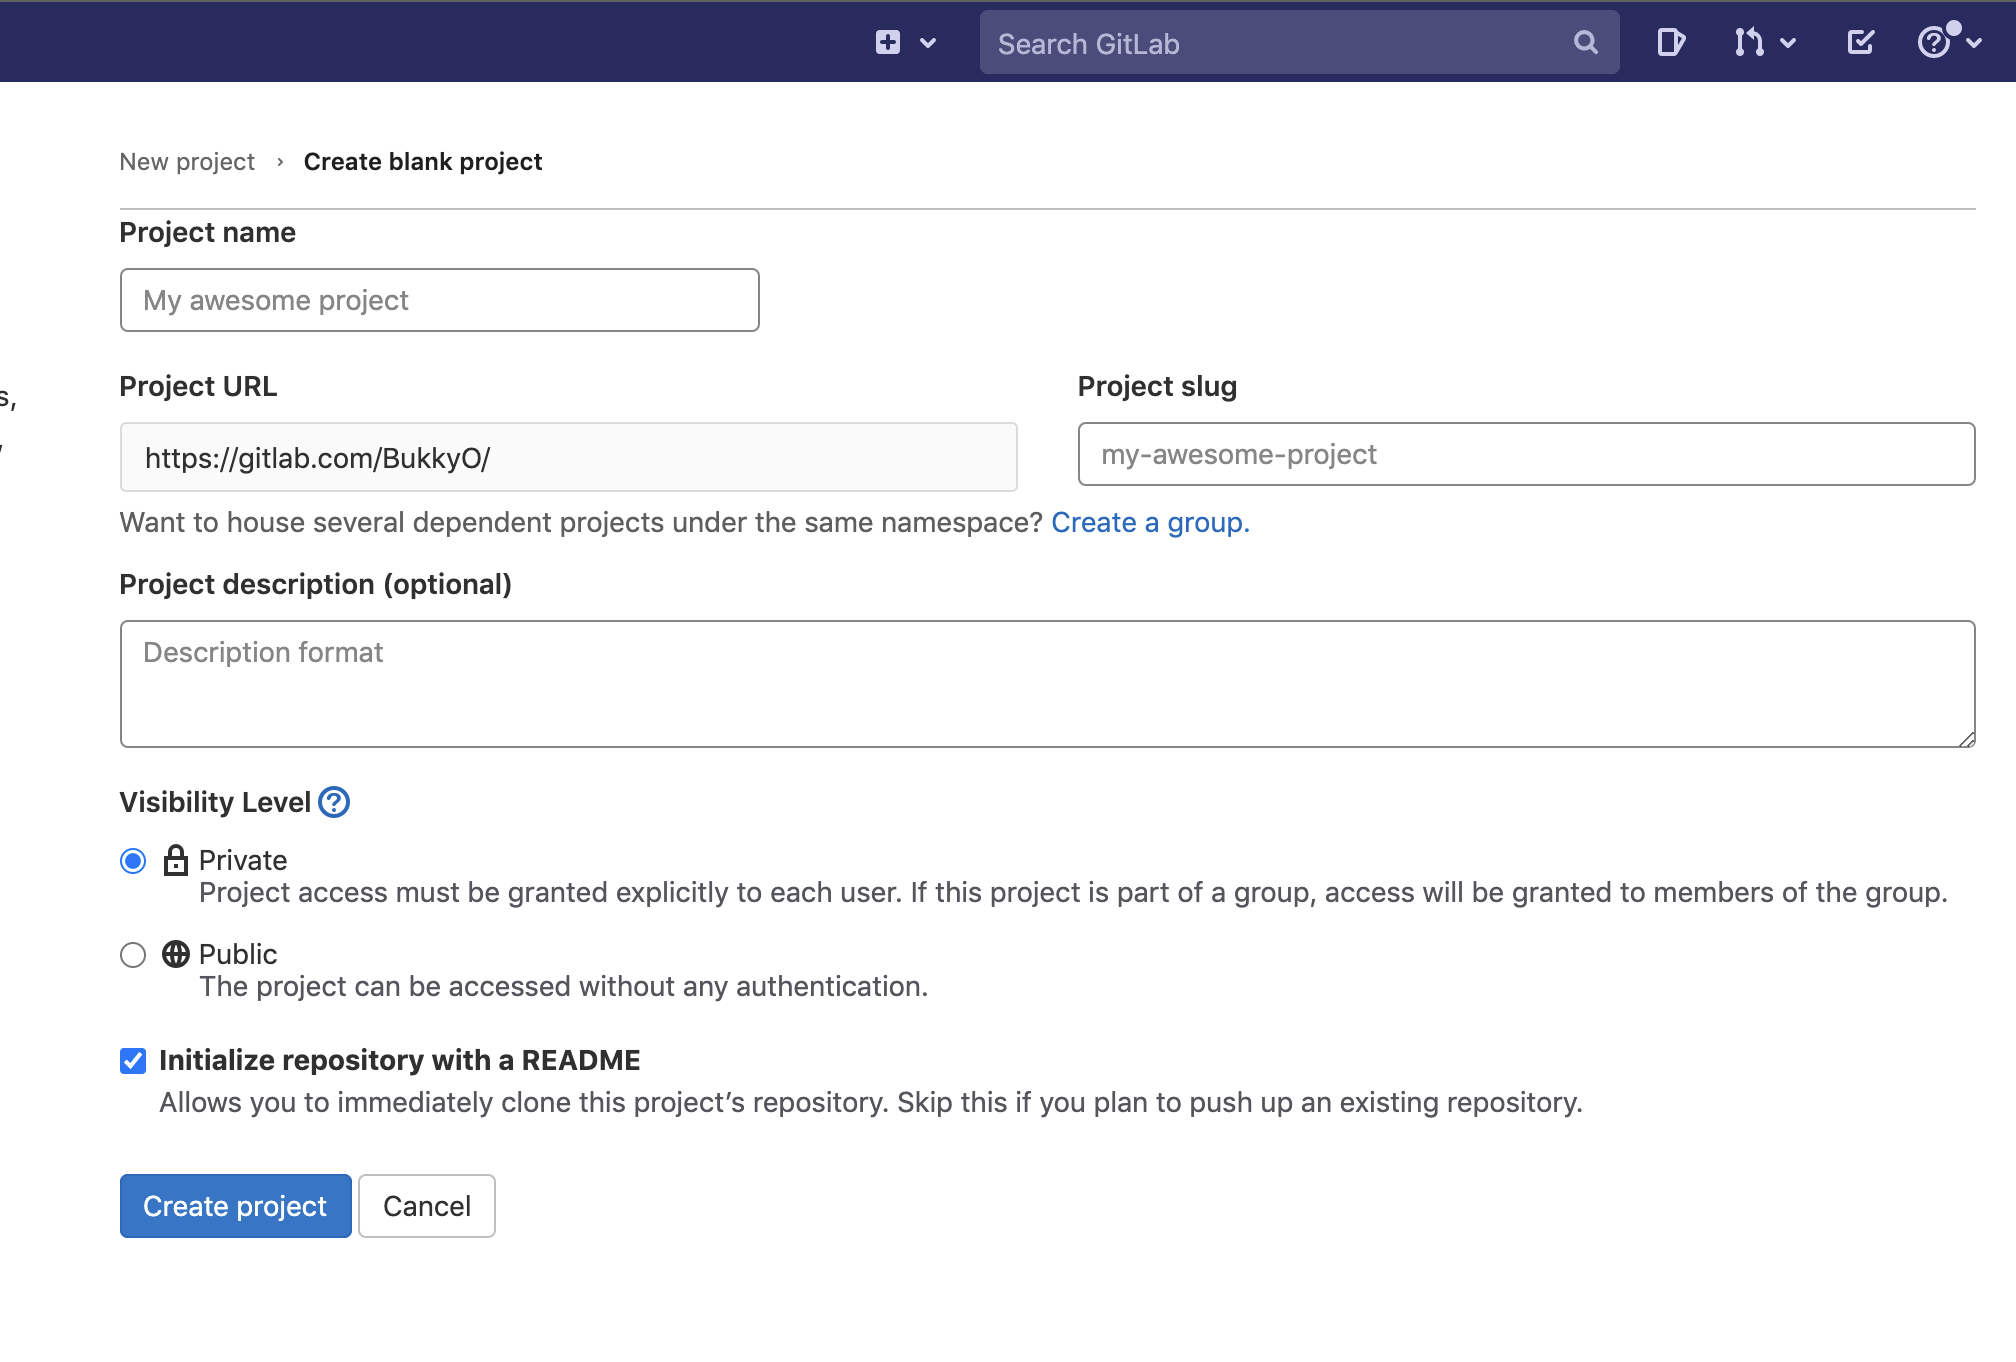
You will be redirected to a page where you’ll fill in details like the project name. You can also set the visibility of your project.

Click on Create Project. You can clone the project directly to your computer.
Add Variables To GitLab
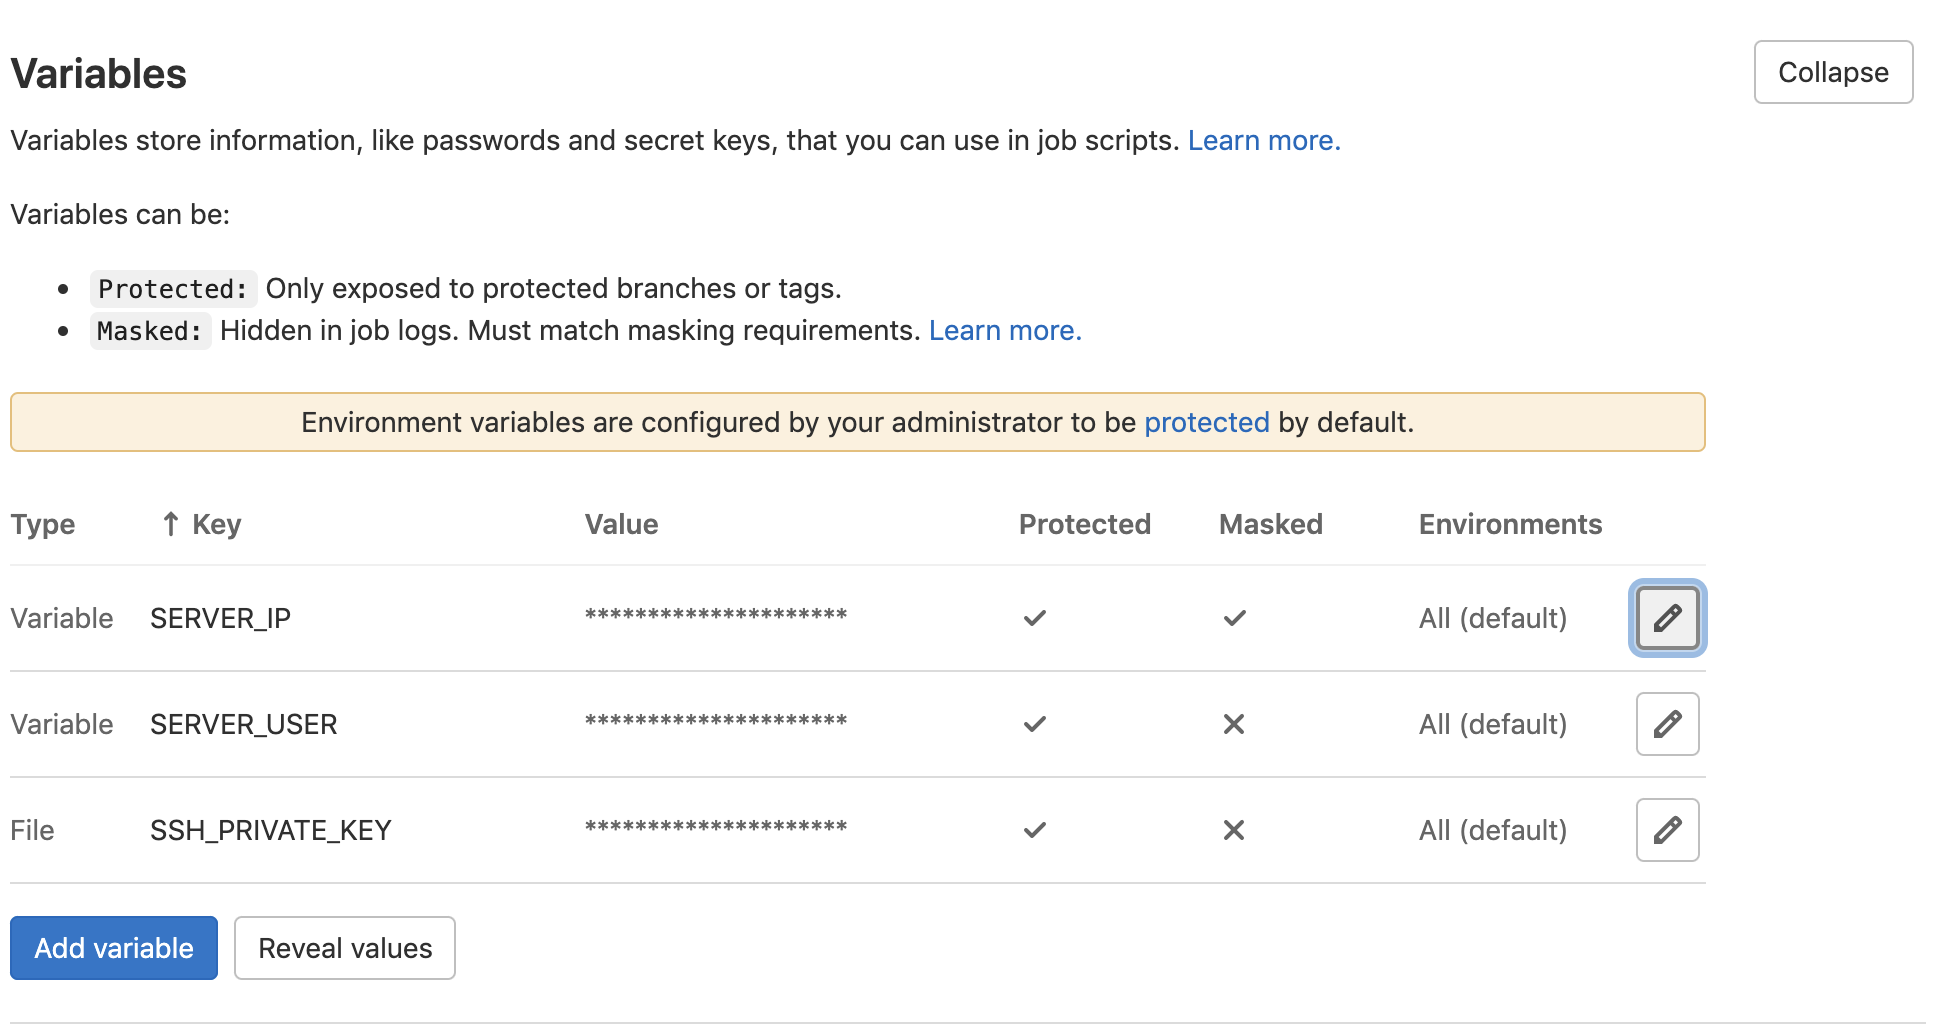
You’ll need to save some required variables on your GitLab repository that will enable GitLab to access your server. The variables are:
- Server username: This is the name of the non-root user
- Server IP address: This is the IP address of the server
- SSH keys: This is the private key that was generated on the server by the non-root user
To add these variables, on the left pane of your repository hover on Settings and click on CI/CD. Expand the Variables section and add the keys.
Here is how it should look:

Set Up a GitLab Runner
If you’ve created a new project, you need to register a GitLab Runner, or the agent that will run your code. If you’re using an existing project, you might already have a runner registered. Here’s how to check:
On the right hand of the project dashboard, go to Settings, click on CI/CD, and expand Runners. If there is a runner with a green circle next to it, then you have a runner available.
In order to deploy your application, your runner must be registered on the server by following these instructions.
Make sure to be logged in as a non-root user while doing this.
Code and Test
Now it’s time to write the code needed to be pushed and deployed. For this tutorial, you’ll write a small piece of code for testing to ensure that the CI/CD pipeline works as expected.
Use the entry file of a Node.js application and test the entry point of the application. First, make sure that Express has been installed on the project.
To run the test, you need to have Mocha and Chai installed as dependencies in the project.
In the index.js file of your project setup, copy and paste the code below:
const express = require('express');

const app = express();
const port = 3000 || process.env.PORT;

app.get('/', (req, res) => {
    res.status(200).json({ message: 'Hello World of CI/CD' })
})

app.listen(port, () => {
    console.log(`App started on port ${port}`)
});

module.exports = app;
Create a test.js file and copy and paste the following code into it:
const chai = require("chai");
const chaiHttp = require("chai-http");
const { expect } = require("chai");
const app = require('./index');

chai.use(chaiHttp);

describe('Testing Entry Suite', () => {
    it('Test the entry point', (done) => {
        chai.request(app)
            .get('/')
            .set('Accept', 'application/json')
            .end((err, res) => {
                expect(res.status).to.have.equal(200);
                expect(res.body.message).to.be.equal('Hello World of CI/CD');
                done();
            });
    });
});
This is a basic test to check that when a user enters the application, hello world is returned along with a status code of 200.
Run this code locally and ensure that it passes.
Create a YAML Configuration File
Create a file named .gitlab-ci.yml in the root of the project folder to define your CI/CD jobs.
When you create this file, it will be detected by GitLab once a push is made.
Below is a snippet of what your .gitlab-ci.yml file should look like:
image: docker:stable

cache:
  paths:
    - node_modules/

stages:
  - build
  - deploy

variables:
  TAG_LATEST: $CI_REGISTRY_IMAGE/$CI_COMMIT_REF_NAME:latest
  TAG_COMMIT: $CI_REGISTRY_IMAGE/$CI_COMMIT_REF_NAME:$CI_COMMIT_SHORT_SHA

build:
  image: docker:latest
  stage: build
  services:
    - docker:dind
  script:
    - echo "Starting to build"
    - docker build -t $TAG_COMMIT -t $TAG_LATEST .
    - docker login -u gitlab-ci-token -p $CI_BUILD_TOKEN $CI_REGISTRY
    - docker push $TAG_COMMIT
    - docker push $TAG_LATEST

deploy:
  image: alpine:latest
  stage: deploy
  script:
    - echo "Starting to deploy"
    - chmod og= $SSH_PRIVATE_KEY
    - apk update && apk add openssh-client
    - ssh -i $SSH_PRIVATE_KEY -o StrictHostKeyChecking=no $SERVER_USER@$SERVER_IP "docker login -u gitlab-ci-token -p $CI_BUILD_TOKEN $CI_REGISTRY"
    - ssh -i $SSH_PRIVATE_KEY -o StrictHostKeyChecking=no $SERVER_USER@$SERVER_IP "docker pull $TAG_COMMIT"
    - ssh -i $SSH_PRIVATE_KEY -o StrictHostKeyChecking=no $SERVER_USER@$SERVER_IP "docker container rm -f my-project || true"
    - ssh -i $SSH_PRIVATE_KEY -o StrictHostKeyChecking=no $SERVER_USER@$SERVER_IP "docker run -d -i -p 3000:3000 --name my-project $TAG_COMMIT"
  environment:
    name: production
    url: http://$SERVER_IP
  only:
    - main
Here is a quick overview of how each part works to aid the deployment process:
The image defines the Docker image to be used.
The cache defines the file or list of files that should be cached between subsequent runs.
In the variables section, you’re creating two tags for the Docker image. The
TAG_LATESTvariable will add the latest tag to the latest built Docker image, while theTAG_COMMITvariable will use the first eight characters of the commit SHA to tag the Docker image.The stages define the order of jobs that would be in the pipeline (note that if no stage is specified, then this defaults to
test). Here, there are two stages of the build and deploy as seen above.
The Build Stage Explained
- The image in this build stage is a Docker image.
- The stage assigns the current job to build.
- The service used here is
docker:dind, which means Docker-in-Docker. This allows you to use the Docker executor to build your Docker image. - The script:
- Outputs “Starting build” to the console
echo "Starting to build"- Builds the Docker image using your Dockerfile
docker build -t $TAG_COMMIT -t $TAG_LATEST .- Logs the Docker image into the project’s container registry
docker login -u gitlab-ci-token -p $CI_BUILD_TOKEN $CI_REGISTRY- Pushes the image with the variables specified at the top of the file to the container registry
    docker push $TAG_COMMIT
    docker push $TAG_LATEST
The Deploy Stage
- The image used at this stage is an Alpine image, which is a minimal Docker image based on Alpine Linux.
- The stage assigns the current job to deploy.
- The script:
- Outputs “Starting to deploy” to the console
echo "Starting to deploy"chmodis used to changes access of all other users and groups except for the owner of the file
chmod og= $SSH_PRIVATE_KEY- The third command of the script updates the Alpine package manager and installs the openssh-client
apk update && apk add openssh-client- After that, the Docker image is pulled, any existing container with the same name is removed, and the new one is started.
    ssh -i $SSH_PRIVATE_KEY -o StrictHostKeyChecking=no $SERVER_USER@$SERVER_IP "docker login -u gitlab-ci-token -p $CI_BUILD_TOKEN $CI_REGISTRY"
    ssh -i $SSH_PRIVATE_KEY -o StrictHostKeyChecking=no $SERVER_USER@$SERVER_IP "docker pull $TAG_COMMIT"
    ssh -i $SSH_PRIVATE_KEY -o StrictHostKeyChecking=no $SERVER_USER@$SERVER_IP "docker container rm -f my-project || true"
    ssh -i $SSH_PRIVATE_KEY -o StrictHostKeyChecking=no $SERVER_USER@$SERVER_IP "docker run -d -i -p 3000:3000 --name my-project $TAG_COMMIT"
Now that you understand the flow of the YAML and Docker files, you need to push your code to your GitLab repository.
Brief Overview of Deployment
When your changes have been pushed, GitLab automatically runs the script in the file created above with the help of the runner that you registered. You can view the pipeline by navigating to the CI/CD panel on GitLab > pipelines.
You should see a list of your pipelines. Click on the topmost pipeline to get more details. Here is how it looks:

There are two stages involved in this deployment. The first stage was the build stage; when it was successful, it displayed “Passed” on the status button. While the branch gets merged, the deploy job starts to run, since you stated in the job script to run the deploy stage only when the branch is merged into the main branch.
If your job status is stuck, make sure your runner was properly set up.
Code in Action
Below is a screenshot of the code deployed on an Ubuntu server using DigitalOcean:

There is another deployment option to consider.
Auto DevOps
This is a collection of pre-configured features and integrations that enables faster software delivery processes. All you need to do is enable Auto DevOps in your project settings. Some of its features include:
- Auto build
- Auto test
- Auto deploy
- Auto monitoring
- Providing security
Conclusion
GitLab is well regarded in the software development industry for its fast setup and deployment tools. As this tutorial has demonstrated, GitLab can offer a lot of help in automating your deployment workflow.
Another tool that can help you is Earthly, which allows users to automate all their builds using containers. It integrates with GitLab to provide faster builds and better collaboration among team members. Earthly makes your build self-contained and reproducible, and it ensures that your build can run locally as well as in your CI.
You can learn more about Earthly by reading the Learn the basics guide.
Earthly Lunar: Monitoring for your SDLC
Achieve Engineering Excellence with universal SDLC monitoring that works with every tech stack, microservice, and CI pipeline.


