Setting up Your First AWS Lambda Deployment for a Node Application

In this Series
Table of Contents
AWS Lambda is a cloud computing solution that allows you to execute your backend applications without having to worry about server configurations or maintenance.
It can be used for a variety of tasks, including sending and receiving emails using AWS SES (Simple Email Service), uploading files to Amazon S3, and managing databases such as DynamoDB.
In this article, you’ll learn how to leverage one of the most common use cases for Lambda services by creating and deploying a simple Lambda Node.js app that uses SES to send emails.
What Is AWS Lambda?
AWS Lambda is an event-driven computing service offered by Amazon that enables developers to run code without having to worry about managing servers, which Lambda handles for you. You pay only for the time you use, and Lambda can lower the number of development and maintenance jobs you need, making it a more cost-effective solution for your backend.
Here are some of the benefits Lambda offers:
- It allows the service to scale for you automatically.
- It enables you to establish access control and permissions for your backend services.
- It supports languages including Python, Ruby, Go, Java, and Node.js.
- It allows you to run scripts to automatically discover unused computing resources using CloudTrail, a service that tracks and records your AWS API usage.
- You can create an event-driven app to track your costs and consumption across AWS services.
Lambda has excellent support for Node.js. The V8 engine and runtime environment starts quickly in AWS Lambda. This means you don’t need a server or container running in order to do something like sending emails.
This tutorial will show you how to construct and integrate a service with AWS Lambda that sends emails using SES, which you’ll build and integrate into a Node.js app.
Requirements
Here is what you’ll need to begin:
- NodeJs: to run an AWS Lambda function with JavaScript, you must have at least Node.js version 10.x. Install here.
- GitHub account and Git: you’ll need both to set up a build and deployment pipeline.
- AWS account: for credentials to access AWS services and adjust permissions and access control. Create an account here.
- AWS CLI: the official command line for AWS SDK management and installation can also be utilized to distribute your application. To install, check here. It will be required in order to use the AWS SDK client and acquire access to the SES module.
- AWS SDK for JavaScript: the developer kit for building, managing, and deploying AWS services with JavaScript and Node.js.
- Serverless Framework: used to deploy and monitor serverless apps on AWS Lambda.
Setting Up
We will be using serverless.com, which is a tool that allows you to deploy, maintain, test, and debug your AWS lambda functions and apps. The goal of using this tool is to make it as simple as possible to set up the deployment and ongoing integration of your serverless functions.
If you don’t have an account yet, go ahead and create one. Next, open your dashboard, and click on the button that says create a new app, and The interface will appear, with various options to pick from.
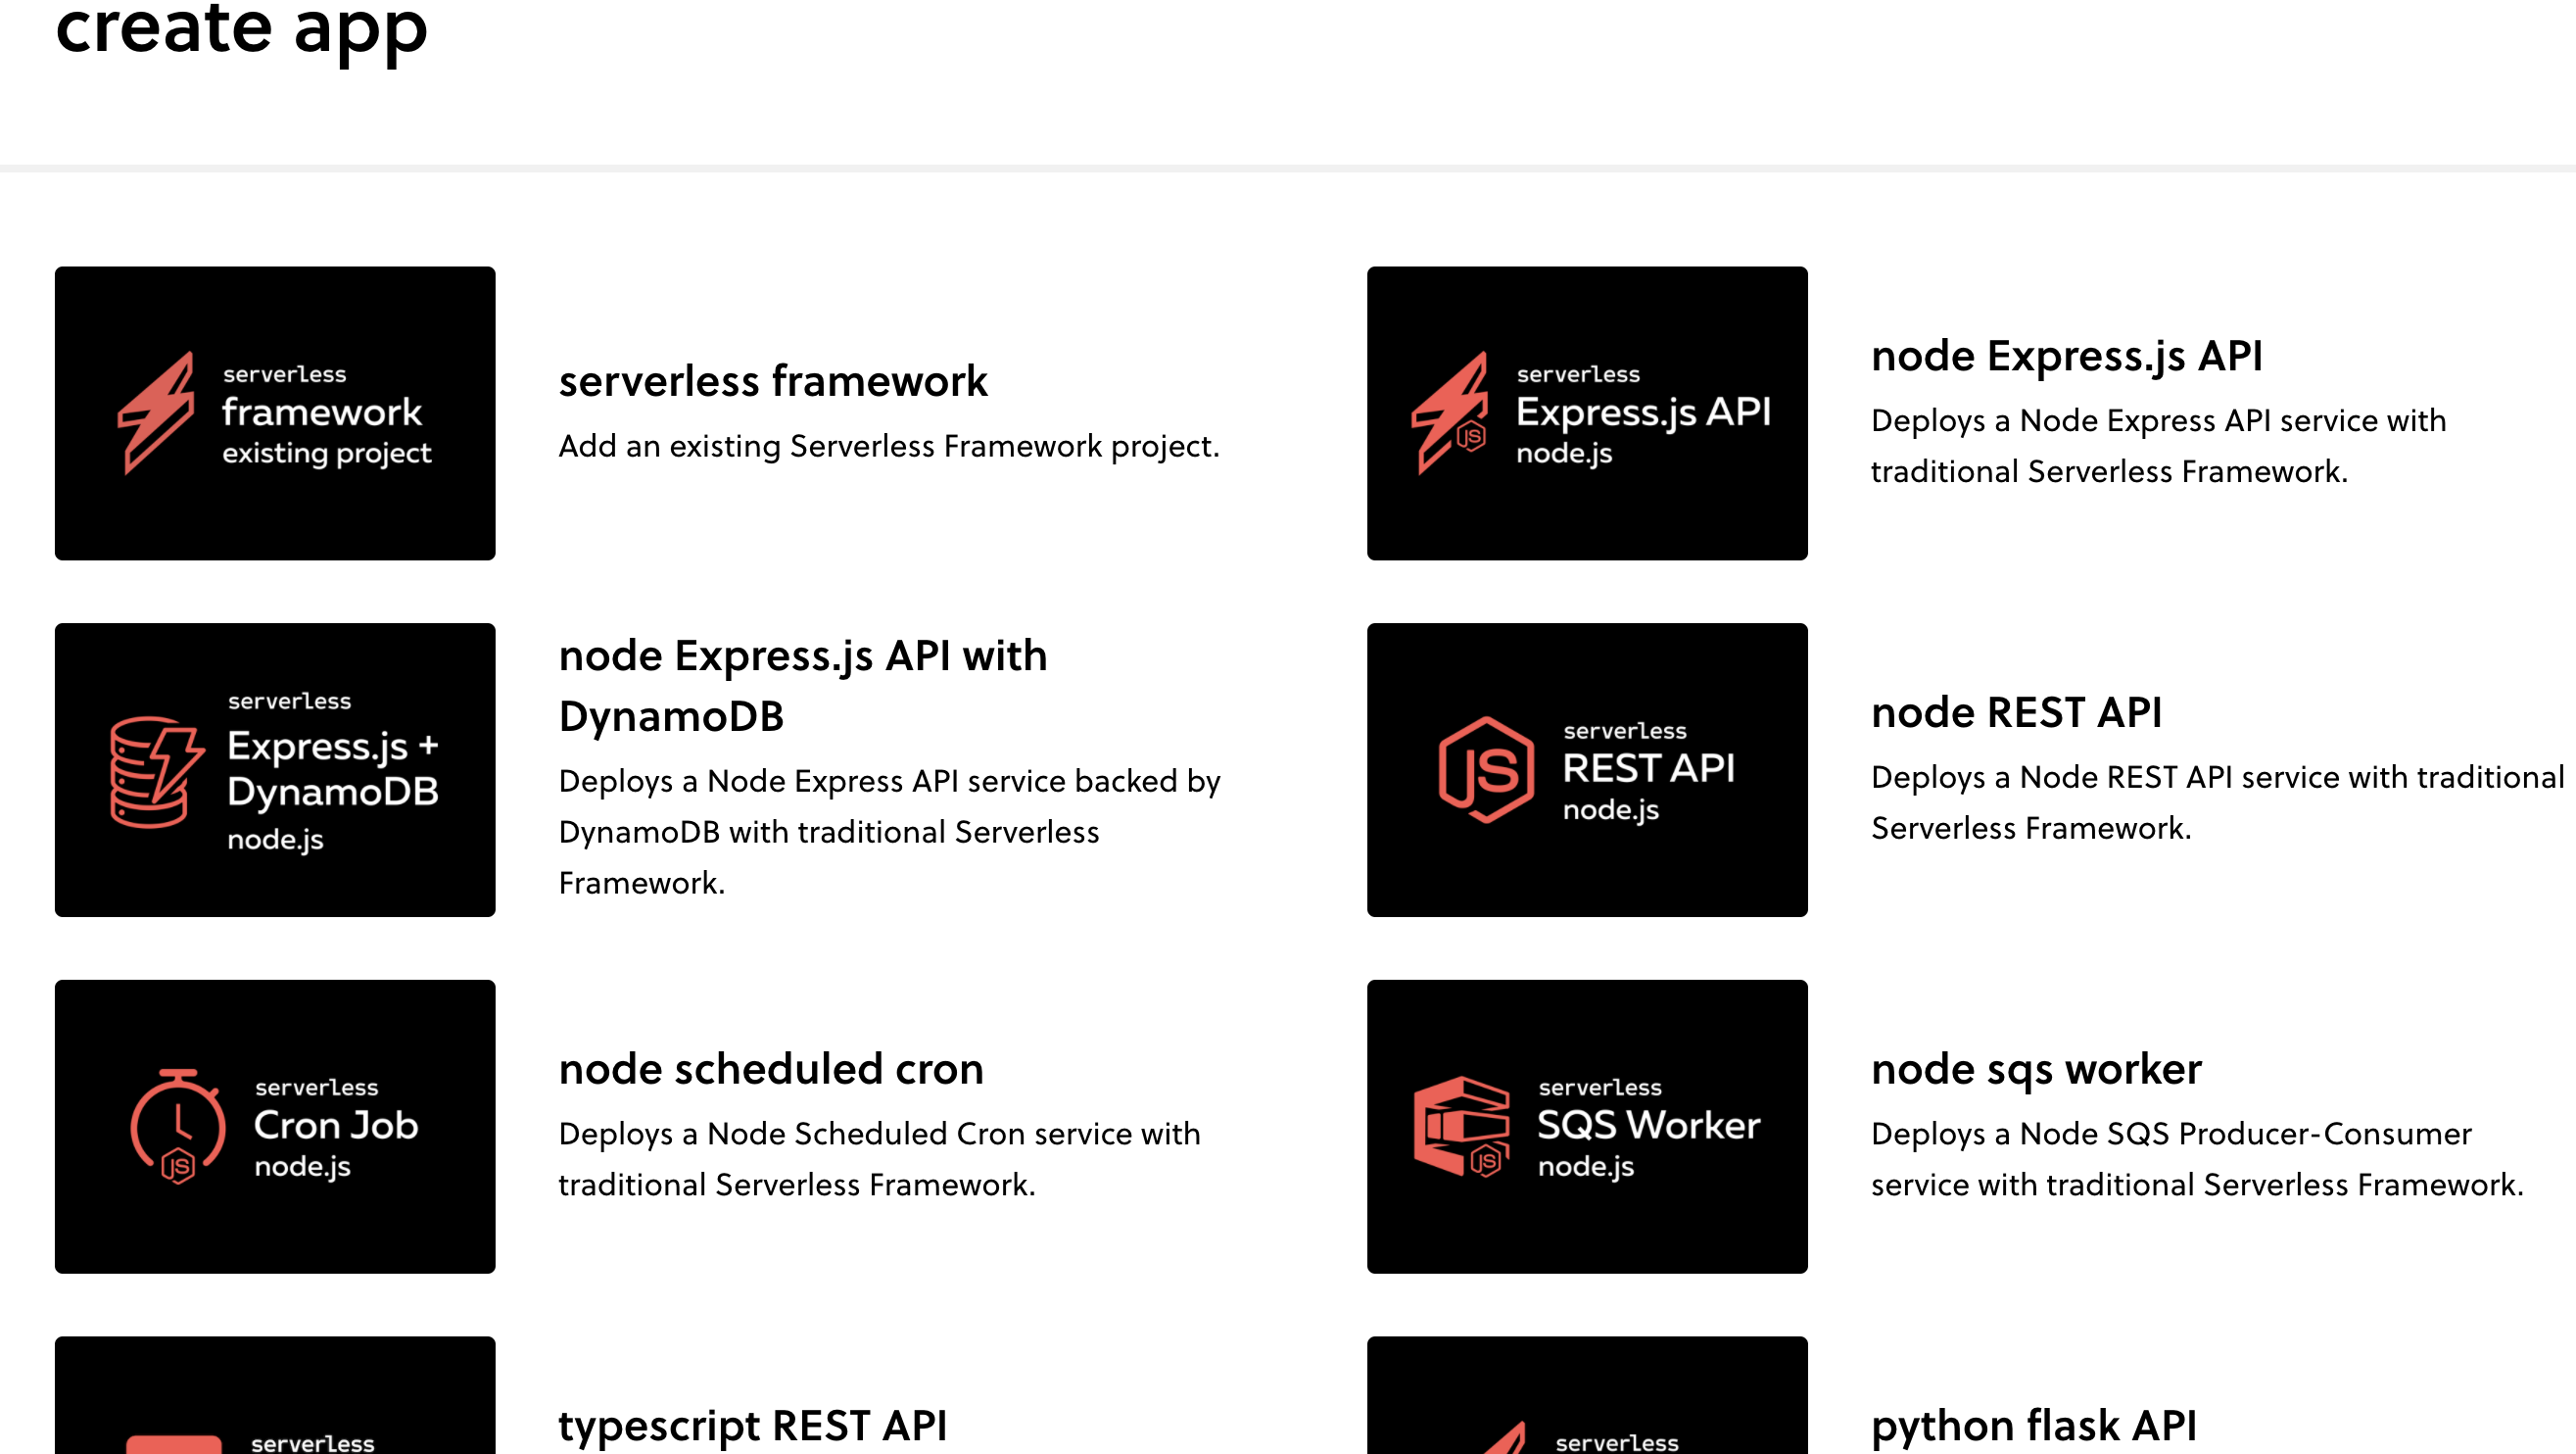
Select Node Express.js API. A Node.js app and credentials will be automatically generated. You will be prompted to authenticate with your AWS account, or you can enter your AWS credentials:

The Lambda function should automatically appear on your AWS account. Go to the Lambda section > functions. You’ll see the following:

Download the app and install it locally. You’ll be using the serverless CLI to make adjustments.
If you haven’t installed the serverless CLI, you can run npm by running this command line:
npm install -g serverlessCopy and Clone Your App
Using the serverless CLI, type serveless init [app id] into your terminal, which will copy the source code. Once you have the app ID that was generated when you first created the app, run the command line on your local terminal.
Use this code in the handler.js file for the simple Lambda/Node.js app that you’ll deploy to AWS Lambda:
const AWS = require('aws-sdk')

AWS.config.update({
  accessKeyId: process.env.AWS_ACCESS_KEY_ID,
  secretAccessKey: process.env.AWS_SECRET_ACCESS_KEY,
  region: 'us-east-1'
})
const AwsInstance = new AWS.SES({apiVersion: '2010-12-01'})
module.exports.sendMail = async (event, context, callback) => {
  const {toEmailAddress, sourceAddress, subject, body} = event.body
  const params = {
    Destination: {
      /* required */
      CcAddresses: [
        //   'info.said.dev@gmail'
        /* more items */
      ],
      ToAddresses: toEmailAddress
    },
    Message: {
      /* required */
      Body: {
        /* required */

        Text: {
          Charset: 'UTF-8',
          Data: body
        }
      },
      Subject: {
        Charset: 'UTF-8',
        Data: subject
      }
    },
    Source: sourceAddress /* required */
    //   ReplyToAddresses: [
    //      'EMAIL_ADDRESS',
    //     /* more items */
    //   ],
  }

  const response = await AwsInstance.sendEmail(params).promise()

  callback(response)
}
The code is a function that receives four parameters (ToEmailAddress, sourceAddress, body, subject) that you need to call a sendMail function via an endpoint. You’re using SES by the AWS SDK to send emails.
Setting up the environment variable is simple: go to the AWS console, click your function, then go to setting > environment variables, as shown in the image below:

When you select Edit, a new screen will appear where you can input your variable keys and values.

The serverless.yml file will look like the following:
org: saidhhyn
app: my-aws-node-express-api-app
service: my-aws-node-express-api-app

frameworkVersion: '2'

provider:
  name: aws
  runtime: nodejs12.x
  lambdaHashingVersion: '20201221'

functions:
  sendMail:
    handler: handler.sendMail
    events:
      - http:
          path: sendMail
          method: post
          cors: true
          response:
            headers:
              Access-Control-Allow-Origin: "'*'"
The values info we used in the example above are just mock values; when writing your own function, be sure to include your information instead.
To deploy your app, run the serverless deploy command line inside the app directory.
Feel free to make changes depending on your needs. You can see the full source code on GitHub.
Now that your Lambda function is deployed using serverless, you’ll want to make sure that the function is working and that you can test it before deploying to production.
Testing the Lambda Function
Serverless.com provides a friendly environment for testing. Under the Interact tab on your dashboard, you can immediately launch and test your functions. Your functions will appear on the side, and you can pass parameters and make requests on the right side, as illustrated below.
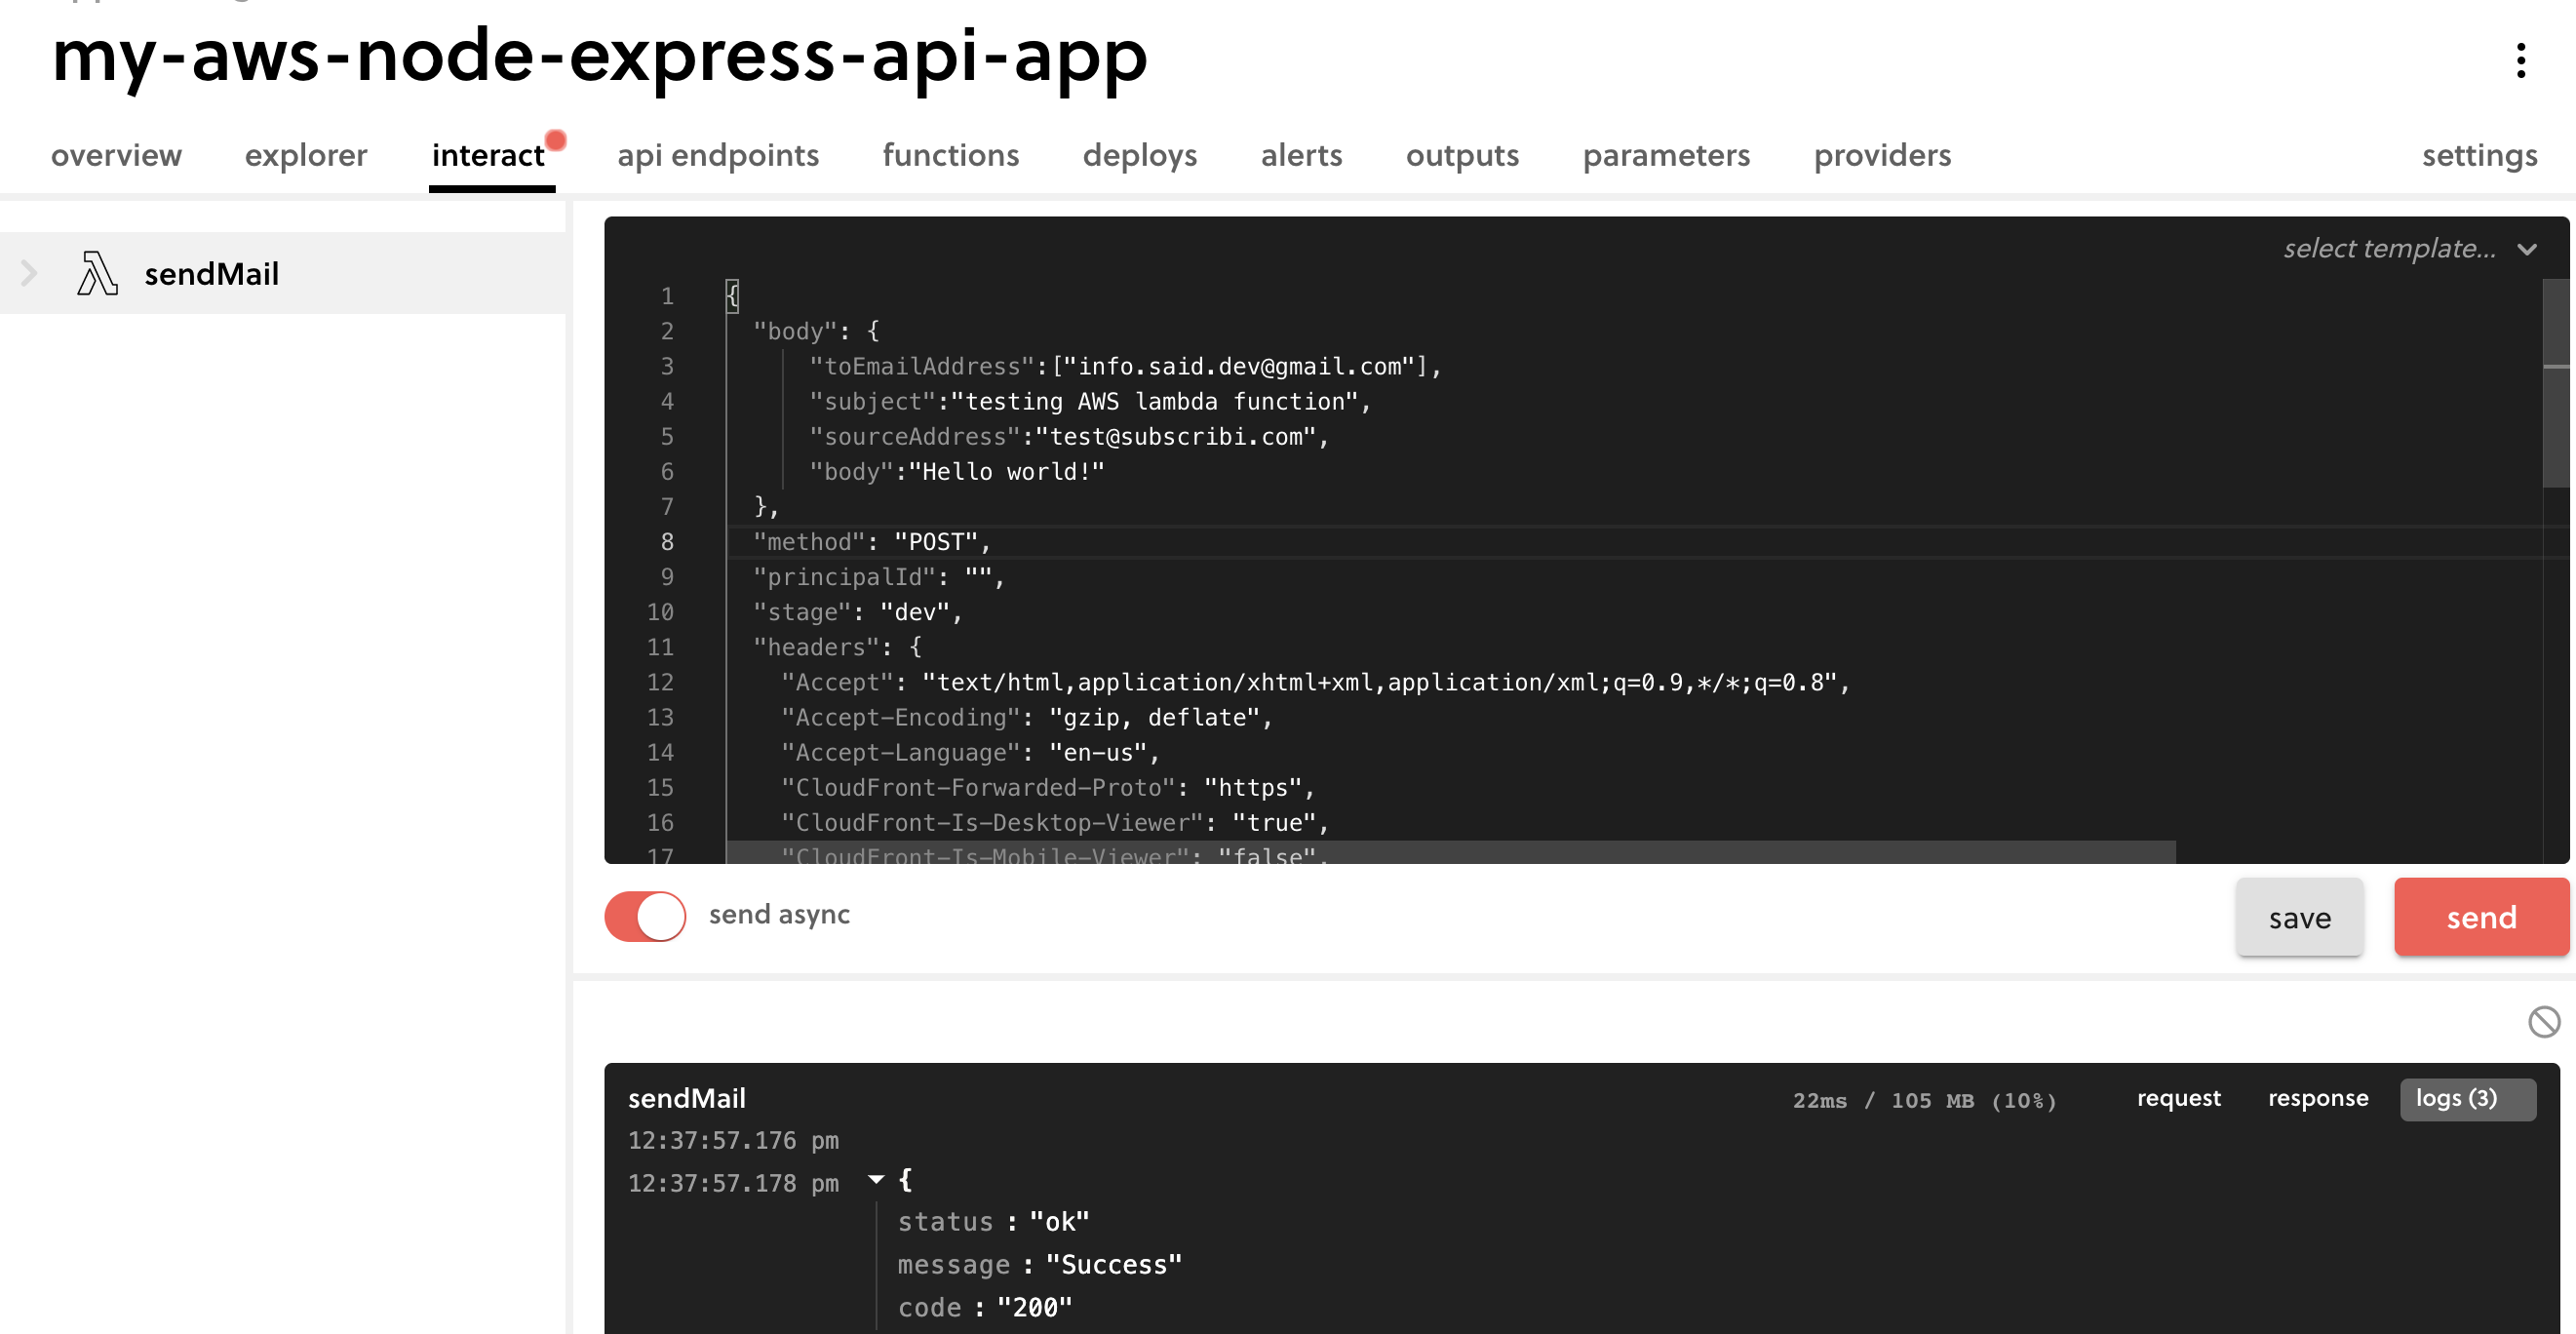
However, you can’t control bad requests from unauthorized users. In order to secure your app, you need to add permissions and roles.
Setting Up Permissions
AWS Lambda allows you to manage who has access to your app’s resources and limit unauthorized API queries.
On your AWS account, define the roles and permissions. Below is a policy template for a Lambda function from the AWS official documentation:
{
"Version": "2012-10-17",
"Statement": [
{
"Sid": "ReadOnlyPermissions",
"Effect": "Allow",
"Action": [
"lambda:GetAccountSettings",
"lambda:GetEventSourceMapping",
"lambda:GetFunction",
"lambda:GetFunctionConfiguration",
"lambda:GetFunctionCodeSigningConfig",
"lambda:GetFunctionConcurrency",
"lambda:ListEventSourceMappings",
"lambda:ListFunctions",
"lambda:ListTags",
"iam:ListRoles"
],
"Resource": "*"
},
{
"Sid": "DevelopFunctions",
"Effect": "Allow",
"NotAction": [
"lambda:AddPermission",
"lambda:PutFunctionConcurrency"
],
"Resource": "arn:aws:lambda:*:*:function:intern-*"
},
{
"Sid": "DevelopEventSourceMappings",
"Effect": "Allow",
"Action": [
"lambda:DeleteEventSourceMapping",
"lambda:UpdateEventSourceMapping",
"lambda:CreateEventSourceMapping"
],
"Resource": "*",
"Condition": {
"StringLike": {
"lambda:FunctionArn": "arn:aws:lambda:*:*:function:intern-*"
}
}
},
{
"Sid": "PassExecutionRole",
"Effect": "Allow",
"Action": [
"iam:ListRolePolicies",
"iam:ListAttachedRolePolicies",
"iam:GetRole",
"iam:GetRolePolicy",
"iam:PassRole",
"iam:SimulatePrincipalPolicy"
],
"Resource": "arn:aws:iam::*:role/intern-lambda-execution-role"
},
{
"Sid": "ViewLogs",
"Effect": "Allow",
"Action": [
"logs:*"
],
"Resource": "arn:aws:logs:*:*:log-group:/aws/lambda/intern-*"
}
]
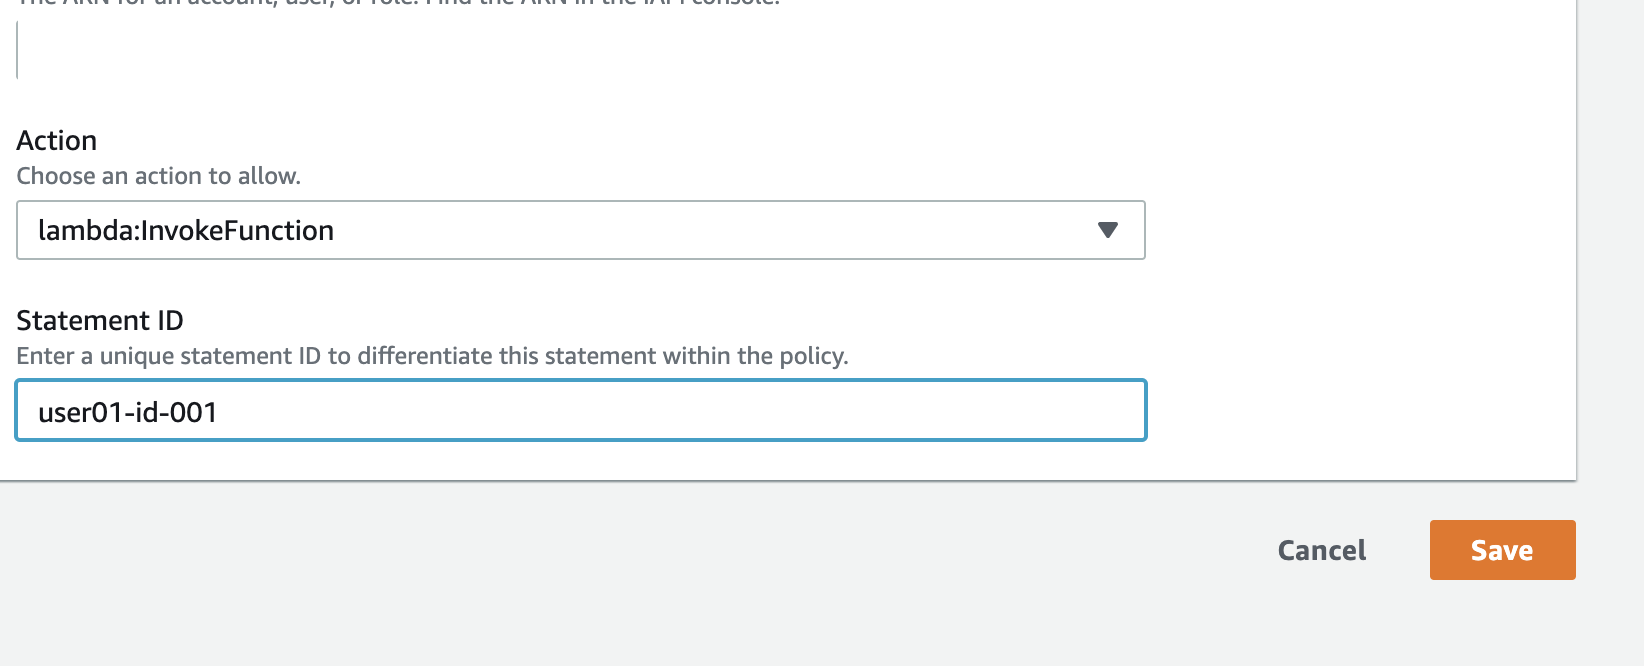
}To edit or add a permission, go to the AWS interface > Lambda, click on your app, and click the Add Permission button on the right under the configuration tab. You should see this screen:
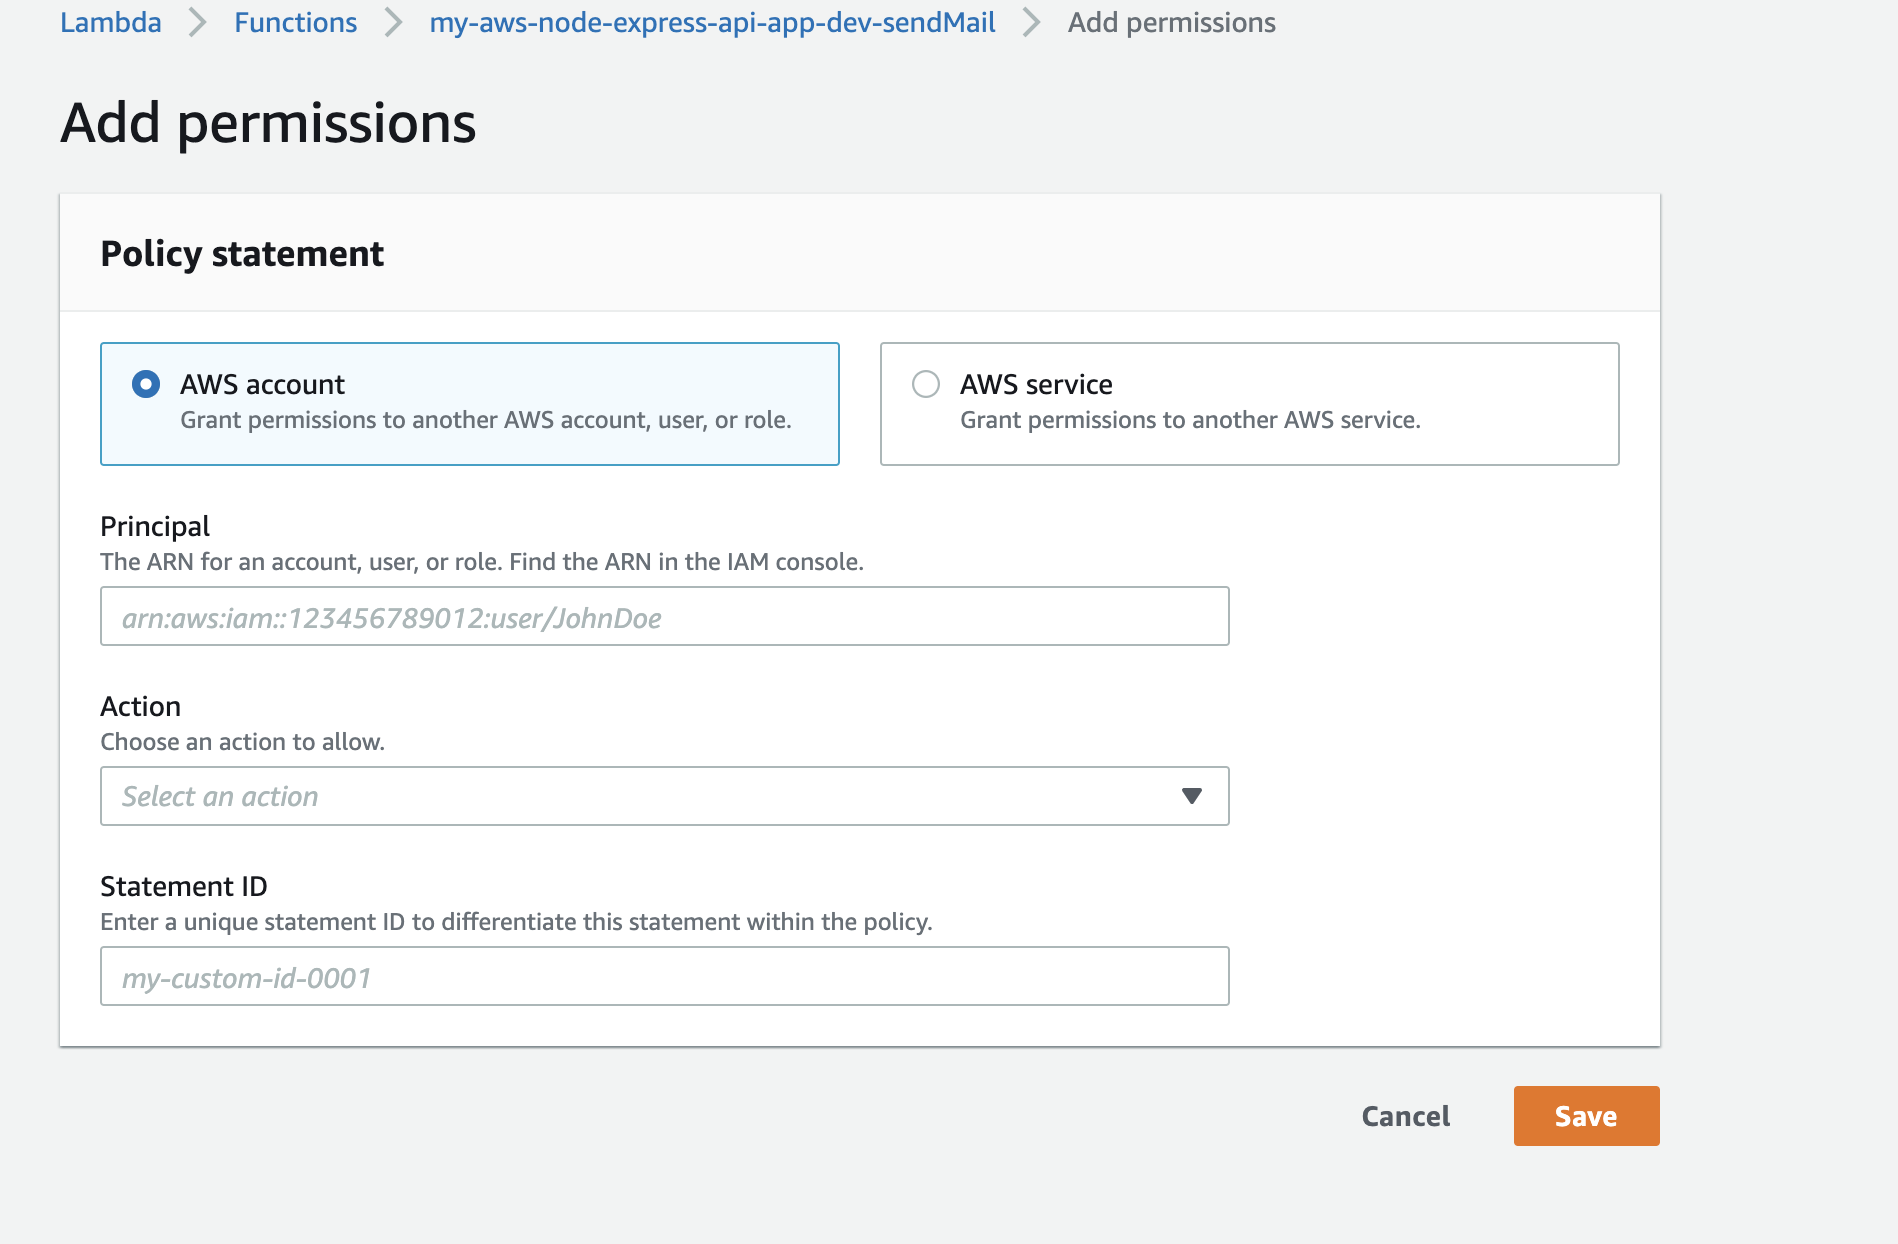
Choose the actions a user can take, then type in the User ID or Amazon Resource Name (ARN) of the user:

In this example, the user only has the InvokFunction permission, as mentioned in the configuration.
After you save, an automatic policy will be generated, which you can view under the policy resources page.
To test your permissions setting, assume you have another app that utilizes the same function but with different credentials. AWS Lambda will throw an error if this app tries to delete the function, for example, and the only permission this app has is InvokFunction.
Setting Up a Deployment Pipeline
Instead of deploying your app manually, you may want to automatically deploy your app with Git whenever you push new changes. To do so, go to serverless.com, select the app you want to deploy, and go to settings. You should see this window:
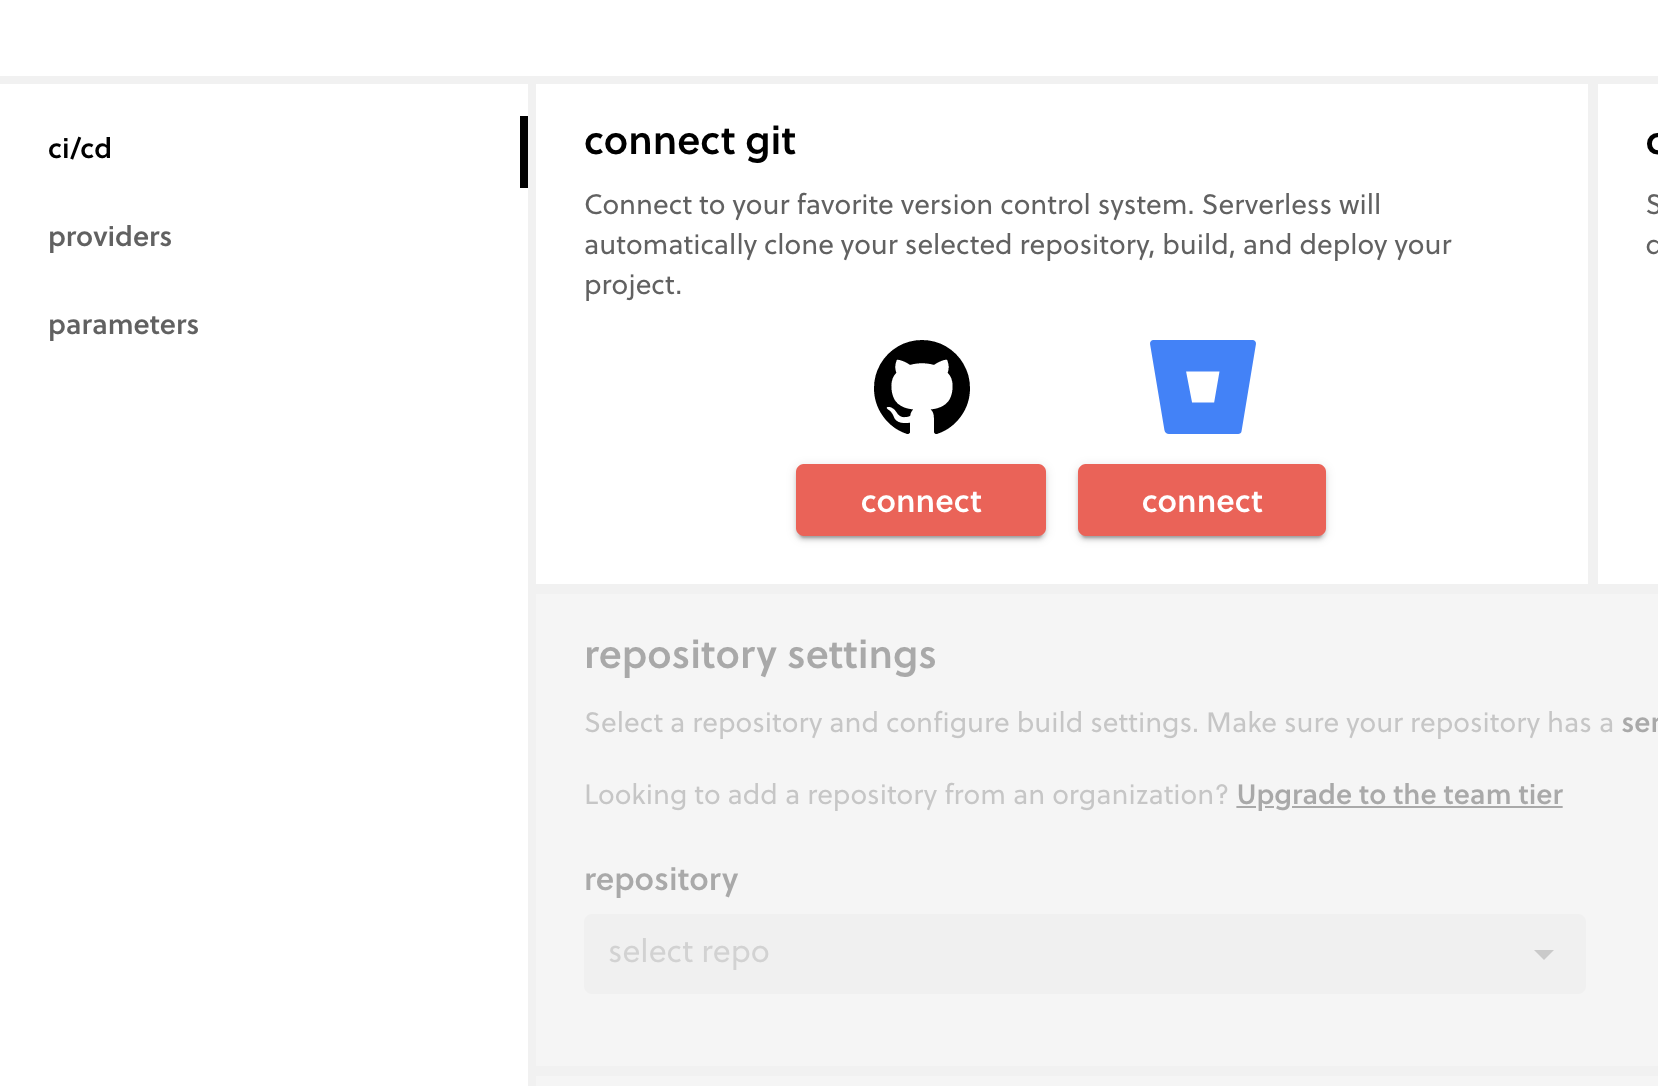
Connect your GitHub or GitBucket account. You’ll be directed to GitHub to authorize Serverless to access all of your repositories, or you can limit access to the repo that contains your Lambda app. You’ll be asked to confirm the app. Select the repository, scroll down, and select the branch you want to deploy.
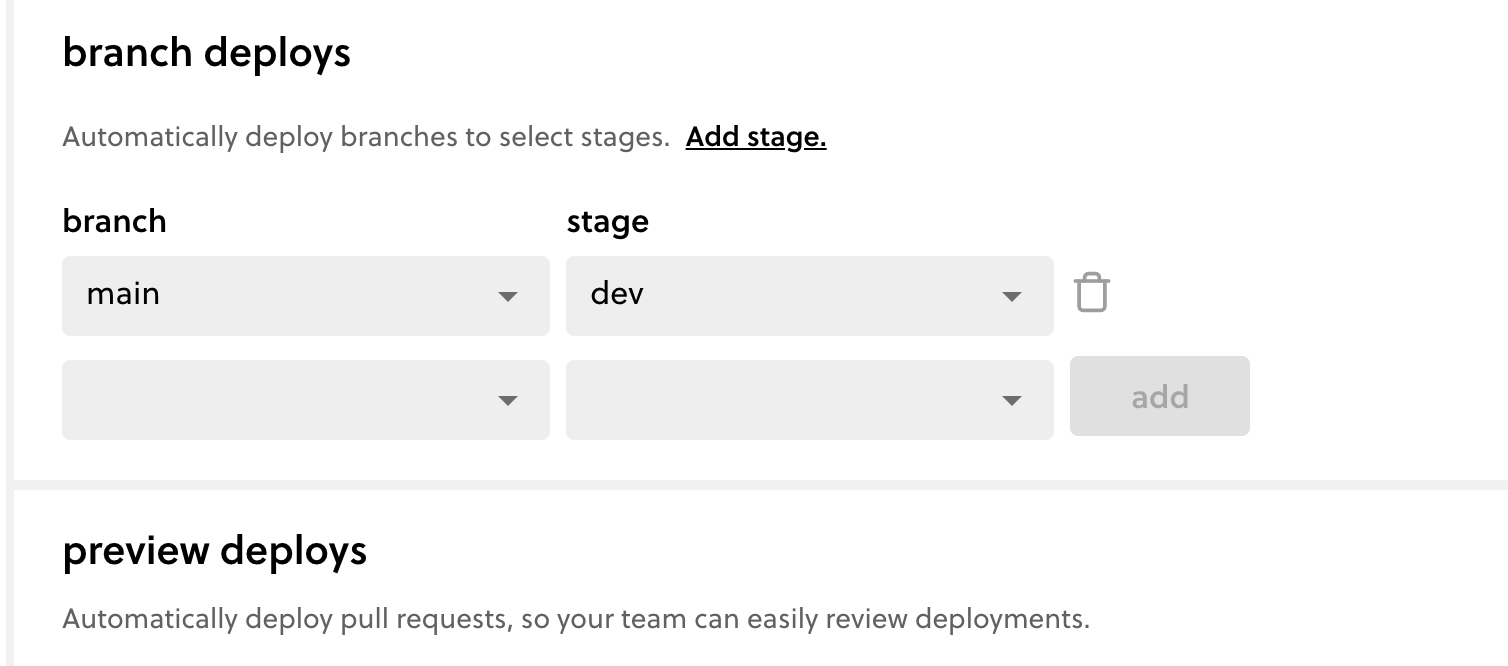
Select Add, and you’re all set.
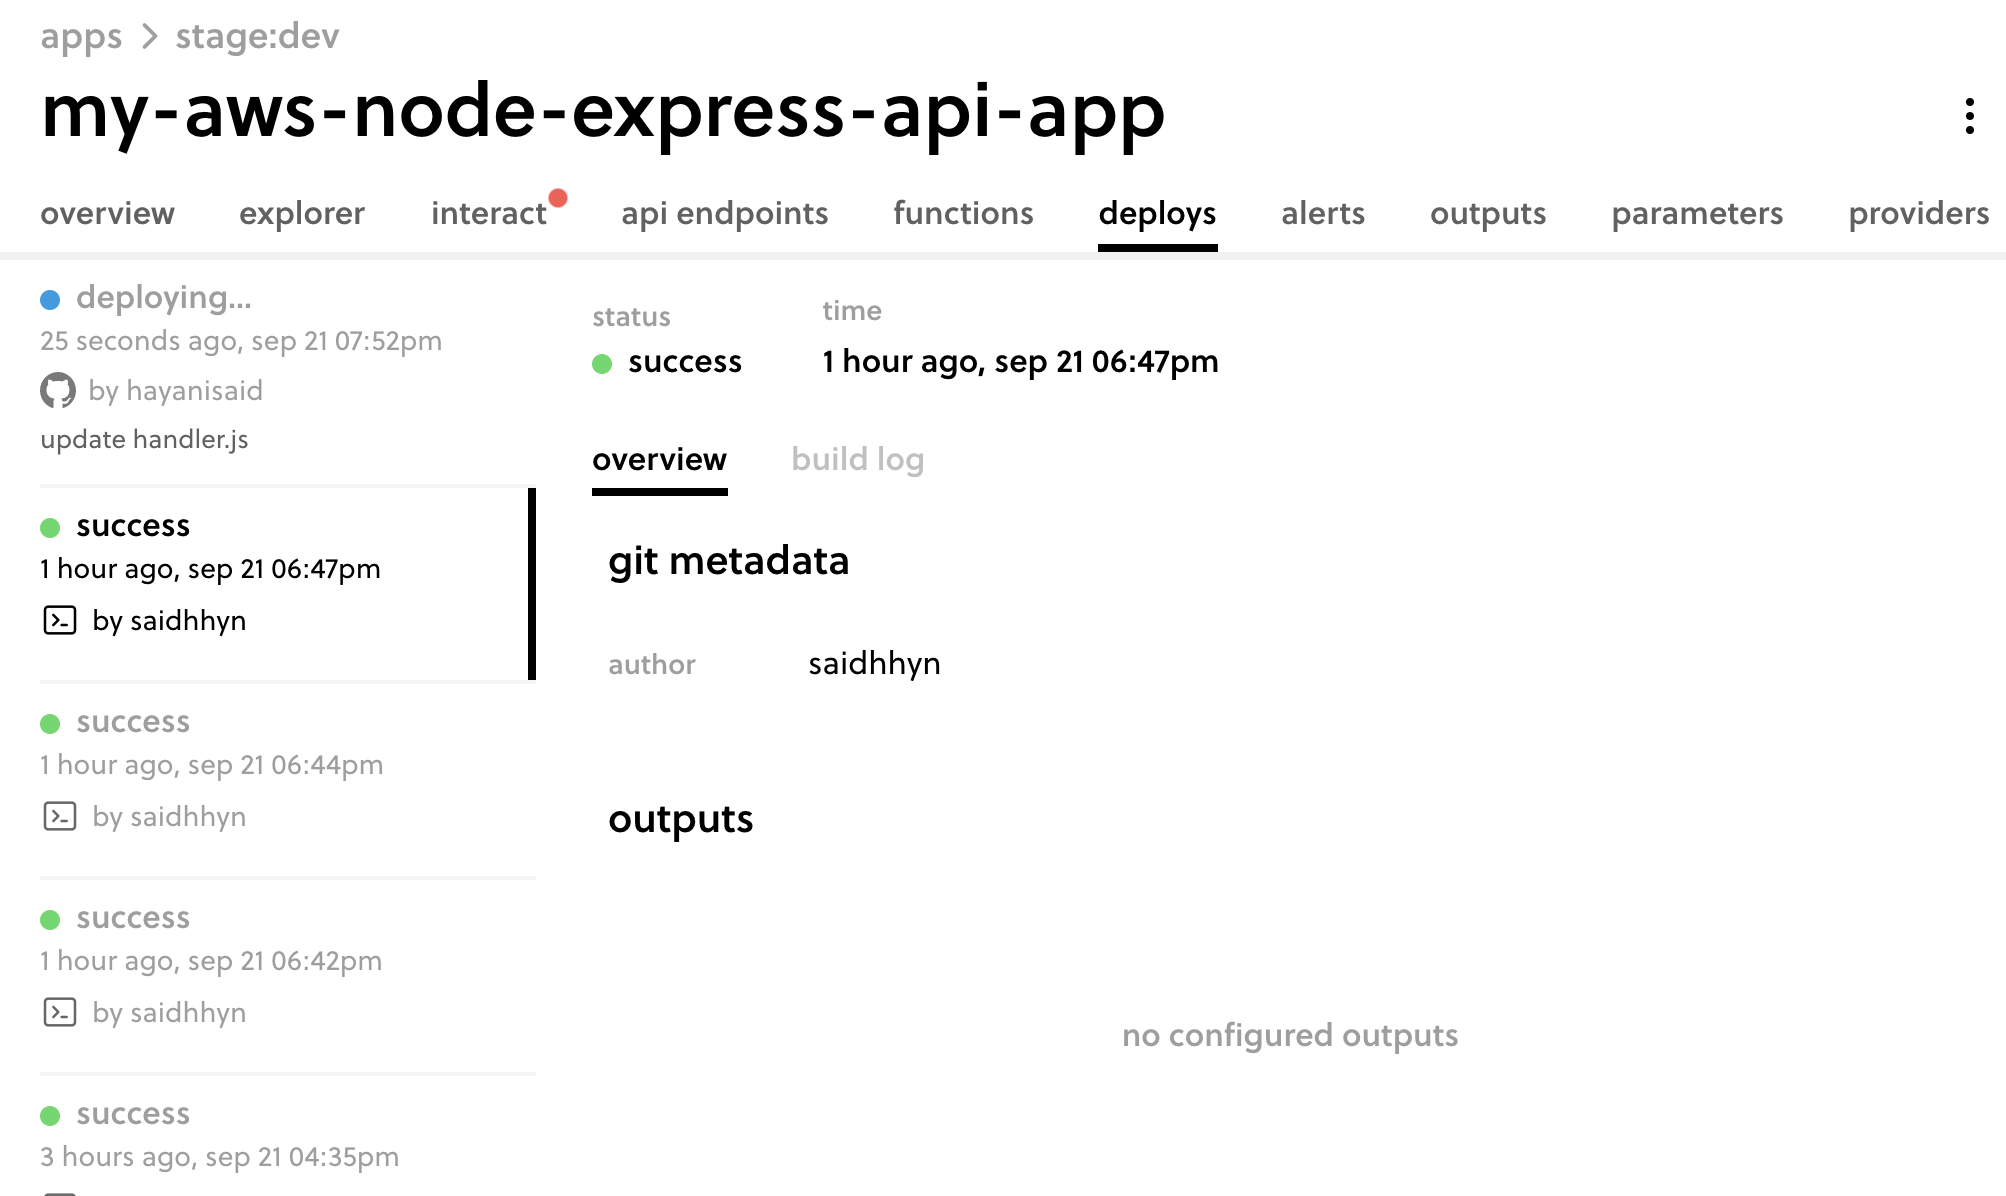
Make your modifications, commit, and push your code using Git. You should see the deployment status on your serverless.com dashboard:
You can test your AWS function in two ways. First, you can use serverless.com. The Interact dashboard looks like the following:
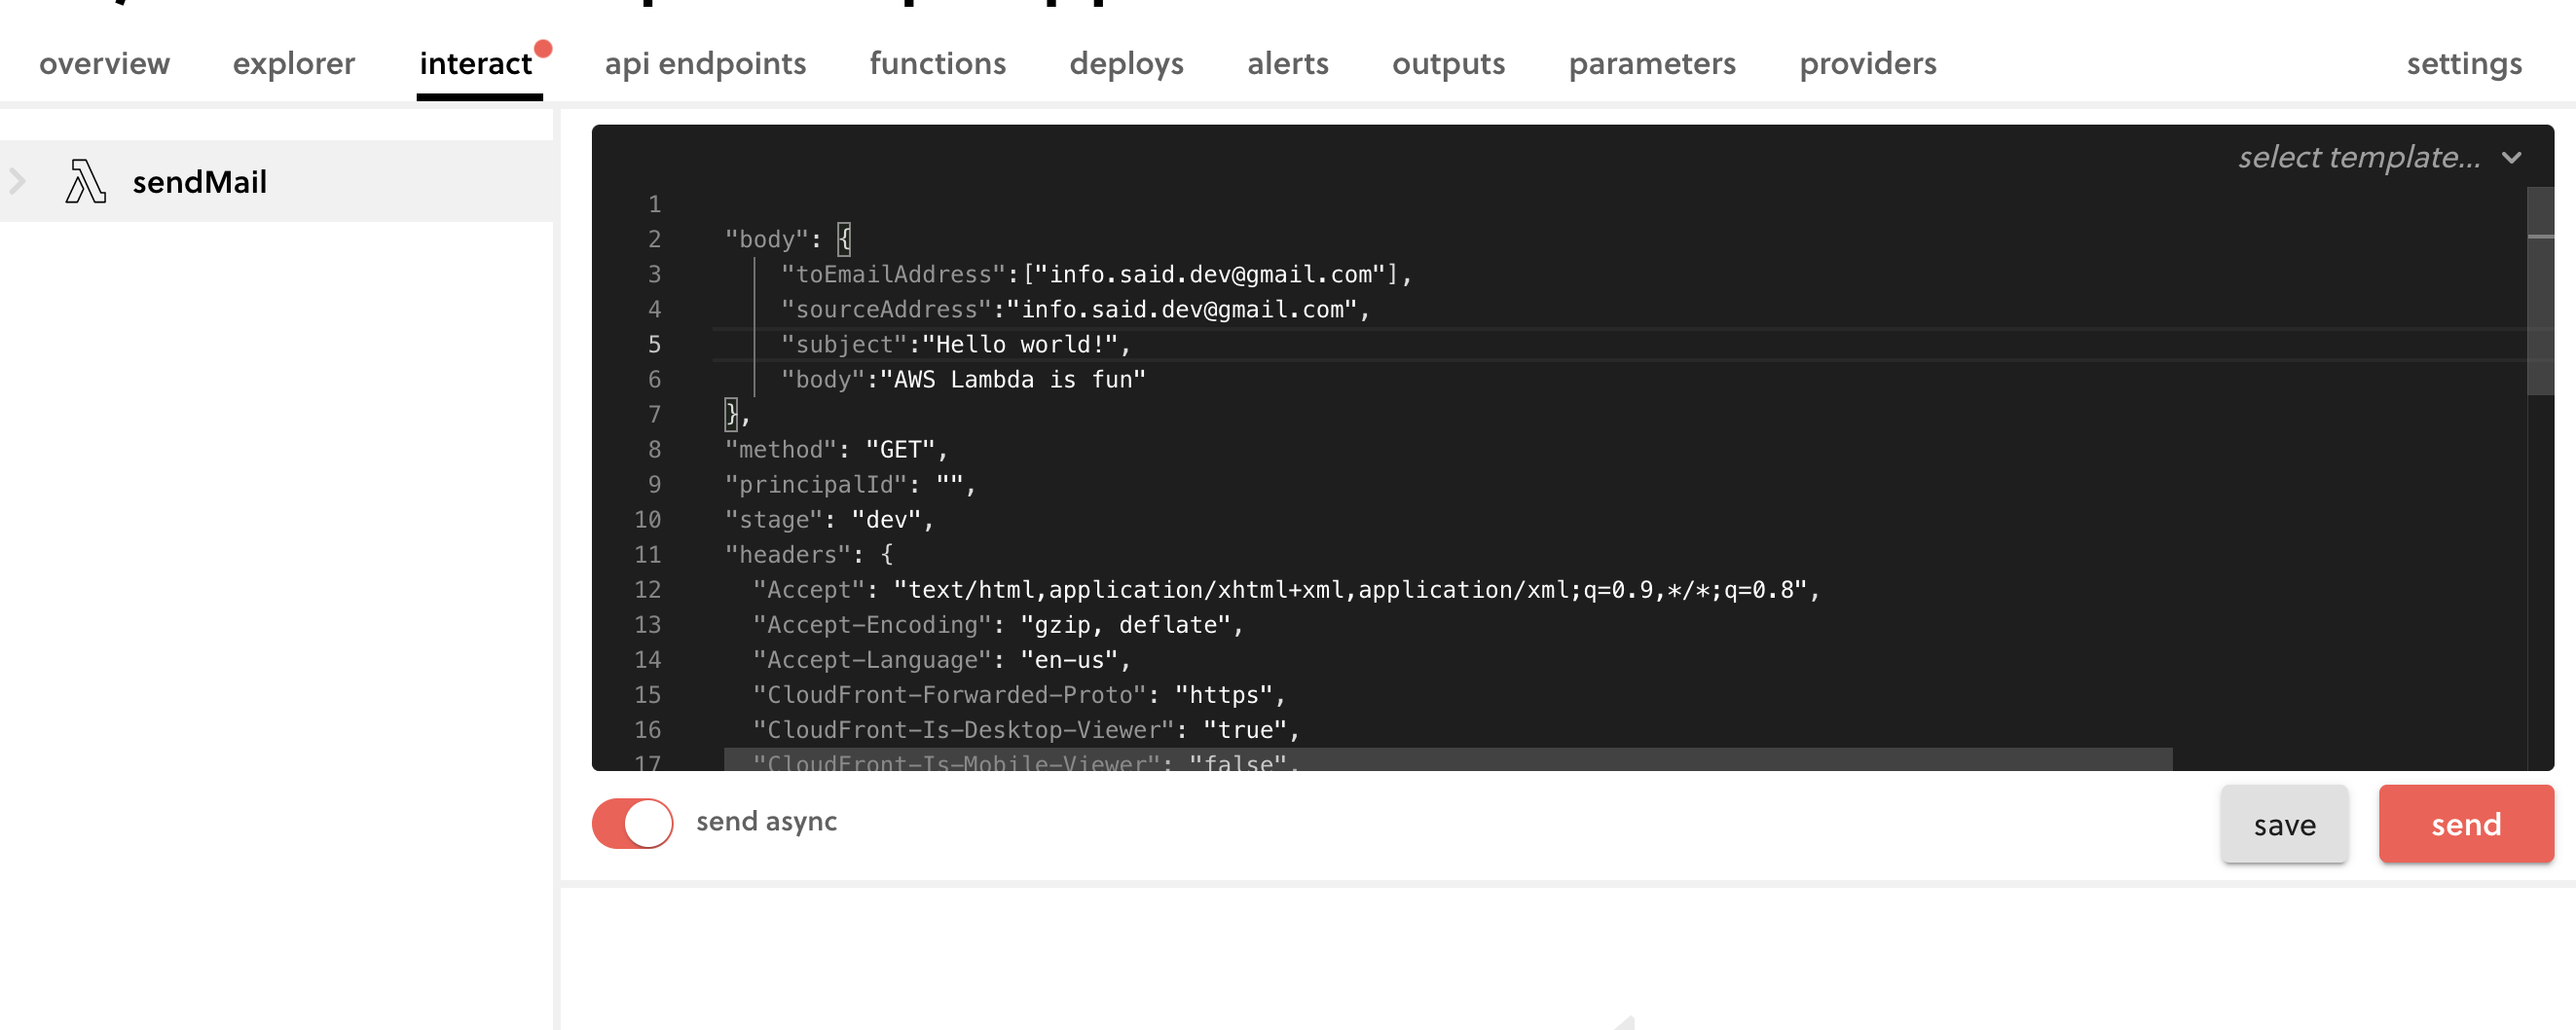
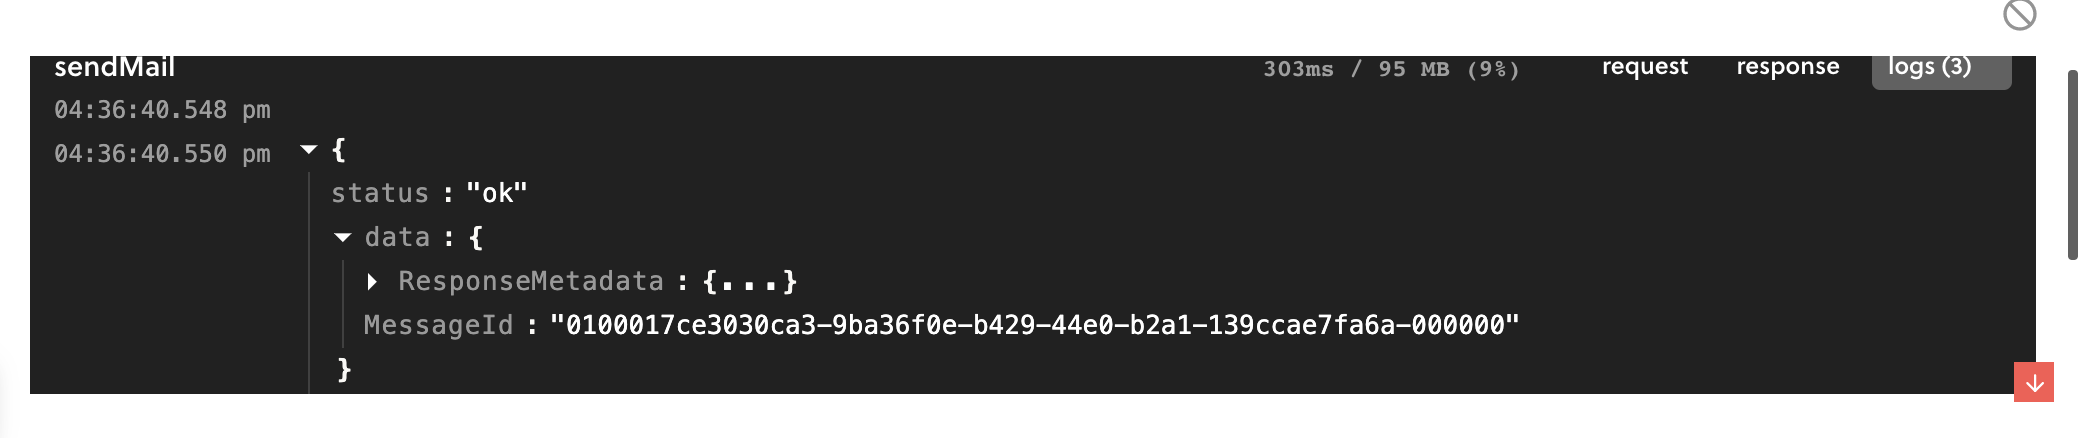
When you click Send the function will be invoked through an HTTP request and a response will be returned. Below is the response you should receive:
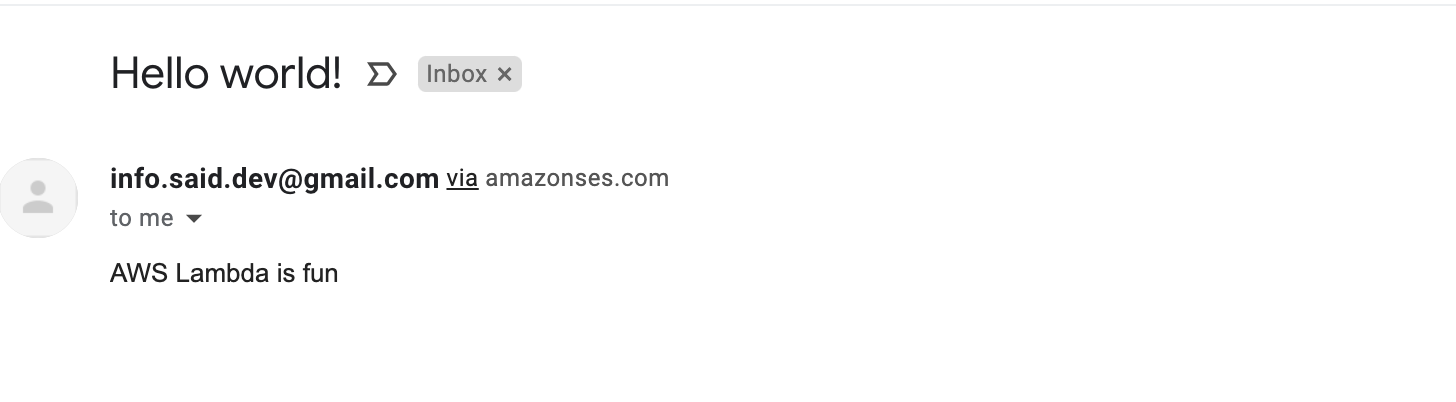
You should receive an email similar to this:
The second option for testing your AWS Lambda deployment is to use a simple curl request on your terminal, as in the following example:
curl -X GET https://yourawslambdaendpoint.amazonaws.com/dev/sendMail
   -H 'Content-Type: application/json'
   -d 'toEmailAddress:["info.said.dev@gmail.com"]
sourceAddress:"info.said.dev@gmail.com"
subject:"Hello world!"
body:"AWS Lambda is awesome"'
Conclusion
You’ve now created and deployed your first AWS Lambda/Node.js app. To get started with AWS Lambda functions, you used the serverless.com platform as a reliable and easy-to-manage tool to manage and monitor your AWS Lambda apps.
To further improve your development workflow, try Earthly. The free, open-source container tool works with multiple programming languages and platforms. Earthly can help you establish and repeat a build process for your app.
Turn your engineering standards into automated guardrails that provide feedback directly in pull requests, with 100+ guardrails included out of the box and support for the tools and CI/CD systems you already have.