Building a Monorepo with Java

Table of Contents
Microservices architecture has introduced new challenges for managing code and versions. Monorepos, despite being simpler than polyrepos, still require careful implementation, especially for Java projects. That’s why, in this guide, you’ll learn how to put together a monorepo in Java.
The Basic Structure of Java Monorepos
A monorepo for Java typically is made up of directories for microservices, libraries, and documentation:
my-monorepo/
├─ microservices/
│ ├─ MicroService1/
│ ├─ MicroService2/
├─ libs/
│ ├─ Lib1/
│ ├─ Lib2/
├─ docs/
  ├─ readme.md
You can alter your monorepo based on your project’s needs. For instance, you can substitute the microservices folder with projects, apps, applications, or web.
The Best Monorepo Tools for Java
Once you know how you want to structure your monorepo, it’s time to decide what you’ll use to implement it.
Monorepos can be instantiated, defined, and managed with the following open-source tools:
- Apache Maven: Widely used for Java projects, Apache Maven offers robust build automation and dependency management.
- Gradle: An alternative to Maven, Gradle uses a domain-specific language for configuration and offers features like incremental builds and compile avoidance.
- Bazel: Google’s open-source tool, Bazel, is known for fast and reliable builds, making it ideal for large-scale repositories.
- Earthly: Earthly can help cut build time when working with Java Monorepos.
Pairing these tools with an integrated development environment (IDE) like IntelliJ IDEA, NetBeans, or Visual Studio Code can enhance your development workflow further.
Building a Monorepo with IntelliJ IDEA and Maven
To help enforce structure across your projects, you can create a Maven archetype tailored for your monorepo setup. This archetype acts as a standardized template, ensuring that all your monorepos adhere to a consistent structure and design patterns.
Creating the Archetype
The first thing you’ll need to do is create a new Maven archetype project:
mvn archetype:generate -B \
  -DarchetypeArtifactId=maven-archetype-archetype \
  -DarchetypeGroupId=org.apache.maven.archetypes \
  -DgroupId=org.earthly \
  -DartifactId=maven-archetype-microservice-monorepo
This command creates an archetype at the maven-archetype-microservice-monorepo directory and scaffolds the basic folder structure.
Edit the provided pom.xml file by adding the packaging tags, adding or editing the build tags, and removing the properties. When finished, your file should look like this:
<?xml version="1.0" encoding="UTF-8"?>

<project xmlns="http://maven.apache.org/POM/4.0.0"
         xmlns:xsi="http://www.w3.org/2001/XMLSchema-instance"
         xsi:schemaLocation="http://maven.apache.org/POM/4.0.0
         http://maven.apache.org/maven-v4_0_0.xsd">
    <modelVersion>4.0.0</modelVersion>
    <groupId>org.earthly</groupId>
    <artifactId>maven-archetype-microservice-monorepo</artifactId>
    <version>1.0</version>
    <name>Archetype - maven-archetype-microservice-monorepo</name>
    <url>http://maven.apache.org</url>
    <packaging>maven-archetype</packaging>
    <build>
        <extensions>
            <extension>
                <groupId>org.apache.maven.archetype</groupId>
                <artifactId>archetype-packaging</artifactId>
                <version>3.2.1</version>
            </extension>
        </extensions>
    </build>
</project>
Delete the src/test directory as this tutorial does not cover testing the archetype.
Next, it’s time to edit the archetype descriptor. This file resides in the src/main/resources/META-INF/maven directory.
The archetype descriptor lets you define the directory structure of your monorepo:
<archetype-descriptor xmlns="https://maven.apache.org/plugins/maven-archetype-plugin/archetype-descriptor/1.1.0" xmlns:xsi="http://www.w3.org/2001/XMLSchema-instance"
       xsi:schemaLocation="https://maven.apache.org/plugins/maven-archetype-plugin/archetype-descriptor/1.1.0 http://maven.apache.org/xsd/archetype-descriptor-1.1.0.xsd"
      name="monorepo">

    <fileSets>
        <fileSet>
            <directory>docs</directory>
        </fileSet>
        <fileSet>
            <directory>libs</directory>
        </fileSet>
        <fileSet>
            <directory>microservices</directory>
        </fileSet>
    </fileSets>
</archetype-descriptor>
This tells Maven to create directories named docs, libs, and microservices in any project created using this archetype.
Now, you can delete the src folder along with its subdirectories in the archetype-resources folder, as it’s unnecessary. Then, edit the prototype POM (pom.xml in the archetype-resources folder):
<project xmlns="http://maven.apache.org/POM/4.0.0"
         xmlns:xsi="http://www.w3.org/2001/XMLSchema-instance"
         xsi:schemaLocation="http://maven.apache.org/POM/4.0.0
         http://maven.apache.org/maven-v4_0_0.xsd">

    <modelVersion>4.0.0</modelVersion>
    <groupId>${groupId}</groupId>
    <artifactId>${artifactId}</artifactId>
    <version>${version}</version>
    <packaging>pom</packaging>
    <dependencies>
    </dependencies>
</project>
Please note: The
dependenciestags are mandatory. You can use thedependenciessection as an alternative or in addition to yourlibsfolder for external dependencies.
This pom.xml file is copied to the root of the monorepo generated using this archetype.
Once you’ve established the basic structure of the monorepo, you can refine it further. Monorepo-specific changes should be made to the monorepo itself, while global monorepo changes should be made in the archetype.
For instance, if you decide that all your monorepos should contain a README.md file, you’ll need to create a template for it and then use the includes tags in your archetype descriptor file:
<includes>
    <include>README.md</include>
</includes>
You can learn more about Maven’s archetype descriptor/metadata files and their capabilities in the official documentation.
You can also organize and list your monorepo’s folders as modules in the prototype pom.xml file. This technique allows you to enforce hierarchy in your monorepo:
<modules>
    <module>microservices</module>
    <module>libs</module>
</modules>
As with most modular Maven-based projects, each module (folder) must have its own pom.xml file defining the structure, properties, and build instructions. You can also add build plugins to the monorepo, such as the Flatten plugin:
<build>
    <plugins>
        <plugin>
            <groupId>org.codehaus.mojo</groupId>
            <artifactId>flatten-maven-plugin</artifactId>
            <version>1.1.0</version>
            <configuration>
                <outputDirectory>${project.build.directory}</outputDirectory>
            </configuration>
            <executions>
                <!-- enable flattening -->
                <execution>
                    <id>flatten</id>
                    <phase>process-resources</phase>
                    <goals>
                        <goal>flatten</goal>
                    </goals>
                </execution>
                <!-- ensure proper cleanup -->
                <execution>
                    <id>flatten.clean</id>
                    <phase>clean</phase>
                    <goals>
                        <goal>clean</goal>
                    </goals>
                </execution>
            </executions>
        </plugin>
    </plugins>
</build>
Finally, install the archetype using mvn install:
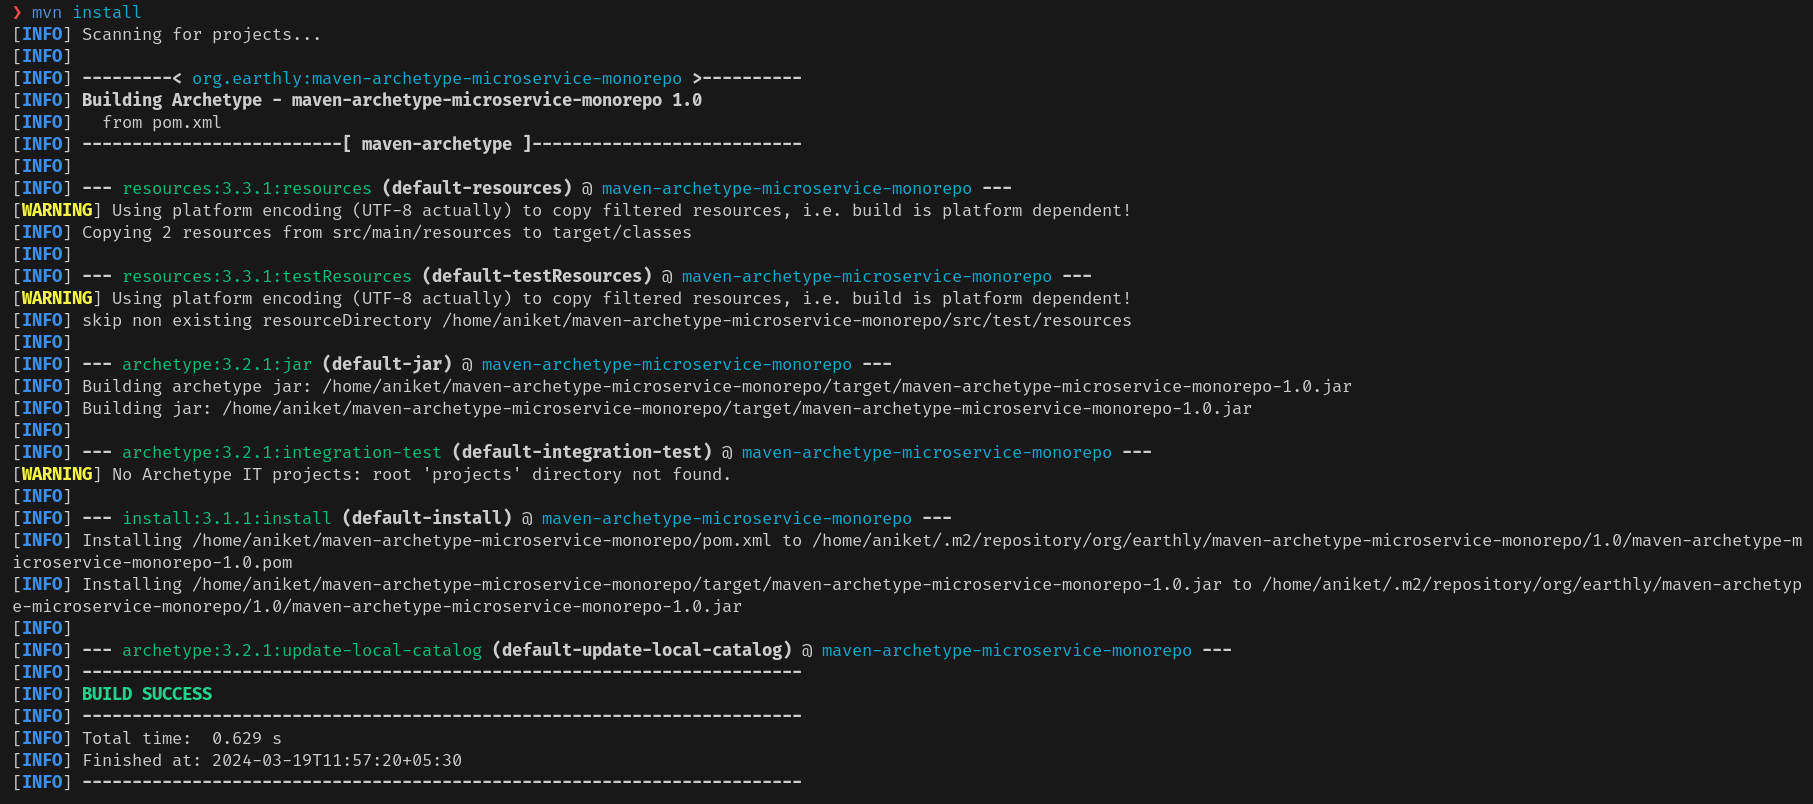
Note: This archetype is available on GitHub. You can clone this repo and use it as a starting point for customizing your monorepo template.
Creating the Monorepo
At this point, you can use the archetype to scaffold your monorepo. To do so, you’ll need to take note of the groupId, artifactId, and version of the archetype. You can find these in the pom.xml file of the newly created archetype. In this example, the groupId is org.earthly, artifactId is maven-archetype-microservice-monorepo, and version is 1.0:
mvn archetype:generate \
  -DgroupId=org.example \
  -DartifactId=Microservices \
  -DarchetypeGroupId=org.earthly \
  -DarchetypeArtifactId=maven-archetype-microservice-monorepo \
  -DarchetypeVersion=1.0 \
  -DinteractiveMode=false
Refining the Monorepo
Once the monorepo structure has been generated, you’ll need to refine and tweak it to add project-specific details. This includes changing the project-wide configuration and configuring the modules. You can explore a sample monorepo created using this archetype as you read this section. The sample monorepo has two libraries (Lib1 and Lib2) and two microservices (MicroService1 and MicroService2).
Each of the modules (libs and microservices) has pom.xml files that contain information about the modules. The pom.xml file for the libs module looks like this:
<?xml version="1.0" encoding="UTF-8"?>

<project xmlns="http://maven.apache.org/POM/4.0.0"
         xmlns:xsi="http://www.w3.org/2001/XMLSchema-instance"
         xsi:schemaLocation="http://maven.apache.org/POM/4.0.0
         http://maven.apache.org/xsd/maven-4.0.0.xsd">
    <modelVersion>4.0.0</modelVersion>

    <parent>
        <groupId>org.example</groupId>
        <artifactId>Microservices</artifactId>
        <version>1.0-SNAPSHOT</version>
    </parent>

    <groupId>org.example.libs</groupId>
    <artifactId>libs</artifactId>
    <packaging>pom</packaging>

    <modules>
        <module>Lib1</module>
        <module>Lib2</module>
    </modules>
</project>
It declares the groupId and artifactId of the libs module and the two individual child modules (Lib1 and Lib2). The child modules also have their own pom.xml files. For example, this is what the pom.xml file looks like for Lib1:
<?xml version="1.0" encoding="UTF-8"?>
<project xmlns="http://maven.apache.org/POM/4.0.0"
         xmlns:xsi="http://www.w3.org/2001/XMLSchema-instance"
         xsi:schemaLocation="http://maven.apache.org/POM/4.0.0
         http://maven.apache.org/xsd/maven-4.0.0.xsd">
    <modelVersion>4.0.0</modelVersion>
    <groupId>org.example</groupId>
    <artifactId>Lib1</artifactId>
    <version>1.0-SNAPSHOT</version>
    <packaging>jar</packaging>
    <properties>
        <project.build.sourceEncoding>UTF-8</project.build.sourceEncoding>
        <maven.compiler.source>17</maven.compiler.source>
        <maven.compiler.target>17</maven.compiler.target>
    </properties>
</project>
This is a typical pom.xml file that creates a JAR file from the library code.
A similar configuration is present in microservices/pom.xml, which also declares the two child modules:
<?xml version="1.0" encoding="UTF-8"?>

<project xmlns="http://maven.apache.org/POM/4.0.0"
         xmlns:xsi="http://www.w3.org/2001/XMLSchema-instance"
         xsi:schemaLocation="http://maven.apache.org/POM/4.0.0
         http://maven.apache.org/xsd/maven-4.0.0.xsd">
    <modelVersion>4.0.0</modelVersion>

    <parent>
        <groupId>org.example</groupId>
        <artifactId>Microservices</artifactId>
        <version>1.0-SNAPSHOT</version>
    </parent>

    <groupId>org.example.microservices</groupId>
    <artifactId>microservices</artifactId>
    <packaging>pom</packaging>

    <modules>
        <module>MicroService1</module>
        <module>MicroService2</module>
    </modules>
</project>
Each individual microservice has a pom.xml file that builds a typical executable JAR. However, it’s important to note that the microservices depend on the libraries. For example, take a look at this section in MicroService1/pom.xml:
<dependencies>
    <dependency>
        <groupId>org.example</groupId>
        <artifactId>Lib1</artifactId>
        <version>1.0-SNAPSHOT</version>
        <type>jar</type>
    </dependency>
</dependencies>
The library is imported into the microservice code using import org.example.lib1.Lib1;. You can create dependencies between modules in a monorepo this way.
You can compile the monorepo by running mvn package and then run the microservices using java, like this:
$ java -jar microservices/MicroService2/target/MicroService2-1.0-SNAPSHOT-jar-with-dependencies.jar
Greeting from MicroService2 using Lib2
Relying on Maven to manage, compile, and build your monorepo projects can result in long compile times and heavy consumption of local disk space. You can mitigate this issue by hosting only a few of your monorepo applications (microservices) locally. However, this undermines one of the key purposes and advantages of a monorepo, which is why you may want to consider using a different build tool.
Optimizing Your Monorepo Builds
To help you define and maintain the structure of your monorepo, you can keep using Maven’s pom.xml files. However, you need something more robust for building and deployment, especially if you want to optimize your monorepo for CI/CD pipeline functionality.
Each project, application, or microservice should be viewed as separate. This means they need to be individually built, containerized, and tested. Earthly is the perfect tool for this. It tackles your resource utilization limitations by using caching to only rebuild and compile the necessary packages.
Earthly follows an implementation structure that is very similar to Maven’s. Every library and application/microservice folder contains an Earthfile connected to a “parent” Earthfile located at the root of the monorepo. The parent Earthfile acts similarly to your project or monorepo’s main pom.xml file.
For instance, the Earthfile for MicroService1 will look something like this:
VERSION 0.8

build:
  FROM maven:3-eclipse-temurin-17
  COPY ../../libs/Lib1+build/Lib1-1.0-SNAPSHOT.jar .
  RUN mvn install:install-file \
    -Dfile=Lib1-1.0-SNAPSHOT.jar \
    -DgroupId=org.example \
    -DartifactId=Lib1 \
    -Dversion=1.0-SNAPSHOT \
    -Dpackaging=jar
  COPY . .
  RUN mvn package
  SAVE ARTIFACT microservices/MicroService1/target/MicroService1-1.0-SNAPSHOT-jar-with-dependencies.jar

docker:
  FROM +build
  CMD ["java", "-jar", "target/MicroService1-1.0-SNAPSHOT-jar-with-dependencies.jar"]
  SAVE IMAGE microservice1:latest
This Earthfile has two sections: the build section builds the specific project and the docker section creates a Docker image from generated JAR file. Note that the build section uses the command COPY ../../libs/Lib1+build/Lib1-1.0-SNAPSHOT.jar . This invokes the build section of the Earthfile for Lib1 and copies the generated JAR file. The next line installs this jar as a dependency of Microservice1.
You can run Earthly from the microservices/MicroService1 directory:
earthly +dockerThis runs the docker section from the Earthfile. This section depends on the build section, so Earthly executes the build section first, followed by the docker section, and caches the build outputs.
If you run this command again without making any code changes, you’ll notice that Earthly reuses the cache, which saves you time and resources since you won’t have to unnecessarily compile the entire project:
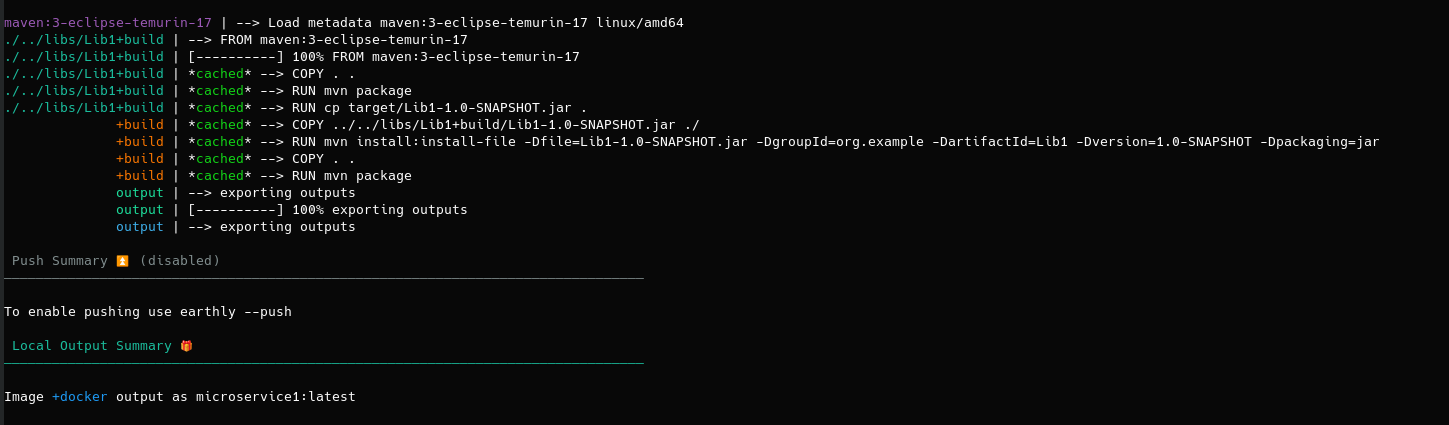
You can also compile your libraries into a self-contained artifact that can be referenced by your microservices:
VERSION 0.8

build:
  FROM maven:3-eclipse-temurin-17
  COPY . .
  RUN mvn package
  RUN cp target/Lib1-1.0-SNAPSHOT.jar .
  SAVE ARTIFACT Lib1-1.0-SNAPSHOT.jar
You can connect all these individual Earthfiles in the parent Earthfile at the root of the project:
VERSION 0.8

build:
    BUILD ./microservices/MicroService1+build
    BUILD ./microservices/MicroService2+build
    BUILD ./libs/Lib1+build
    BUILD ./libs/Lib2+build

docker:
    BUILD ./microservices/MicroService1+docker
    BUILD ./microservices/MicroService2+docker
The monorepo can then be built and run using the earthly +build CLI command and packaged into Docker images using earthly +docker from the root of the project.
Conclusion
Monorepos can ease collaboration, make version control easier, and increase transparency. However, the process does have a few disadvantages, including high system resource usage and more complicated builds and deployments. Fortunately, many of these issues can be overcome by implementing the right build and orchestration toolchains.
In addition to acting as a monorepo platform, Earthly can function as a full-featured CI/CD framework that enables you to define repeatable builds. This means you don’t have to use separate tools for your build and integration operations.
Earthly helps you achieve faster compile and build times, streamlined module and package management, and more efficient containerization. Visit Earthly.dev to learn more.
Turn your engineering standards into automated guardrails that provide feedback directly in pull requests, with 100+ guardrails included out of the box and support for the tools and CI/CD systems you already have.