10 Advanced Git Commands Part2

Table of Contents
The last article discussed ten advanced Git commands you should know as a developer.
In this article, we take a look at ten more advanced commands including bisect, reset, and archive.
Git Remote
Git remote can be used to list, add, remove, and update remote repositories. Git remote allows you to create shortcuts to remote repositories. These shortcuts are called “remote names”. You can use remote names to refer to remote repositories in other Git commands. Think of it as a bookmark to other directories instead of links. The diagram below further explains the git remote.
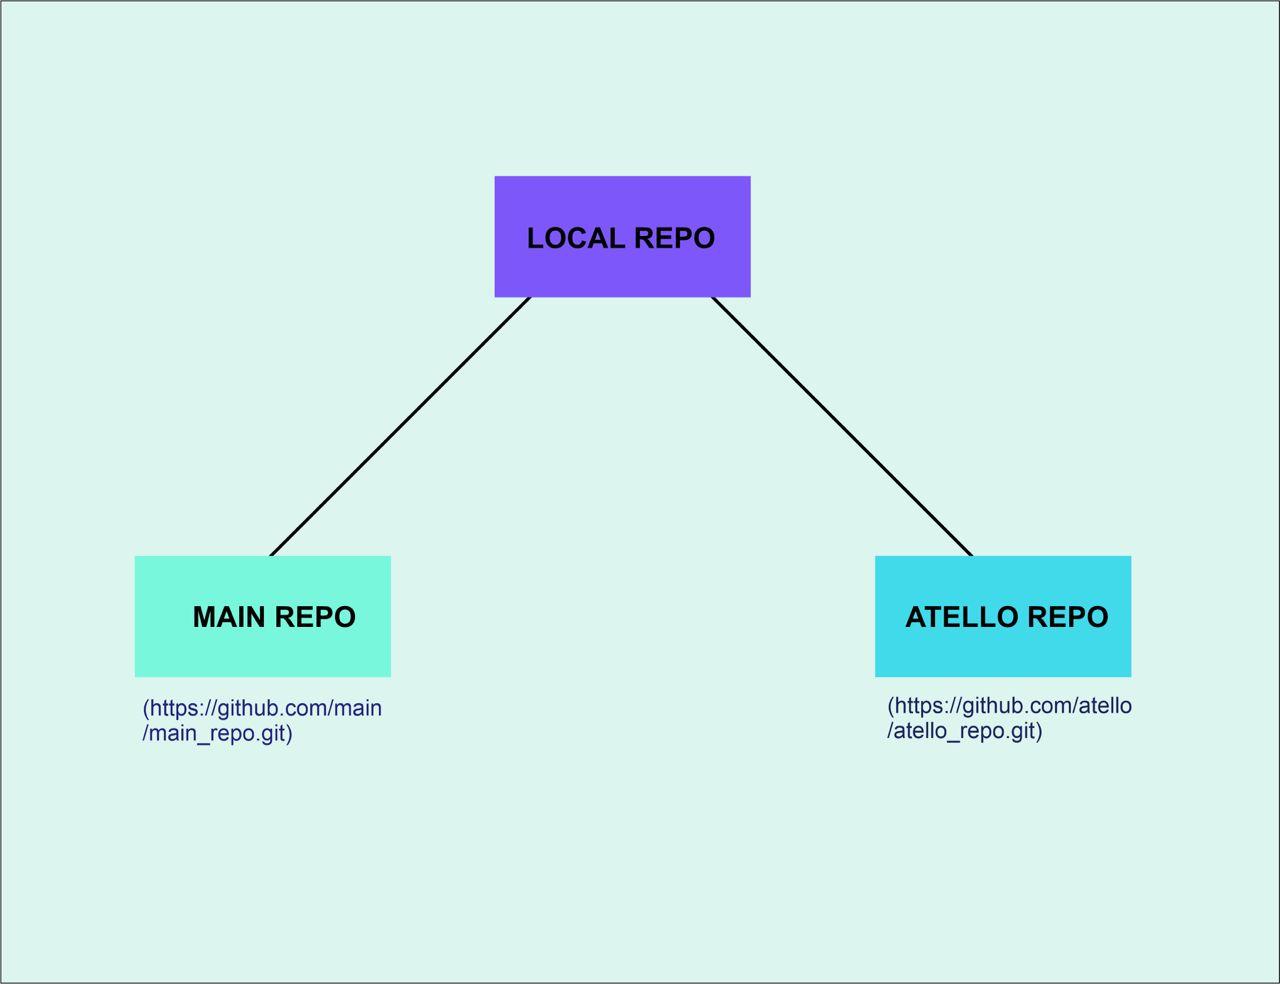
The diagram above shows two remote connections from my repo into the main repo and another developer’s repo. The remote names for these connections are main and Atello. Instead of referencing the full URLs of these remote repositories in other Git commands, you can use the remote names origin and Atello.
To see the remote names of you current repository, use this command:
git remote
The output shows the remote names associated with season-of_docs repository which are oyedeletemitope and origin are remote names associated with this repository.
To view more detailed information about the remotes, including their URLs, you can use:
git remote -vThis will show you each remote’s name, the repository’s URL, and the fetch and push URLs like so:
To connect your local repository with a remote repository, you use the Git remote add command:
git remote add <name> <remote_url>To remove a remote, you can run the following command:
git remote remove [name]To update the URL of a remote, you can run the following command:
git remote set-url [name] [new_url]To incorporate changes from a remote repository into your local repository, you can use the git pull command:
git pull <remote_name> <branch_name>Git Bisect
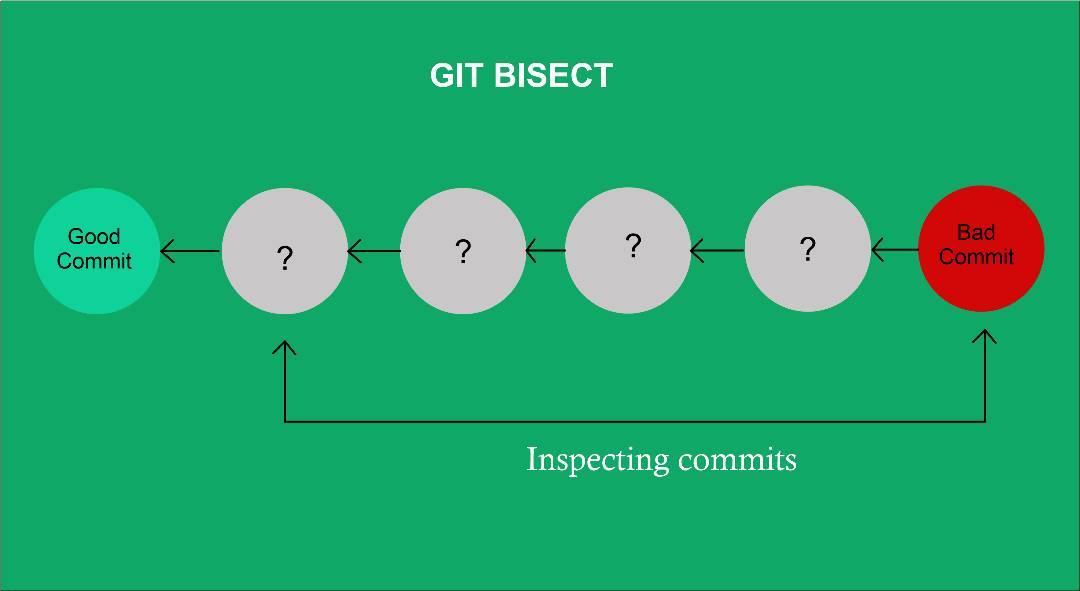
git bisect is a really powerful tool to help you quickly find a specific commit. This is often used to help you find where a bug or issue was introduced into the code base. It uses a binary search algorithm to narrow down the range of commits until it finds the exact commit that caused the problem.
To use git bisect, you start with an initial known good commit (a commit where the bug is not present) and an initial known bad commit (a commit where the bug is present). Git will then perform a binary search, automatically selecting a commit between the good and bad commits for you to test.
Based on the outcome of your tests, you provide feedback to Git using either git bisect good or git bisect bad indicating whether the bug is present or not in the selected commit. Git will then automatically choose the next commit to test, effectively halving the commit range each time.
Git continues this process, automatically selecting commits for you to test and adjusting the search range until it pinpoints the specific commit that introduced the bug.
git bisect startThis will start the bisect process and check out the commit halfway between the good and bad commits.
You will then need to test the commit that is checked out. If the commit does not have the bug, you can mark it as “good”.
Using this command:
git bisect good <known_good_commit>If the commit does have the bug, you can mark it as “bad” using this command:
git bisect bad <known_bad_commit>Git bisect will check out the commit halfway between the good and bad commits, and you will repeat the process.
This process will continue until git bisect narrows down the range of commits to a single commit. This commit is the one that introduced the bug.
Git Fetch
git fetch is a command used in Git to retrieve the latest changes from a remote repository without automatically merging them into your local branch. It allows you to bring your local repository up to date with the remote repository’s changes without modifying your current working state.
Here’s how git fetch works:
git fetch <remote_name>When you run git fetch, Git contacts the remote repository specified by <remote_name> (the default remote name assigned is usually “origin.”) and retrieves all the new branches, commits, and other objects that exist in the remote repository but are not present in your local repository.
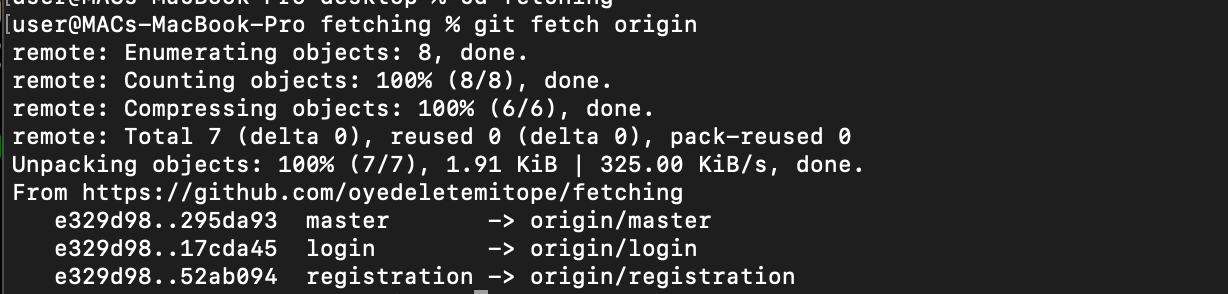
Unlike git pull, which automatically merges the fetched changes into your current branch,git fetch does not modify your working branch or introduce any changes. Instead, it updates the remote-tracking branches to allow you to inspect the fetched changes and decide how to integrate them later.
Git Checkout
git checkout is a versatile command in Git that allows you to navigate between branches, switch to a specific commit, or restore files to a previous state. It is a fundamental command for managing your Git repository’s working directory.
git checkoutLet’s see some use cases of git checkout:
Switching To an Existing Branch
Let’s say you have an existing branch called another-branch and want to switch to that branch. You can use the following command:
git checkout another-branchThis command will switch your working directory to the another-branch branch.
Creating and Switching to a New Branch
Suppose you want to create a new branch called test and switch to it. You can use the -b flag with git checkout to create and switch to the new branch in one step.
git checkout -b testThis command will create and switch to the test branch based on your current branch (usually the branch you are currently on).
Checking Out a Specific Commit
Sometimes, if you need to examine or work on a specific commit, you can use git checkout to switch to that commit. For example
git checkout <your commit>This command will place you in a detached HEAD state, where you are not on a specific branch but directly on the commit.
Git Branch
The git branch command is used in Git to manage branches within a repository. It allows you to create, list, delete, and perform various operations related to branches. Here are some common use cases and syntax for the git branch:
git branchThis command will display a list of branches with an asterisk (*) indicating the current branch you are on:

To create a new branch, you can use the following syntax:
git branch <new_branch_name>For example, to create a branch named “test”:
git branch testGit Reset
The git reset command is used to manipulate the commit history by moving the branch pointer to a specific commit. It allows you to undo changes, unstage files, and modify the state of the repository. The git reset command has different options and can be used in various ways.

Some of these commands work side by side with each other. A typical example is the git branch used alongside the git checkout command and the git bisect used alongside the git reset command.
The git reset command has three main modes: soft, mixed, and hard.
Soft Reset
A soft reset does not change the working directory or the index. It only updates the HEAD pointer to point to a different commit. This means you can still see the changes you have made, but they won’t be staged for commit.
Imagine having a repository and you wanted to perform a soft reset. You would use the following command:
git reset --soft 8c019e7Let’s see what happens with git status:

You’ll notice that in the git status the file has been indexed and ready to be committed.
Mixed Reset
A mixed reset is similar to a soft reset but also removes the changes you have staged for commit. This means that you will not be able to see the changes that you have made, but they will still be in your working directory.
To perform a mixed reset, you would use the following command:
git reset --mixed 8c019e7You’ll notice it says unstaged changes.

And if we check the status we can see that we have a modified file which we can add and make a commit if we wanted to.
Hard Reset
A hard reset is the most destructive mode of git reset. It removes the changes you have made in the working directory and the index. This means that you will lose all of your changes, and you will be reverted to the state of the commit that you specified.
To perform a hard reset, you would use the following command:
git reset --hard 8c019e7 
You should notice that the changes disappear in the file itself and the head is now pointing at that commit. If we run a git status we’ll see that there’s nothing to commit.

Git Archive
The git archive command in Git allows you to create a compressed archive (e.g., ZIP or TAR) of a specific commit, a branch, or the entire repository. It extracts the repository’s contents at a particular state without including Git-specific metadata. This command is useful when exporting a clean snapshot of your project for distribution or deployment. Here’s how to use git archive:
git archive --format=<format> --output=<output_file> <commit_or_branch>Breaking down the options and parameters:
--format=<format>specifies the format of the archive. It can be one of the following: zip, tar, tar.gz, or tar.bz2. Choose the appropriate format based on your requirements.--output=<output_file>specifies the name and location of the output file. Provide the desired filename and the appropriate extension for the chosen archive format.<commit_or_branch>represents the commit hash, branch name, or any other valid reference that identifies the desired state of the repository.
Git Help
The git help command in Git is used to access the built-in documentation and get help on various Git commands and topics. It provides information about Git commands, concepts, configuration options, and more. Let’s check out several ways in which we can use the git help command.
For General Git Help
To get a list of common Git commands and a brief description of each, you can run:
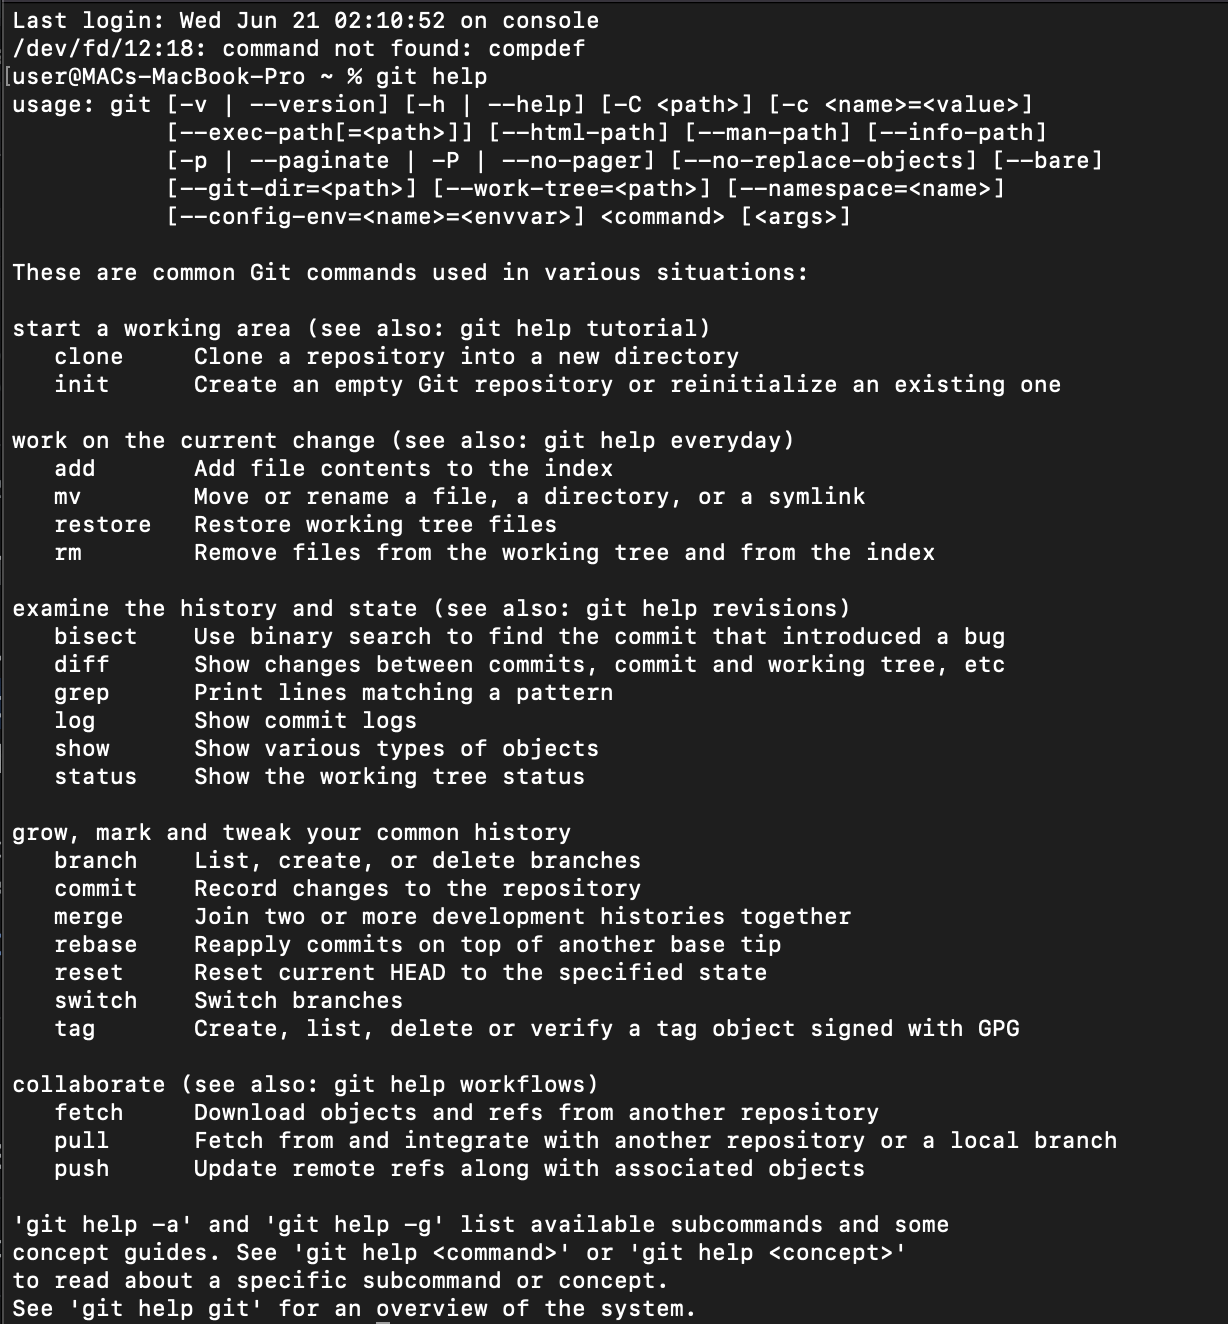
git helpThis will display the main help page, which provides an overview of available commands and links to more specific documentation.
Help for a Specific Command
Shown in the image below is the result of the git help command, which shows command git commands for various situations and also subcommands also:
If you want detailed information about a specific Git command, you can use git help followed by the command name. For example:
git help commitThis will display the documentation for the commit command, including its usage, options, and examples.
Search for Help Topics
You can search for help topics related to a specific keyword or topic using the-g flag. For instance:
git help -g branchThis will show a list of help topics related to the keyword “branch”, such as branch management, branch creation, and more.
Opening the Git Manual in a Web Browser
If you prefer to access the Git documentation in a web browser, you can use:
git help --webThis will open the Git manual in your default web browser, allowing you to navigate and search the documentation more conveniently.
Conclusion
Exploring and mastering advanced Git commands can greatly benefit developers by streamlining their version control workflows.
By delving into these powerful commands, developers gain the ability to navigate complex branching strategies, handle large-scale codebases more efficiently, and collaborate effectively with team members. Also, with these tools, developers can confidently tackle intricate Git scenarios, ensuring smoother code management and facilitating a more productive development process.
Turn your engineering standards into automated guardrails that provide feedback directly in pull requests, with 100+ guardrails included out of the box and support for the tools and CI/CD systems you already have.