How to Install and Run CMake on Windows

Table of Contents
CMake is an open source multiplatform tool that you can use to help with build automation, testing, packaging, and the installation of software. One of the main advantages of CMake is that it supports generating build scripts for a wide variety of platforms including Windows, macOS, and Linux. This gives developers the flexibility they need when building a new project and hopefully helps speed up the build.
In this article, you’ll learn more about CMake and if it’s the right solution for you. You’ll also walk through the process of installing it on Windows.
Pros and Cons of CMake

There are a number of benefits to using CMake to help build your solutions, including the fact that CMake can run on all major platforms, including Windows, Linux, and macOS. This means that a team of developers who are using different operating systems can still have common development tools.
Using CMake for projects, instead of something like Visual Studio projects, helps you avoid being locked into one integrated development environment (IDE). A team can create a project using CMake, and then each developer can use their preferred IDE to work on it. CMake integration is supported by a variety of IDE tools, including CLion, Atom, and Visual Studio.
It may be useful for some developers and software architects to understand what dependencies are within their projects and the nature of the dependency. CMake can create a visualization of any dependencies within the project, that you can use to create documentation.
While many would assume that CMake’s active development is an advantage (which it is!), it also has its downsides: Not everyone within a developer team will be running the same version of CMake. However, to help reduce this issue, CMake has introduced policies that define how certain CMake features should behave. This means your team can set a common policy regardless of what version people are using.
Another disadvantage of CMake is the lack of information available for some versions. It can be hard to find accurate information to resolve an issue or answer a question.
When to Use CMake
As you can see, CMake can be a useful build system. Developers using CMake can quickly check performance on different build backends and easily move between them.
CMake can also help to keep your source code folder clean. It can separate the build system, intermediaries, and output files from the source code, keeping your code clean for the future.
Install CMake on Windows
There are several ways to install CMake on Windows. The first option is to use pre-compiled binaries as either the Windows Installer file (MSI) or the compressed version (ZIP) files. You just have to download the files and then walk through the interactive installation wizard.
The second option is to download and build CMake from the source, and CMake even includes a source release download option.
The third option is to use a package manager tool, such as Windows Package Manager or Chocolatey. This can be especially convenient if you already have either installed on your machine. We will use the package manager method you’ll use for your installation here.
If you’re using Windows Package Manager, run the following command to install CMake:
winget install kitware.cmakeIf you’re using Chocolatey, use the following command:
choco install cmakeInstall a CMake Extension with Visual Studio
Once you’ve finished installing CMake on Windows, you need to install an extension that lets you integrate the functionality of CMake into your IDE (Visual Studio is used here).
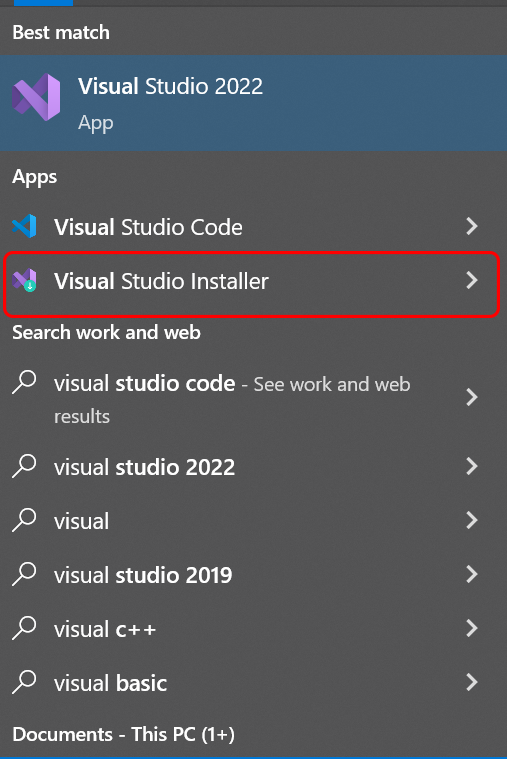
To install the CMake extension, you need to select Start and then open the Visual Studio Installer from the menu:
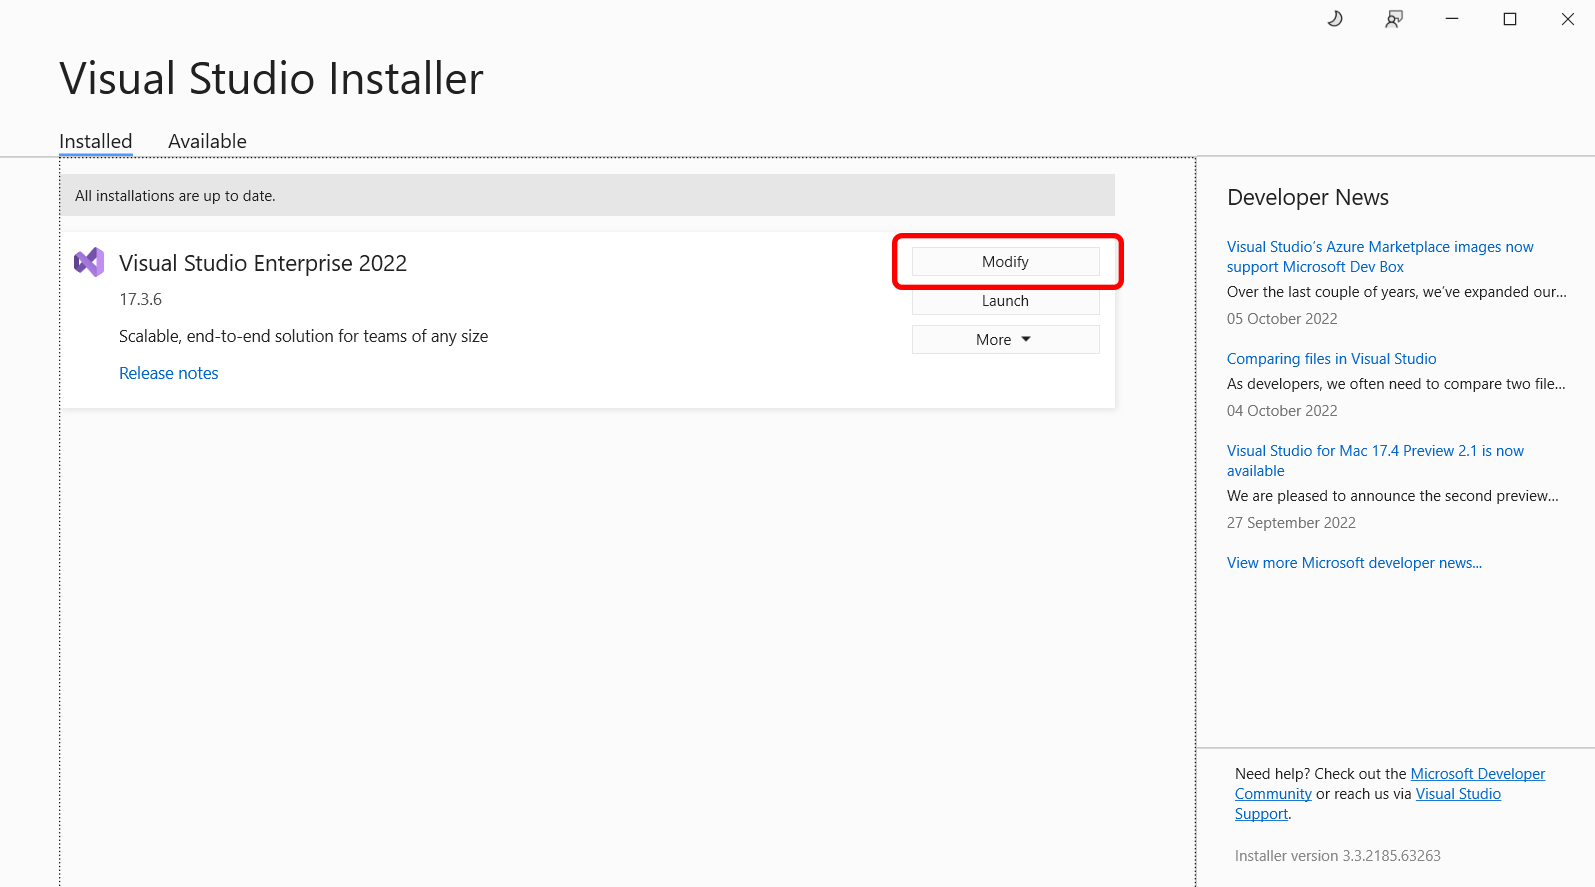
Once the Visual Studio Installer loads, select Modify:
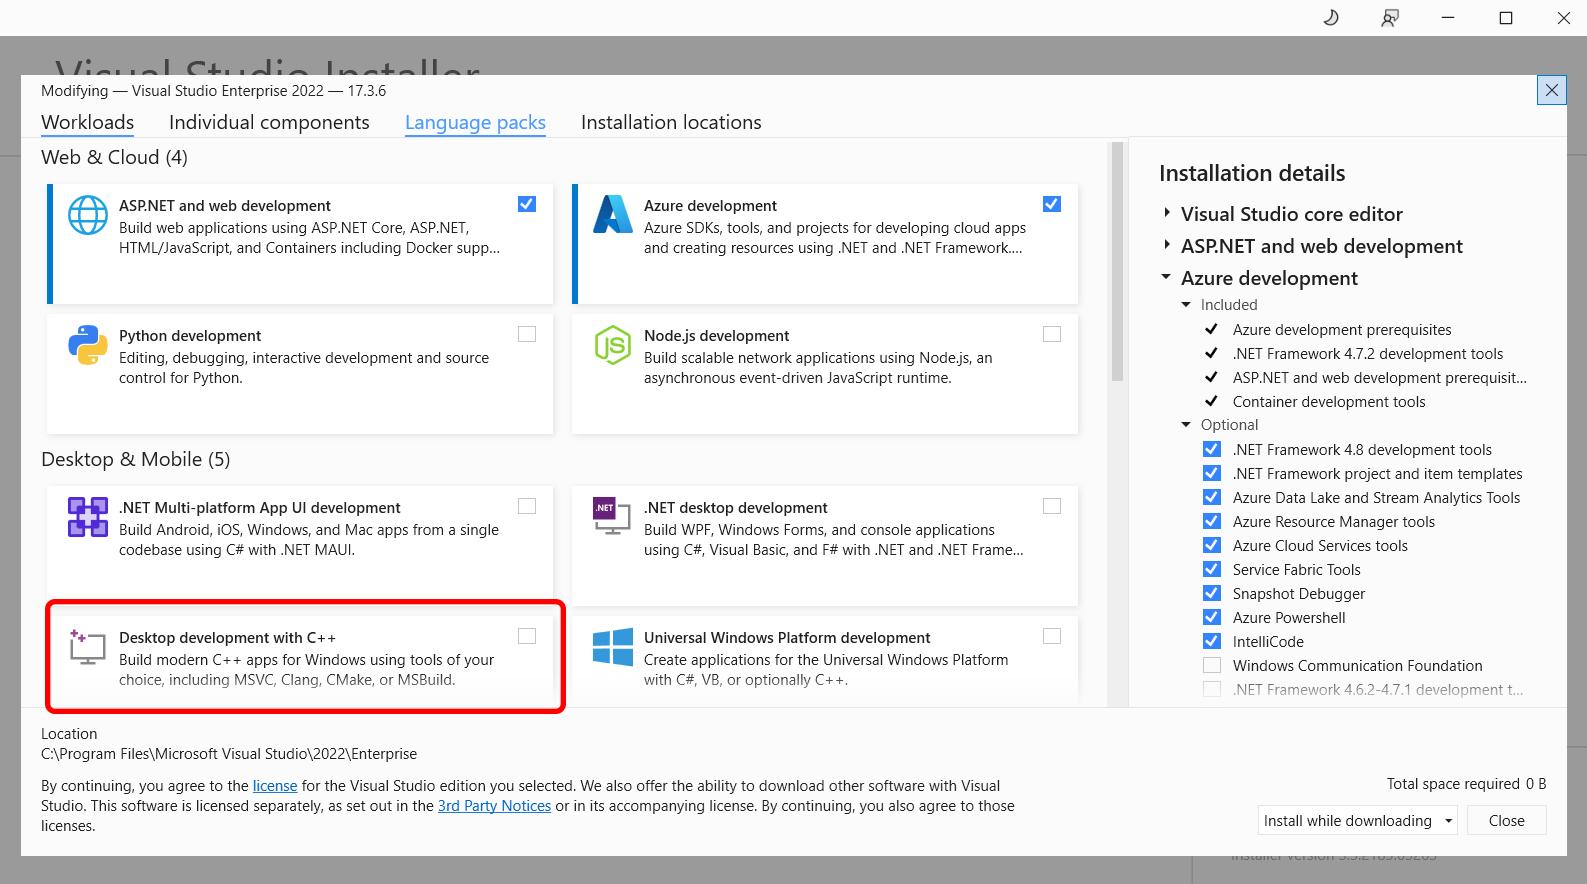
Under Workloads, locate Desktop development with C++, which can be found under Desktop & Mobile:
On this same page, you also need to find and select the Linux and embedded development with C++ component. This component ensures you have cross-platform CMake development capabilities:
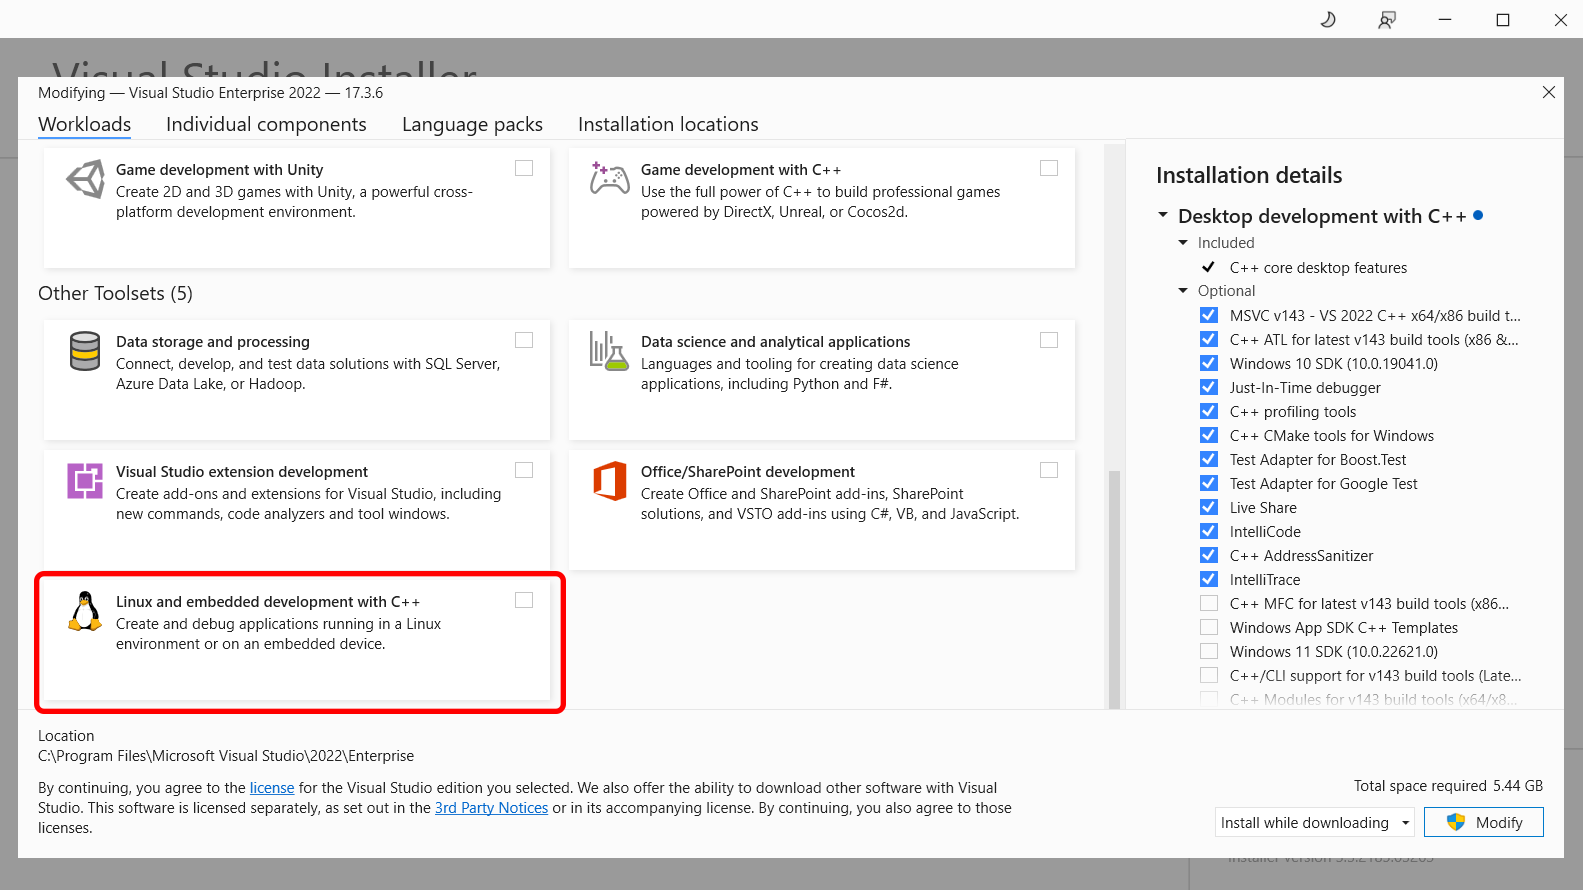
Once you’ve selected both, select Modify again, and the additional tools will be installed.
Integrate an IDE
Now that you’ve installed CMake and a few components, it’s time to use them. Start a new project by opening Visual Studio and selecting Create a new project > CMake project:

After selecting CMake project, Visual Studio, and CMake will create a directory and a file called CMakeLists.txt, which is a set of instructions describing certain settings within the project, such as source files and targets.
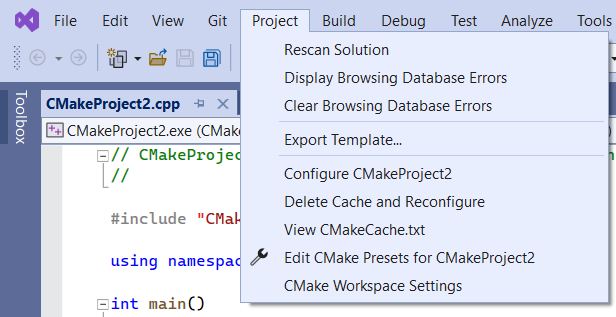
When Visual Studio detects that there is a CMakeLists.txt file within a project that’s been opened, it adds CMake items to the Project menu, which gives you access to commands for viewing and editing CMake scripts:
Configure CMake Projects
CMake supports two files that let you specify build and test options. These files are CMakePresets.json and CMakeUserPresets.json. Microsoft recommends that you use CMakePresets.json.
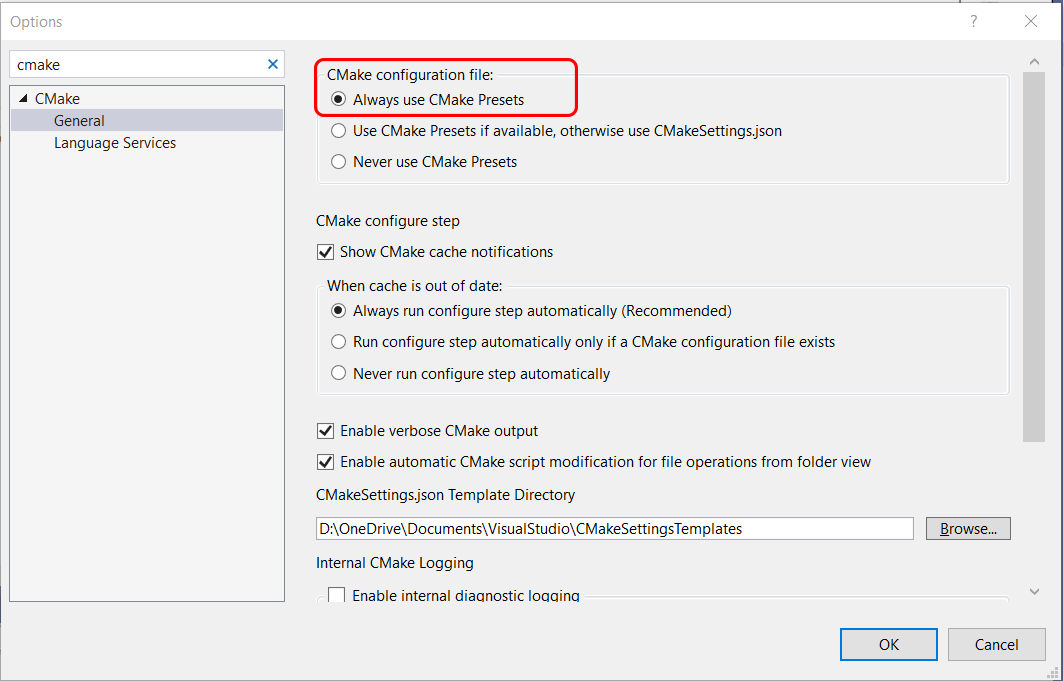
To ensure that Visual Studio uses the CMakePresets.json file, you need to enable it. You can do so via Tools > Options > CMake > General. Please ensure that the Always use CMake Presets option is selected:
If Visual Studio can’t find a CMakePresets.json file, it will fall back to using the default configure presets.
There are three key settings within your CMakePresets.json file: target systems, configure presets, and build presets. The target system is the system on which CMake is invoked to configure and build your project. You can use systems installed on your local machine, SSH connections, and all Windows Subsystem for Linux (WSL) installations.
The configure preset option is used when CMake is invoked to generate the project build system. Depending on your target system, the options for this will change. So if you are using Ubuntu as your target system, your configure preset could be Linux debug.
The build preset value is used when CMake is invoked to build the project and should align with the configure preset. If Visual Studio can’t find any build presets that are associated with the configure preset, then it will provide the default build preset.
As you can see, there are a lot of options available to configure your CMake projects to suit your needs and project. If you’re looking for even more information on how to configure your projects, check out this Visual Studio documentation.
Build CMake Projects on Visual Studio
When you’re ready, Visual Studio gives you several options to build your CMake projects, including the toolbar or the Solution Explorer.
If you want to use the toolbar, you need to find the Startup Item drop-down:

Select your preferred target to build, and either press F5 or choose Run.
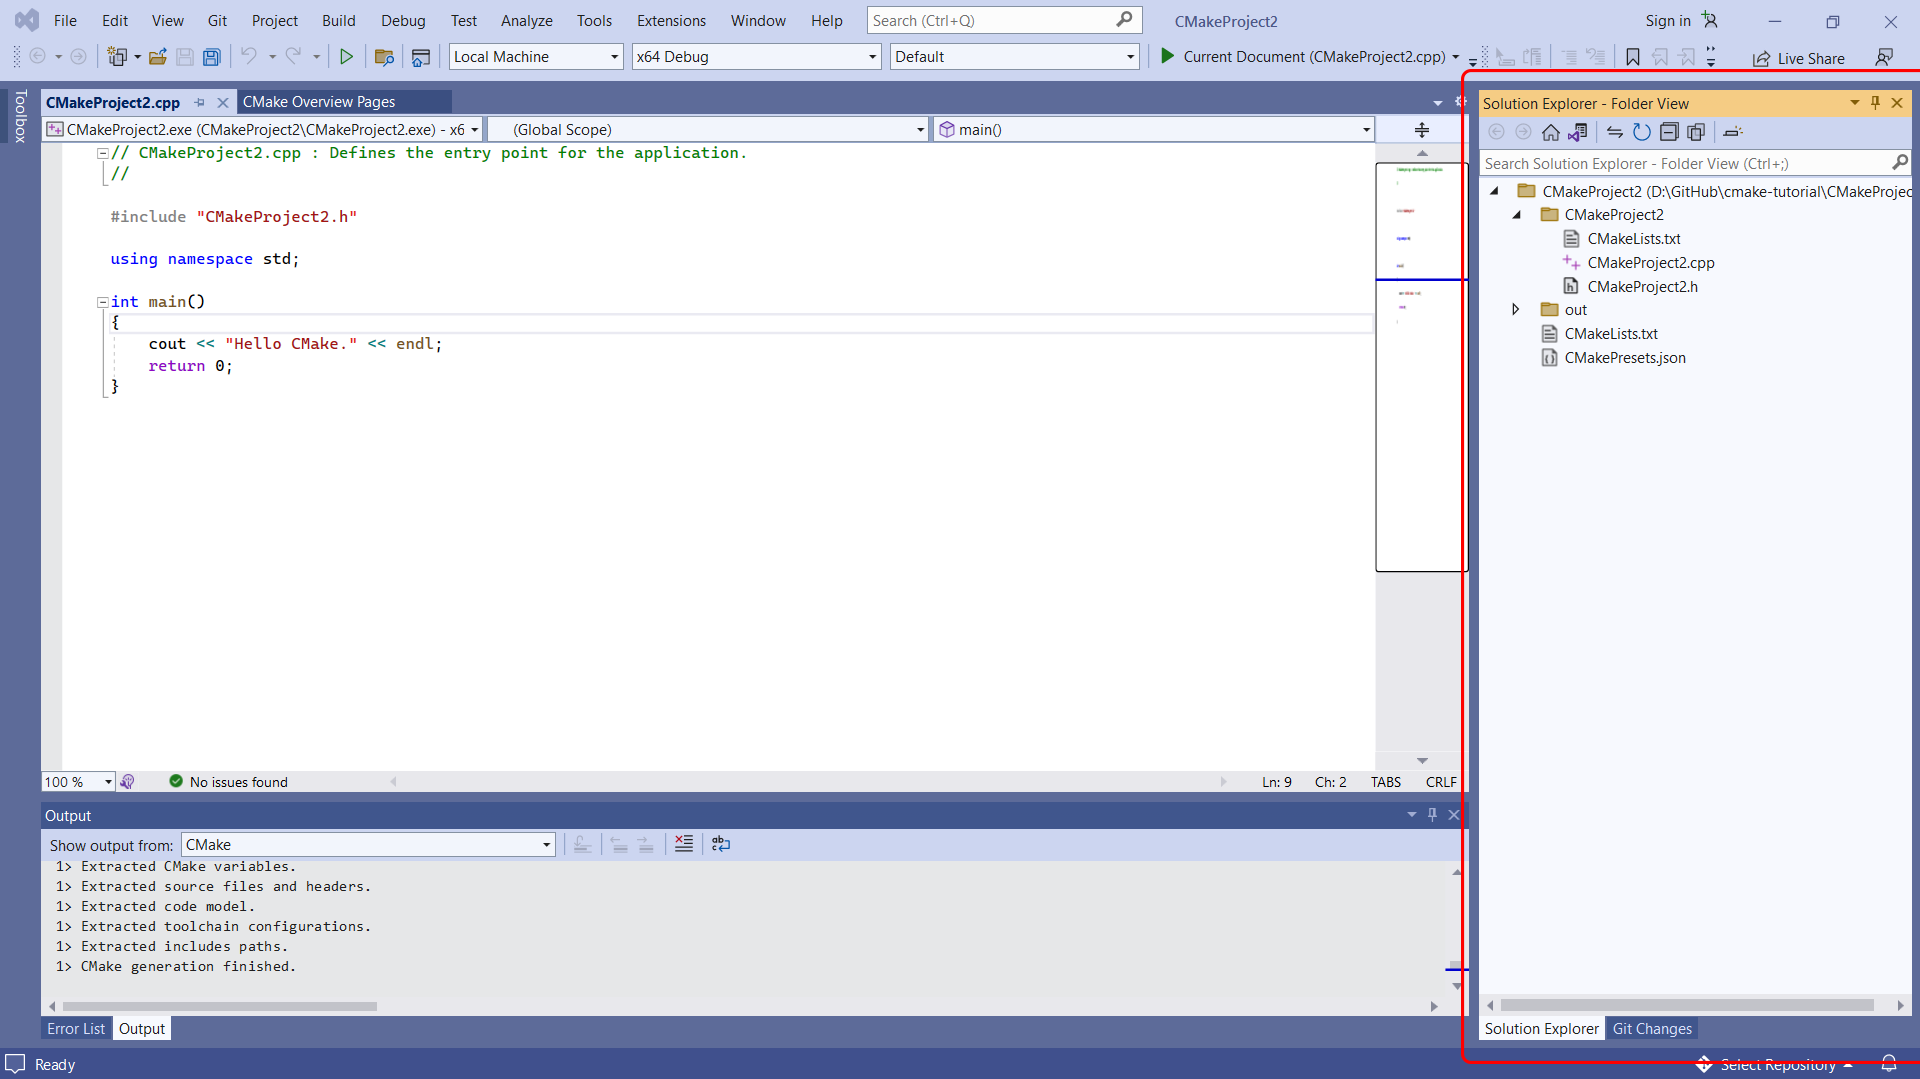
If you want to use the Solution Explorer, navigate to the Solution Explorer on the right-hand side of your screen. By default, it will be set to the Folder View:
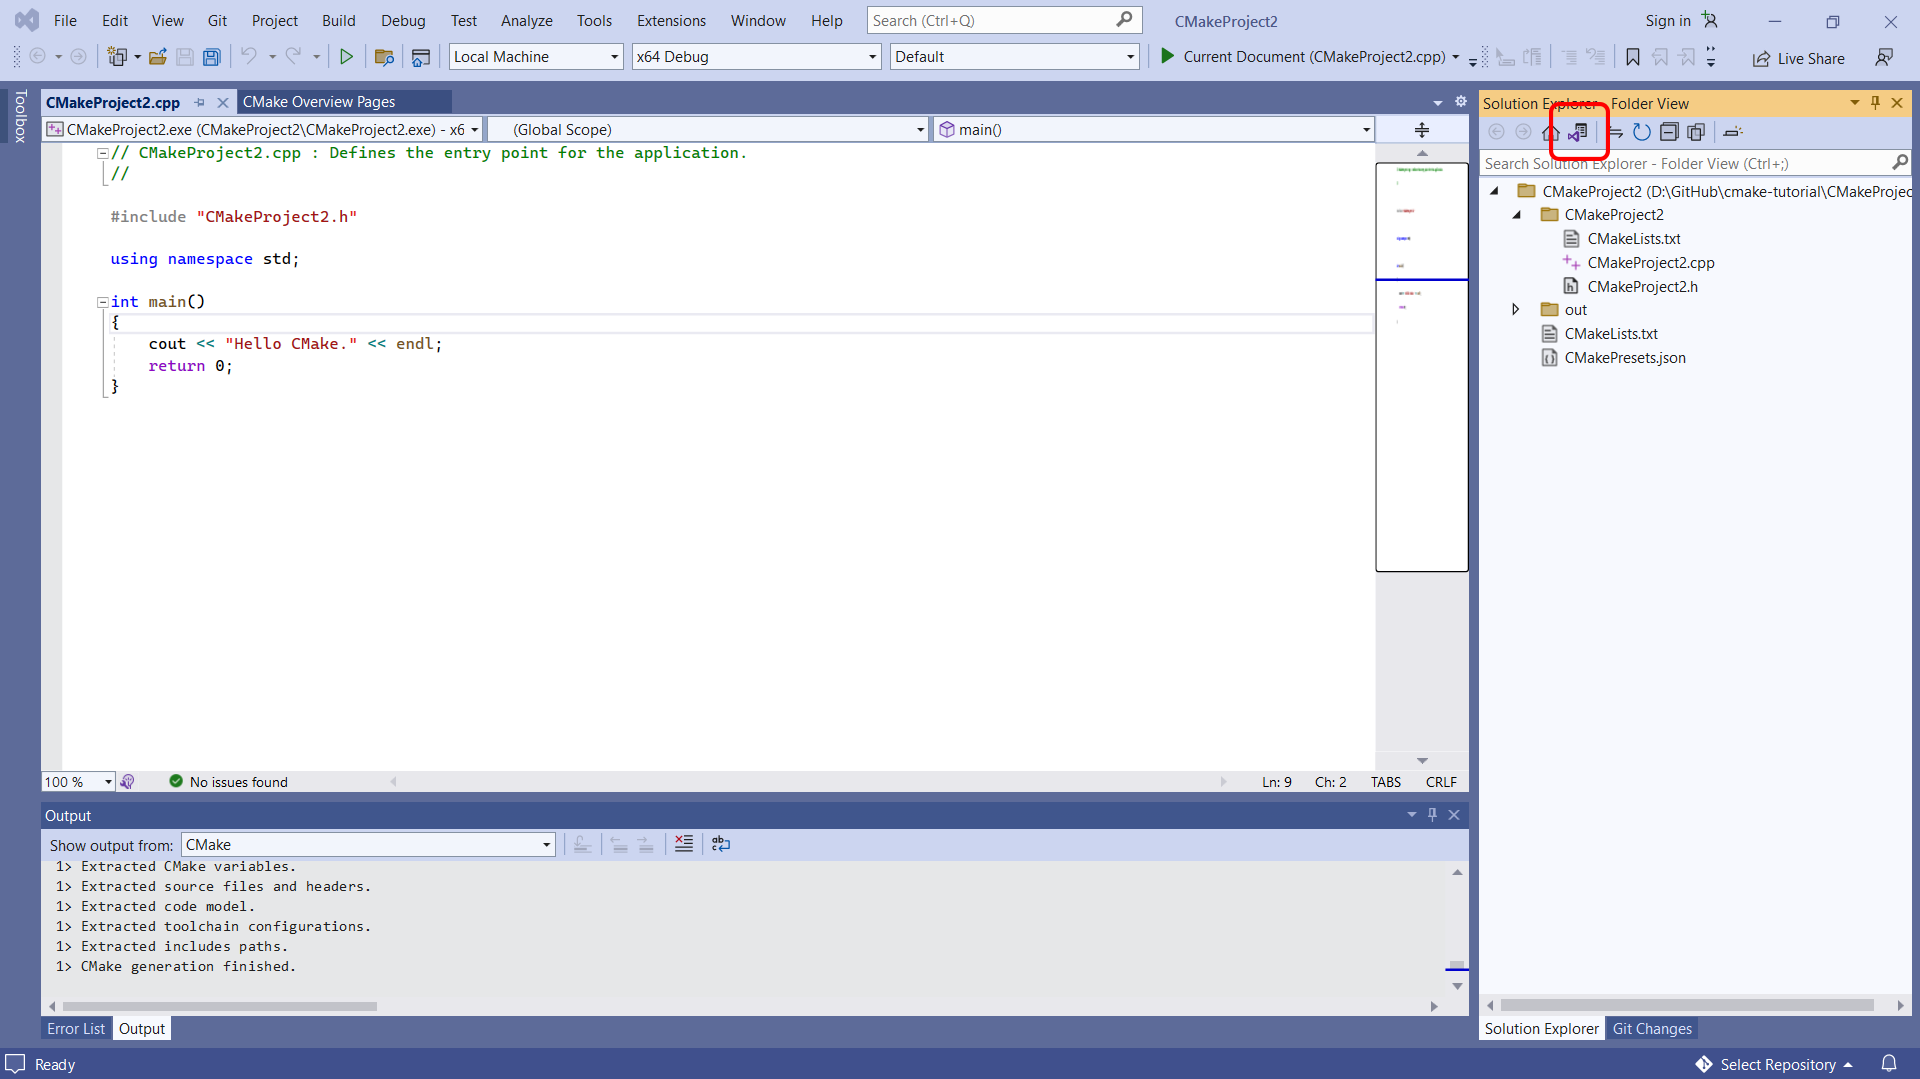
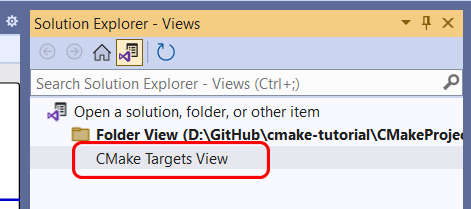
You need to change the Folder View to the CMake Targets View. To do this, select the view icon:
Then select CMake Targets View:
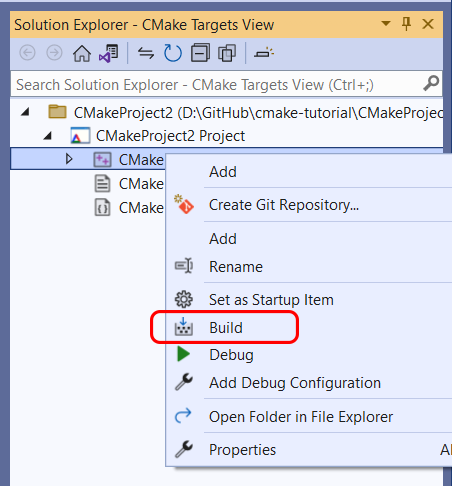
Then right-click on CMake Target and select Build from the context menu:
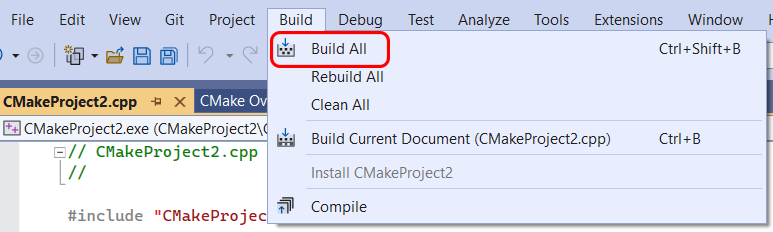
Lastly, you can select Build > Build All from the main menu of Visual Studio to build your CMake project:
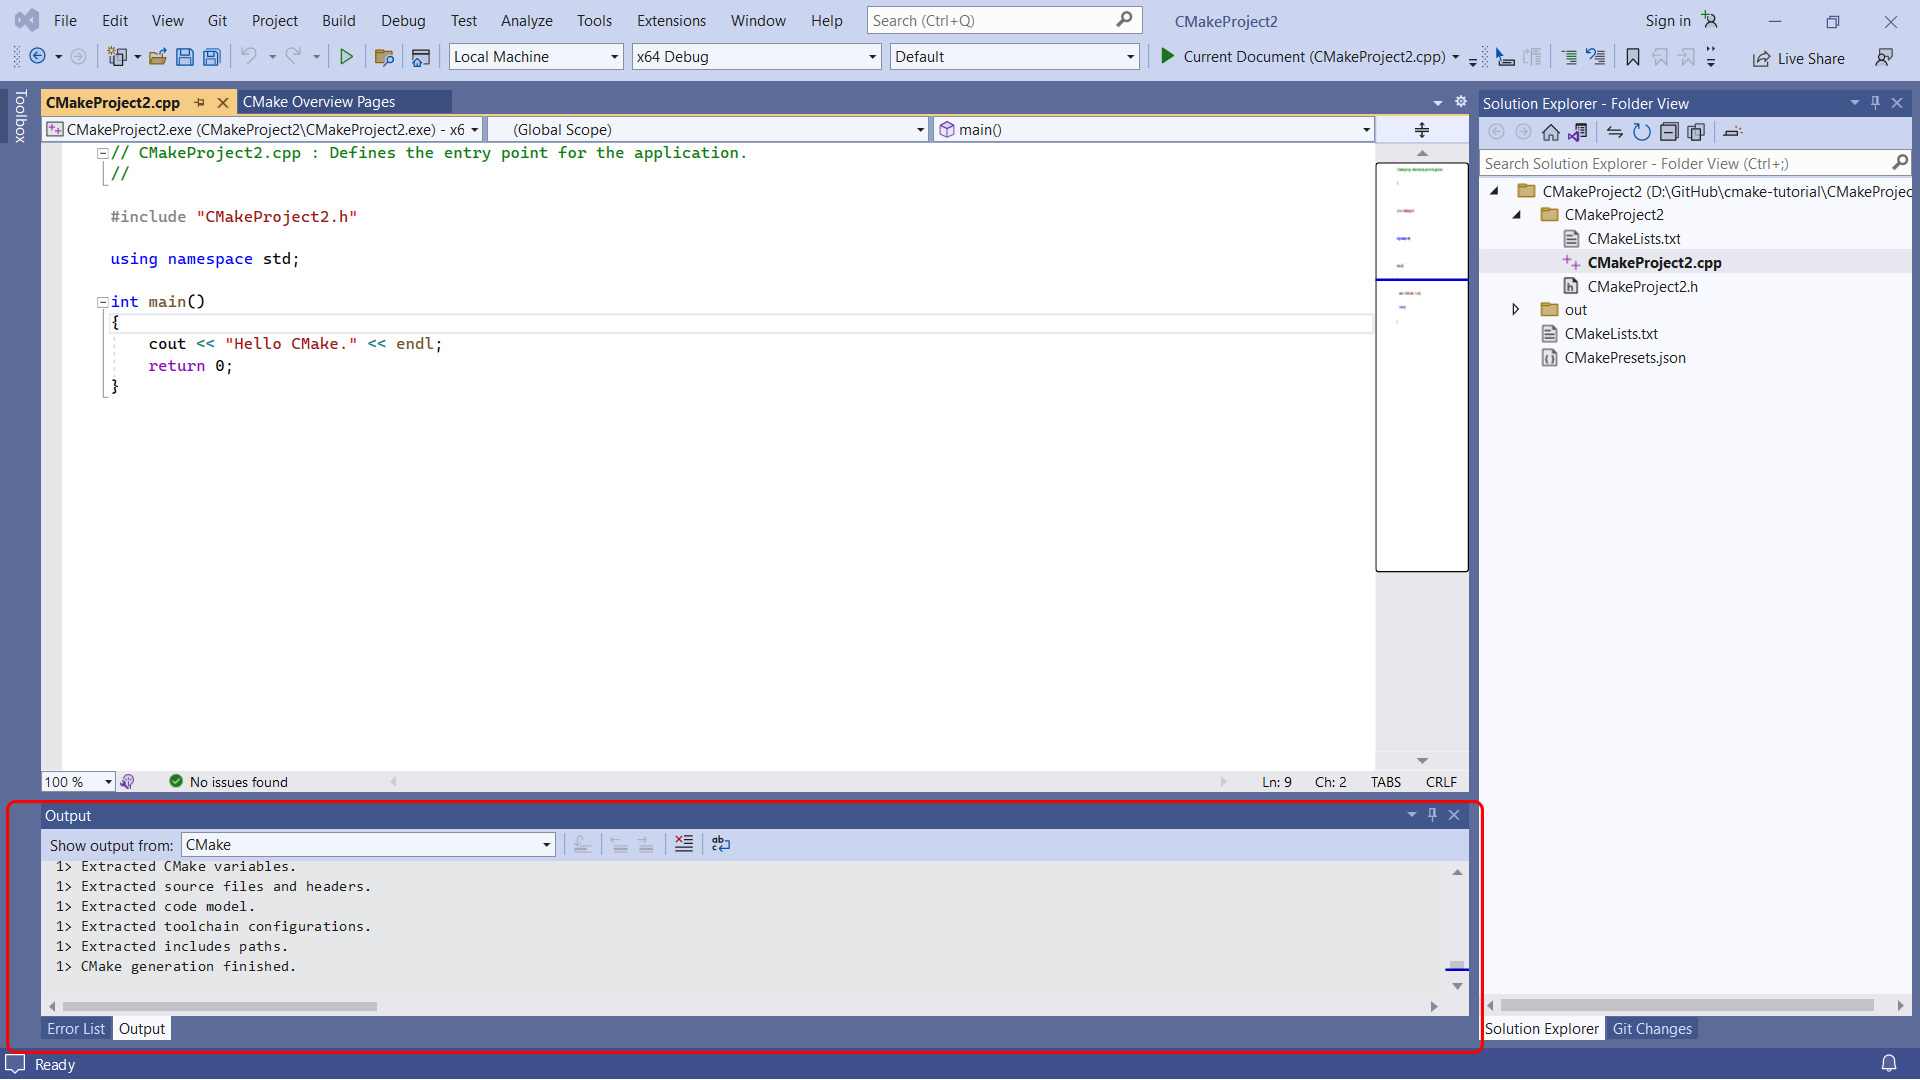
After completing either one of these options, you can find the build results within the Output window and Error List:
Debug CMake Projects
As you know, when writing code, it’s never perfect the first time, which is why you’ll need to be able to debug your code.
To debug your CMake project using Visual Studio, start by selecting one of the targets shown in the Startup Item drop-down within the toolbar:
Then select Debug > Start Debugging from the main toolbar:
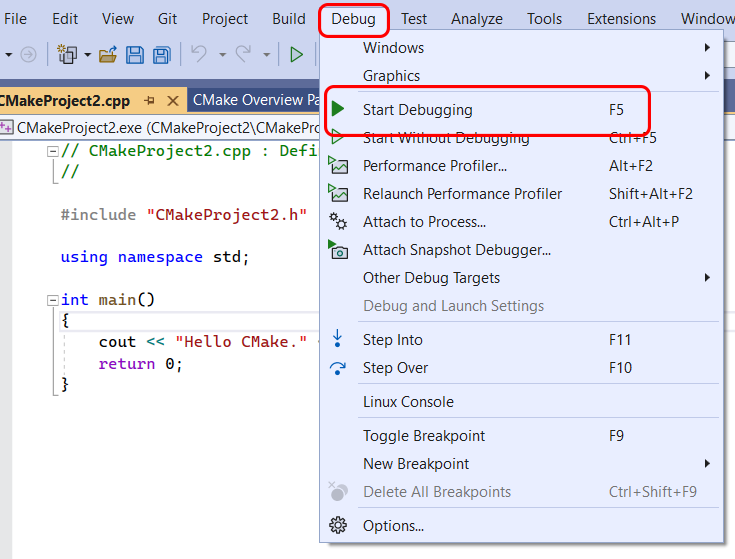
If any changes have been made since the last time you built the project, the debug command will build it first before the debugging can take place.
The launch.vs.json file can be used to customize your CMake debugging session. This file can be used to input any environment variables or command line arguments that you might want to pass into the program during debugging.
Conclusion
CMake is a versatile tool that aids in build automation, testing, packaging, and software installation. It integrates with many IDEs, giving developers the flexibility to stick with their preferred IDE. It ensures your application’s compatibility across any platform. While CMake isn’t for everyone, it can be a robust solution for the right developer or project.
If your team is working across multiple C/C++ projects, keeping build standards consistent becomes its own challenge. Earthly Lunar helps teams enforce build policies, security scans, and dependency checks directly in PRs.
Turn your engineering standards into automated guardrails that provide feedback directly in pull requests, with 100+ guardrails included out of the box and support for the tools and CI/CD systems you already have.